Category: Cleaning Tips

  • How to Clean Carpet for a Fresh and Revitalized Home

    How to Clean Carpet for a Fresh and Revitalized Home

    Keeping your carpets clean is essential for a healthy and welcoming home. Carpets can enhance the comfort and beauty of your space, but they also face daily challenges like tough stains, lingering odors, and dirt buildup. Left unchecked, these issues can lead to worn-out carpet fibers and an uninviting living area.

    In this guide, we’ll uncover practical tips and tricks for cleaning carpets effectively, whether you’re dealing with high-traffic areas or treating spills. From quick solutions using household items to deep cleaning techniques with a carpet cleaning machine, you’ll learn how to maintain your carpets without relying on harsh chemicals.

    By the end, you’ll have all the tools you need to handle common carpet cleaning challenges and keep your home fresh and inviting. Let’s dive into the best cleaning methods to give your carpets a new lease on life!

    Identifying Your Carpet Type

    A cozy living room with a light beige carpet and modern furniture, creating a warm and inviting ambiance.

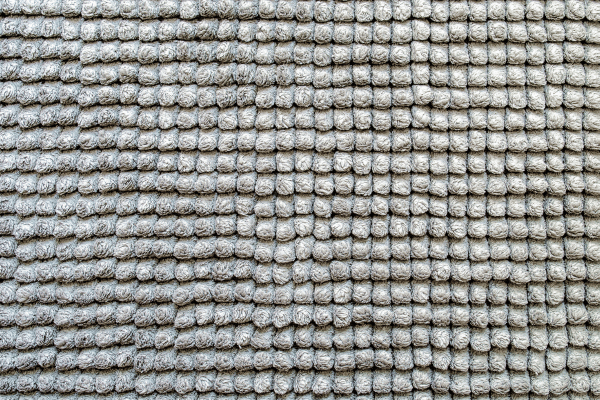
    Understanding your carpet type is the first step toward effective cleaning. Most carpets fall into categories like cut pile, loop pile, or a blend of both. You can identify the type by observing its texture: cut pile carpets have soft, individual strands that stand upright, while loop pile carpets feature loops of yarn that create a durable, textured surface.

    Additionally, some carpets are made of synthetic materials like nylon or polyester, while others are crafted from natural fibers like wool.

    How Carpet Type Affects the Cleaning Method

    The type of carpet you have plays a significant role in choosing the right cleaning process. For example, wool carpets require gentle cleaning solutions to protect their fibers, while synthetic carpets can handle tougher cleaning products and methods.

    High-pile carpets may trap more dirt and debris, needing a deep clean with a carpet cleaning machine, while low-pile carpets are easier to maintain with regular vacuuming and spot treatments. Knowing your carpet type helps you select the best techniques how to clean carpet to preserve its look and lifespan.

    Common Carpet Materials

    Understanding the material of your carpet is crucial for choosing the right cleaning method and products. Let’s explore some popular carpet materials and how they impact cleaning practices:

    1. Nylon

    Nylon is one of the most durable and stain-resistant carpet materials, making it a popular choice for high-traffic areas. It holds up well against wear and tear, making it easy to clean with most methods.

    • Best Cleaning Methods: Use a carpet cleaning machine with a mild cleaning solution, or spot-treat stains with a vinegar solution or carpet shampoo.
    • Chemicals to Use: Gentle dish soap or carpet-specific cleaning solutions.
    • Chemicals to Avoid: Harsh chemicals like bleach, which can damage fibers over time.

    2. Polyester

    Polyester is known for its vibrant color retention and softness, but it’s less resistant to stains and tends to trap more dirt. It’s ideal for homes without heavy foot traffic.

    • Best Cleaning Methods: Spot-clean spills with baking soda and a spray bottle, followed by a thorough vacuum. Deep cleaning with warm water is also effective.
    • Chemicals to Use: Mild detergents or household items like white vinegar.
    • Chemicals to Avoid: Strong solvents, as they can leave residue or fade the material.

    3. Wool

    A natural, luxurious option, wool is soft, durable, and naturally resistant to stains. However, it’s highly absorbent, so excess moisture can lead to mold or odors.

    • Best Cleaning Methods: Use a scrub brush with a gentle cleaning solution and air dry completely. A stain treatment should always be tested on an inconspicuous area first.
    • Chemicals to Use: Wool-safe carpet cleaners or a mix of plain water and a few drops of dish soap.
    • Chemicals to Avoid: Bleach or harsh detergents, which can harm the fibers.

    4. Acrylic

    Acrylic mimics wool but is synthetic and less expensive. It’s stain-resistant and easier to maintain than wool but not as durable as nylon.

    • Best Cleaning Methods: Spot-treat stains with a mix of equal parts white vinegar and cold water. Vacuum regularly to remove loose dirt and debris.
    • Chemicals to Use: Mild cleaning solutions and baking soda for deodorizing.
    • Chemicals to Avoid: Harsh chemicals that can weaken the fibers.

    5. Olefin (Polypropylene)

    Olefin is highly stain-resistant and affordable, commonly used in outdoor or basement carpets. It resists moisture but can flatten under heavy traffic.

    • Best Cleaning Methods: Treat spills immediately with a spray bottle and blot dry with old towels. Deep clean with hot water extraction to lift dirt.
    • Chemicals to Use: Vinegar-based solutions or commercial carpet shampoos.
    • Chemicals to Avoid: Oily or solvent-based cleaners, which can leave residue.

    Identifying Carpet Pile Types

    A detailed texture view of a loop-pile carpet in a neutral gray shade, showcasing its intricate design.

    Cut Pile

    Cut pile carpets have individual fibers that stand upright, creating a soft and plush surface. They’re popular for their luxurious feel and are often used in bedrooms and living spaces. This type requires regular vacuuming to remove loose dirt and maintain its texture.

    Loop Pile

    Loop pile carpets feature loops of yarn that are tightly woven, making them highly durable and resistant to wear. They’re ideal for high-traffic areas like hallways and offices. Cleaning involves a thorough vacuum to avoid trapping more dirt in the loops.

    Saxony

    Saxony carpets are a variation of cut pile with a smooth, even finish, offering a classic look. They’re best cleaned with a gentle vacuum and occasional deep cleaning to refresh the fibers without causing flattening.

    Cut-Loop Pile

    Cut-loop pile carpets combine both cut and loop fibers, creating textured patterns. They’re stylish and durable but can be tricky to clean. Spot cleaning is often necessary to maintain the design and texture.

    How Pile Heights Affect Cleaning Techniques

    Low pile carpets are durable and easier to clean, making them perfect for busy households or commercial spaces. A straightforward vacuuming routine is usually sufficient for maintenance.

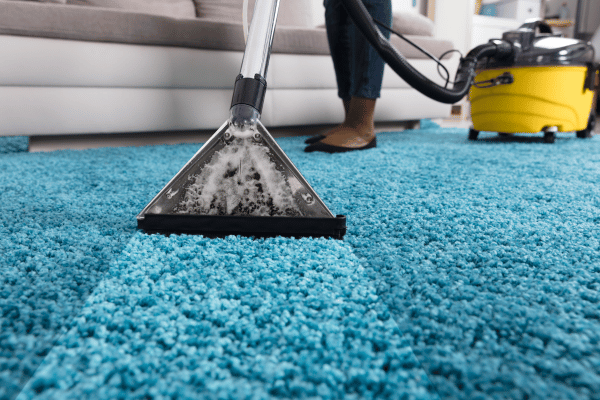
    High pile carpets, such as shag or frieze styles, offer a plush and luxurious feel underfoot. However, their dense fibers can trap more dirt and debris. A carpet cleaning machine and deep cleaning methods are recommended for these types.

    Choosing the right cleaning method based on pile type and height ensures your carpets remain fresh, clean, and long-lasting.

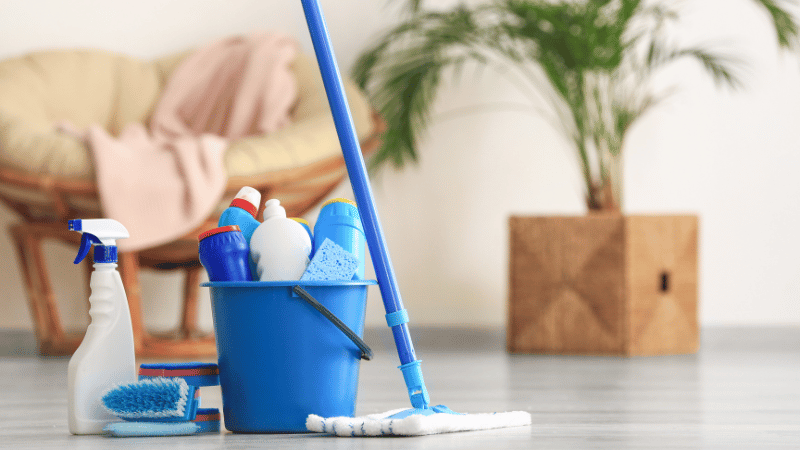
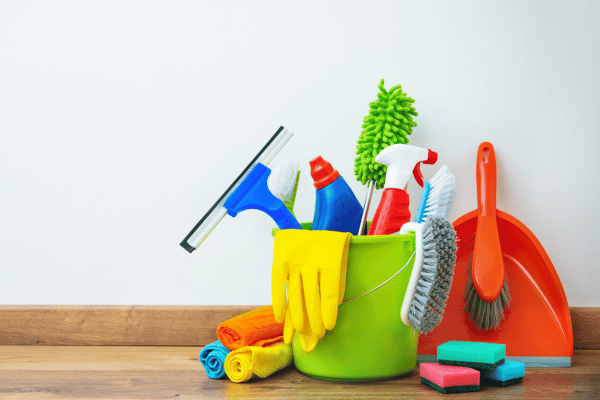
    Tools and Supplies for Carpet Cleaning

    Essential Tools

    Vacuum Cleaners

    A reliable vacuum cleaner is the cornerstone of carpet care. Look for features like HEPA filters to trap fine dust and allergens, as well as strong suction power to remove loose dirt effectively. Vacuums with adjustable height settings work well for different carpet types.

    Steam Cleaners

    Steam cleaners are excellent for deep cleaning, as they use hot water to lift dirt and sanitize carpets. They’re ideal for tackling tough stains and high-traffic areas, leaving carpets fresh and deodorized.

    Carpet Brushes

    A good carpet brush helps scrub dirt and stains from carpet fibers without causing damage. Choose a brush with soft or medium bristles to avoid harming delicate materials like wool.

    Stain Removers

    Having a high-quality stain remover on hand is essential for quick action on spills and tough stains. Look for products that are safe for your specific carpet type and free from harsh chemicals that might damage the fibers.

    Defoamers

    Defoamers prevent excess foam buildup when using carpet cleaning machines or shampoos, ensuring a more efficient cleaning process and reducing residue on your carpets.

    Microfiber Cloths

    Microfiber cloths are perfect for blotting stains and drying treated areas. Their soft, absorbent material helps lift dirt and moisture without leaving behind lint or scratches.

    Cleaning Products

    Store-Bought Solutions vs. DIY Alternatives

    Store-bought carpet cleaning solutions are convenient and effective for tackling tough stains, odors, and dirt. They come pre-formulated to target specific issues like pet stains or high-traffic dirt. However, they can be costly and may contain harsh chemicals that aren’t always safe for children or pets.

    DIY alternatives, like baking soda and vinegar, offer a budget-friendly and eco-conscious way to clean your carpets. Baking soda works well for deodorizing, while a mixture of vinegar and water can effectively lift stains and freshen carpet fibers. These household items are gentle yet powerful enough for most cleaning tasks.

    Eco-Friendly and Pet-Safe Options

    For those who prioritize safety and sustainability, eco-friendly and pet-safe carpet cleaning products are excellent choices. Here are a few popular brands:

    • Seventh Generation Carpet Cleaner: Made with plant-based ingredients, this cleaner is safe for both pets and the environment.
    • Puracy Natural Carpet Cleaner: A non-toxic, biodegradable option that works effectively on stains and odors.
    • Folex Instant Carpet Spot Remover: Highly recommended for its stain-removing power and non-toxic formula.

    Routine Carpet Maintenance

    Regular Vacuuming

    Importance of Vacuuming Frequency

    Vacuuming is a cornerstone of carpet care and should be done regularly to prevent dirt and debris from settling into the fibers. For high-traffic areas like hallways, living rooms, or entryways, vacuuming daily or every other day is ideal. Low-traffic zones, such as bedrooms or guest rooms, can be vacuumed once or twice a week. Adjusting the frequency based on usage helps maintain a clean and fresh appearance while extending your carpet’s lifespan.

    Techniques for Thorough Cleaning

    To achieve the best results, start by dividing your carpet into sections and vacuuming each area slowly, allowing the vacuum to lift dirt effectively. Use overlapping strokes for even coverage, and pay extra attention to high-traffic areas where dirt accumulates more. For deeper cleaning, adjust the vacuum’s height setting to match your carpet pile, and utilize attachments like crevice tools for edges and corners. Regularly empty the vacuum bag or canister to maintain suction power and efficiency.

    Quick Action on Spills

    Acting quickly is essential to prevent spills from turning into permanent stains. Begin by blotting the spill immediately with a clean cloth or old towels to soak up as much liquid as possible. Once the excess liquid is removed, apply a cleaning solution or a mix of equal parts white vinegar and warm water to the affected area using a spray bottle. Blot again gently to lift dirt and residue, then rinse with plain water and blot dry. Ensure the carpet air dries completely to prevent moisture-related issues.

    Common Mistakes to Avoid When Treating Spills

    • Rubbing the Stain: Scrubbing can spread the stain and damage carpet fibers. Always blot instead of rub.
    • Using Harsh Chemicals: Strong cleaning products can discolor or weaken your carpet. Test any solution on an inconspicuous area first.
    • Ignoring the Spill: Delaying cleanup allows stains to set, making them harder to remove.
    • Over-Wetting the Carpet: Excess water can lead to moisture buildup, odors, and mold. Use only a small amount of cleaning solution and blot thoroughly.

    Professional Cleaning

    While regular vacuuming and spot treatments are essential, professional carpet cleaning is vital for maintaining your carpet’s longevity and appearance. Experts recommend scheduling professional cleaning every 12 to 18 months, depending on the level of foot traffic and overall use.

    Professional cleaners use advanced techniques like steam cleaning or hot water extraction to remove deep-seated dirt, stains, and allergens that standard cleaning methods can’t address. This process rejuvenates your carpet fibers, leaving them looking fresh and extending their lifespan.

    Deep Cleaning Carpet Methods

    A high-pressure water spray being used for deep cleaning a dark-colored carpet, removing dirt and grime effectively.

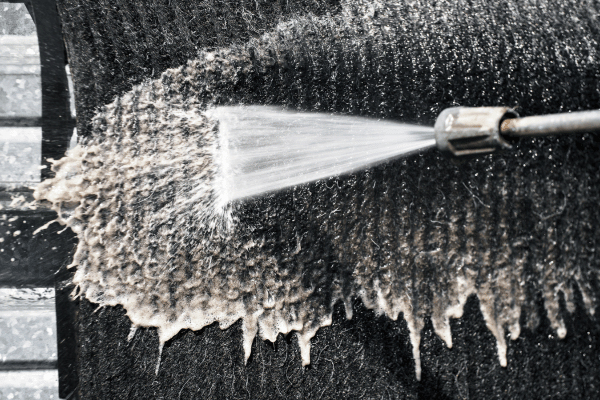
    Steam Cleaning (Hot Water Extraction)

    Steam cleaning, also known as hot water extraction, involves using a machine to inject hot water and cleaning solution deep into the carpet fibers. The combination of heat and pressure loosens dirt, debris, and tough stains. A powerful vacuum then extracts the water along with loosened particles, leaving the carpet clean and refreshed.

    This method is highly effective for deep cleaning, as it removes embedded dirt, allergens, and bacteria that routine vacuuming cannot reach. It also helps restore the carpet’s texture and appearance, making it ideal for high-traffic areas and homes with pets or children.

    When and How Often to Use This Method

    Steam cleaning is recommended every 12 to 18 months as part of routine carpet maintenance. However, high-traffic spaces or carpets exposed to frequent spills and odors may require more frequent cleaning, such as every 6 to 12 months.

    For best results, ensure the entire area of the carpet is vacuumed thoroughly beforehand to remove loose dirt. Allow sufficient drying time after cleaning—typically 8 to 12 hours—to avoid moisture-related issues like mold or mildew.

    Steam cleaning is a reliable way to give your carpets a deep, restorative clean, maintaining their freshness and longevity.

    Dry Carpet Cleaning

    Dry carpet cleaning involves using specialized cleaning powders or compounds that are spread over the carpet and worked into the fibers with a machine or brush. These compounds attract dirt and debris, which are then vacuumed away. Unlike steam cleaning, this method uses minimal to no water, making it ideal for situations where quick drying is essential.

    Dry cleaning is suitable for carpets in commercial spaces, high-traffic areas, or homes needing a quick refresh. It’s also a great choice for delicate materials like wool, as it minimizes the risk of over-wetting and damage.

    Benefits for Quick Turnarounds and Less Water Usage

    One of the biggest advantages of dry carpet cleaning is its rapid turnaround time. Since minimal water is used, carpets can be ready for use almost immediately, often within an hour. This method is especially beneficial for businesses or busy households where downtime needs to be minimized.

    Additionally, dry cleaning reduces the risk of mold or mildew growth, which can occur when carpets remain damp for extended periods. It’s an eco-friendly choice in areas with water restrictions or for those seeking a low-moisture alternative.

    Dry carpet cleaning offers a convenient and effective solution for maintaining clean carpets with minimal disruption.
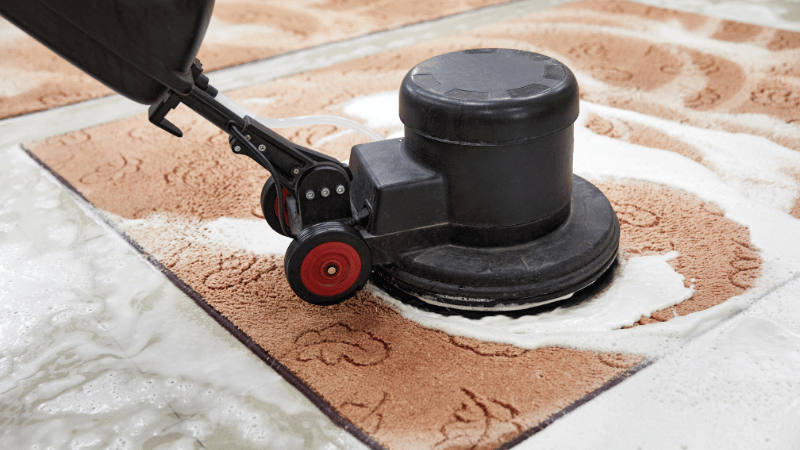
    Carpet Shampooing

    Step-by-Step Guide for Using Carpet Shampooers

    1. Prepare the Carpet
      Begin by vacuuming thoroughly to remove loose dirt, dust, and debris from the carpet. This ensures the shampooer can focus on deep-cleaning the fibers.
    2. Mix the Cleaning Solution
      Follow the manufacturer’s instructions to mix carpet shampoo with water in the shampooer’s tank. Use the recommended ratio to avoid overly concentrated or diluted solutions.
    3. Test in an Inconspicuous Area
      Apply a small amount of the solution to a hidden spot to ensure it won’t discolor or damage your carpet.
    4. Shampoo the Carpet
      Slowly move the shampooer across the carpet, working in small sections. Overlap strokes for even cleaning and avoid rushing to let the solution penetrate the fibers effectively.
    5. Extract Excess Moisture
      Use the shampooer’s extraction function to remove as much water as possible. Make multiple passes to ensure the carpet isn’t left overly wet.
    6. Allow the Carpet to Dry
      Open windows, use fans, or turn on a dehumidifier to speed up the drying process. Ensure the carpet air dries completely before replacing furniture.

    Tips to Avoid Overwetting the Carpet

    • Use the Right Amount of Solution: Stick to the recommended amount of shampoo and water to prevent oversaturating the carpet.
    • Make Extra Extraction Passes: After shampooing, go over the carpet multiple times with the extractor function to remove excess moisture.
    • Dry in Sections: If possible, clean and dry one section at a time to monitor moisture levels.
    • Ensure Proper Ventilation: Always provide good airflow to aid in faster drying and reduce the risk of moisture buildup.

    Spot Cleaning Stains

    Food and Beverage Stains

    Spills like coffee, wine, and juice are common culprits for carpet stains, but quick action and the right methods can minimize damage. Here’s how to tackle these stains using both store-bought and DIY solutions:

    1. Coffee Stains

    • Store-Bought Solution: Use a carpet stain remover designed for tannin-based stains. Apply it to the stain, let it sit for a few minutes, then blot gently with a clean cloth.
    • DIY Solution: Mix equal parts white vinegar and cold water in a spray bottle. Spray the mixture onto the stain, blot with a white cloth, and repeat until the stain lifts. Rinse with plain water and blot dry.

    2. Wine Stains

    • Store-Bought Solution: Opt for an oxygen-based cleaner or a carpet stain remover labeled for red wine stains. Apply according to the instructions and blot gently.
    • DIY Solution: Sprinkle baking soda over the stain, then pour a small amount of vinegar over it to create a bubbling reaction. Blot the area with a white cloth until the stain disappears. Rinse with water and blot dry.

    3. Juice Stains

    • Store-Bought Solution: Use an enzyme-based cleaner to break down sugary residues from juice spills. Apply, let it sit, and blot away with a clean towel.
    • DIY Solution: Combine a few drops of dish soap with warm water and gently dab the mixture onto the stain. Blot with a clean cloth to lift the stain, rinse with water, and blot dry.

    Tips for Effective Spot Cleaning

    • Always blot gently instead of rubbing to avoid spreading the stain or damaging carpet fibers.
    • Test cleaning solutions in an inconspicuous area before applying them to visible spots.
    • Work from the edges of the stain inward to contain its spread.

    Pet Stains and Odors

    1. Act Quickly
      Blot the area with a clean cloth or old towels to soak up as much urine as possible. Avoid rubbing, as it can push the liquid deeper into the carpet fibers.
    2. Apply a Cleaning Solution
      • Store-Bought Option: Use an enzymatic cleaner specifically designed for pet stains. These cleaners break down the proteins in urine, eliminating both stains and odors.
      • DIY Solution: Mix equal parts white vinegar and cold water in a spray bottle. Spray the affected area generously, then blot with a clean cloth to lift the stain.
    3. Rinse and Extract
      Rinse the area with plain water and blot dry to remove any cleaning solution residue. You can also use a wet vacuum to extract excess moisture for faster drying.

    Neutralizing Odors

    1. Use Baking Soda
      After treating the stain, sprinkle a generous amount of baking soda over the area to absorb lingering odors. Let it sit for several hours or overnight, then vacuum thoroughly.
    2. Apply an Odor Neutralizer
      For stubborn smells, use a pet-safe odor neutralizer spray or a mixture of a few drops of essential oil (like lavender) with water. This will leave your carpet smelling fresh.
    3. Ventilate the Room
      Open windows and use fans or a dehumidifier to improve airflow and reduce moisture, which can trap odors.

    Tips for Pet Stains and Odors

    • Avoid Ammonia-Based Cleaners: Ammonia can mimic the scent of urine, encouraging pets to mark the same spot again.
    • Test Cleaning Products: Always check a small, inconspicuous area of the carpet before applying a new product.
    • Deep Clean Periodically: For homes with pets, schedule professional cleaning every 6-12 months to maintain carpet freshness.

    Oil-Based Stains

    Oil-based stains, such as grease, ink, and cosmetics, can be tricky to remove due to their tendency to cling to carpet fibers. Here’s how to tackle these stains effectively:

    1. Grease Stains

    • Blot First: Start by blotting the stain with a clean cloth or paper towel to absorb as much grease as possible. Avoid pressing too hard to prevent spreading.
    • Apply Cleaning Solution: Use a mixture of dish soap and warm water (a few drops in a spray bottle). Spray the solution onto the stain and let it sit for a minute.
    • Blot Again: Gently blot the area with a clean microfiber cloth to lift the grease. Rinse with plain water and blot dry.
    • Store-Bought Option: Use a carpet cleaner specifically designed for grease stains, following the manufacturer’s instructions.

    2. Ink Stains

    • Apply Rubbing Alcohol: Dab a small amount of rubbing alcohol onto a clean white cloth and gently blot the ink stain. Avoid scrubbing to prevent spreading.
    • Blot with Water: Once the stain starts to lift, blot with a cloth dampened with plain water to remove any residue.
    • Store-Bought Option: Use an ink-removing carpet spray or a multi-purpose spot cleaner designed for ink stains.

    3. Cosmetic Stains (e.g., lipstick, foundation)

    • Remove Excess Product: Carefully scrape off any solid residue with a dull knife or spoon to prevent smearing.
    • Apply Dish Soap Solution: Mix a few drops of dish soap with warm water and dab the solution onto the stain with a clean cloth.
    • Rinse and Blot: Use plain water to rinse the area, then blot dry with a clean towel.
    • Store-Bought Option: Look for a carpet stain remover labeled for cosmetics or oil-based stains for extra cleaning power.

    Tips for Removing Oil-Based Stains

    • Use a White Cloth: Avoid colored cloths that may transfer dye onto the carpet.
    • Blot, Don’t Rub: Always blot to lift the stain without pushing it deeper into the fibers.
    • Test First: Test any cleaning solution in an inconspicuous area to ensure it won’t discolor your carpet.

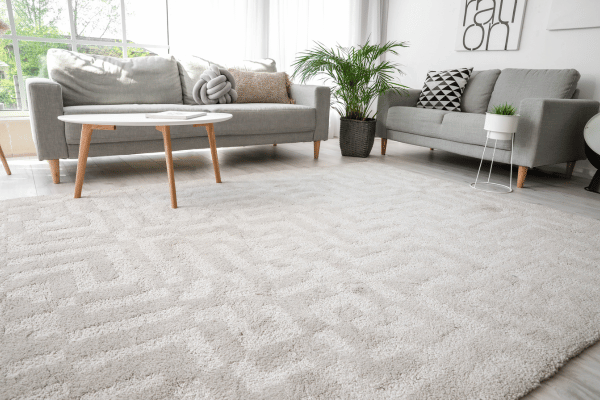
    Preventive Measures for Clean Carpets

    A close-up of a professional carpet cleaning process using a vacuum and cleaning tool on a bright blue carpet.

    1. No-Shoes Policy

    One of the simplest and most effective ways to keep your carpets clean is by implementing a no-shoes policy indoors. Shoes can track in dust, dirt, oil, and other contaminants, which can quickly settle into carpet fibers and lead to wear and stains over time.

    Encourage family members and guests to remove their shoes at the door. Provide a designated area, such as a shoe rack or basket, near the entrance for convenience. You can also offer comfortable indoor slippers for guests to make them feel at ease.

    2. Using Rugs and Doormats

    Placing rugs and doormats strategically is a practical way to protect your carpets from dirt and debris. Start by using sturdy doormats outside each entrance to your home. These mats help catch dirt, dust, mud, rain, and snow from shoes before they can be tracked indoors.

    Inside your home, use rugs in high-traffic areas such as hallways, entryways, and living rooms. Not only do rugs act as a barrier to protect your carpet, but they also add an extra layer of style and comfort to your space.

    3. Regular Carpet Rotation

    Rotating your rugs or rearranging furniture periodically is an excellent way to evenly distribute foot traffic across your carpets. Over time, high-traffic areas like walkways or spots near seating arrangements tend to experience more wear and tear, leading to uneven fading and flattening of carpet fibers.

    Benefits:

    • Prevents Uneven Wear: Helps maintain a consistent look across the entire carpet.
    • Reduces Replacement Costs: Even usage ensures the carpet lasts longer, delaying the need for replacements.
    • Enhances Aesthetic Appeal: Changing furniture placement can refresh the look of your room while protecting your carpet.

    4. Stain Protection Treatments

    Carpet protectors and sprays are an excellent way to safeguard your carpets against stains and spills. These treatments create a protective barrier on the carpet fibers, making it easier to clean up messes before they settle in. Stain protectors are particularly useful in high-traffic areas or households with children and pets, where spills are more likely.

    For best results, apply stain protectors after a professional cleaning. This ensures the carpet is free from dirt and residue, allowing the protector to adhere properly and deliver maximum effectiveness. You can also choose products specifically designed for your carpet type, such as wool-safe sprays for natural fibers or general protectors for synthetic materials.

    Tips for Applying Carpet Protectors:

    1. Test First: Always test the protector on an inconspicuous area to ensure it doesn’t affect the carpet’s color or texture.
    2. Even Application: Spray the protector evenly across the entire carpet, ensuring all areas are covered.
    3. Allow Drying Time: Let the carpet dry completely before walking on it to avoid transferring residue.

    Common Mistakes to Avoid When Cleaning Carpets

    1. Overwetting Carpets or Using Too Much Cleaning Solution

    Excess water or cleaning solution can soak into the carpet backing, leading to mold, mildew, and long drying times. Always use the recommended amount of solution and extract as much moisture as possible.

    2. Ignoring the Manufacturer’s Care Instructions

    Every carpet has specific care requirements based on its material and construction. Ignoring these guidelines can result in damage or voided warranties. Always consult the manufacturer’s instructions before cleaning.

    3. Using Harsh Chemicals That Damage Fibers

    Strong chemicals can weaken carpet fibers, cause discoloration, and leave behind residue. Opt for gentle, carpet-safe solutions and test them on a small area before full application.

    Experience Spotless Carpets with Modern Maids

    Modern Maids is your trusted partner for professional house cleaning and maid services in Dallas, committed to making your home spotless, tidy, and welcoming. With a focus on quality and attention to detail, our team ensures your carpets are cleaned thoroughly, leaving them fresh, vibrant, and free from dirt and stains. Whether you need a routine clean or a deep carpet refresh, we’re equipped to handle it all, saving you time and effort.

    Book your professional carpet cleaning service today through our convenient booking page or call us directly at (469)-430-8860 to experience the Modern Maids difference. Let us take care of your home while you enjoy a cleaner, more comfortable living space!

    FAQs

    1. What is the best thing to clean a dirty carpet?

    The best way to clean a dirty carpet depends on the type of dirt and the carpet material. For general cleaning, a mix of warm water and a mild cleaning solution works well. For deep cleaning, a steam cleaner is highly effective. Spot cleaning with a mixture of white vinegar and water can handle stains quickly.

    2. Does baking soda really clean the carpet?

    Yes, baking soda is an effective and natural cleaner for carpets. It helps absorb odors and loosen dirt. Sprinkle baking soda over the carpet, let it sit for 15-20 minutes (or longer for deeper cleaning), and vacuum thoroughly for a refreshed surface.

    3. What should you not clean the carpet with?

    Avoid harsh chemicals like bleach or ammonia, as they can discolor or weaken carpet fibers. Similarly, using overly soapy solutions can leave residue behind, attracting more dirt and causing damage over time.

    4. Can I use Dawn dish soap to clean my carpet?

    Yes, Dawn dish soap can be used to clean carpets, but it should be diluted. Mix a few drops with warm water and use it for spot cleaning. Avoid over-saturating the carpet and rinse thoroughly to remove any soapy residue.

    5. What should not be used in a carpet cleaner?

    Avoid using oily or solvent-based products in carpet cleaners, as they can leave behind residue. Harsh detergents or anything not specifically labeled for carpet use should also be avoided to prevent damage to the fibers.

    6. Is it better to shampoo or steam clean carpets?

    Steam cleaning is often better because it removes dirt and allergens more effectively using hot water extraction. Carpet shampooing can be effective for heavily soiled areas but may leave more residue if not done properly.

    7. Is it cheaper to clean your own carpet?

    Cleaning your carpet yourself can be cheaper upfront, especially if you have the necessary tools and cleaning products. However, professional cleaning provides deeper results and may save money in the long run by extending your carpet’s lifespan.

    8. What is the best homemade solution for cleaning carpets?

    A mixture of equal parts white vinegar and warm water is one of the best homemade solutions for cleaning carpets. Add a few drops of dish soap for extra cleaning power, and use it to tackle stains or refresh the entire carpet.

  • Baking Soda vs Baking Powder for Cleaning: Which Is More Effective?

    Baking Soda vs Baking Powder for Cleaning: Which Is More Effective?

    DIY cleaning tips often include baking soda and baking powder for cleaning up, but have you ever wondered which one works best? While these two pantry staples might sound similar, their cleaning powers are worlds apart.

    Baking soda is a powerhouse for tackling grease, stubborn stains, and unpleasant odors, thanks to its strong alkaline properties. On the other hand, baking powder is less effective for cleaning tasks due to its milder chemical reaction.

    Baking soda’s versatility makes it a favorite for everything from whitening laundry to cleaning steel sinks and unclogging drains. It’s an inexpensive, natural solution that packs a punch in household cleaning routines.

    This article will guide you through the key differences between baking soda and baking powder, helping you choose the right one for your cleaning needs. Let’s clear up the confusion and keep your home sparkling!

    What Is Baking Soda?

    A glass jar labeled "Baking Soda" filled with white powder sits on a wooden surface.

    Baking soda, scientifically known as sodium bicarbonate (NaHCO₃), is a white, crystalline solid that’s both odorless and non-flammable. With a melting point of 500°C, it’s a stable compound that remains effective under various conditions.

    Its basic nature makes it a powerful yet gentle cleaning agent, capable of tackling a wide range of household messes. Unlike harsh chemical cleaners, baking soda is safe to use and doesn’t release toxic fumes, making it a favorite in many homes.

    When bicarb soda reacts with acids (like vinegar) or oils, it helps break down grease and stains. The carbon dioxide bubbles lift dirt, while its mild abrasiveness scrubs surfaces without causing damage.

    Practical uses of baking soda are endless—sprinkle it on carpets to deodorize, mix it with water to scrub your oven clean, or use it as a fridge deodorizer by placing an open box inside. For laundry, add a scoop to brighten whites and neutralize unpleasant smells.

    Baking soda even doubles as an air freshener when paired with essential oils, keeping your space smelling fresh. Whether you’re scrubbing sinks, cleaning tiles, or freshening up fabrics, baking soda is a simple, affordable solution for nearly any cleaning task!

    What Is Baking Powder?

    Baking powder is a leavening agent commonly used in baking, but it differs chemically from baking soda. While baking soda is pure sodium bicarbonate, baking powder is a mixture of sodium bicarbonate, an acid (such as cream of tartar), and sometimes a starch to prevent clumping. This blend creates a milder chemical reaction, making baking powder less effective as a cleaning agent compared to baking soda.

    The reason baking powder doesn’t pack the same punch is that it already contains both an acid and a base, which neutralize each other. This limits its ability to remove stains or tackle tough grime. However, baking powder can still be used for light cleaning tasks, such as freshening up mild odors or gently scrubbing delicate surfaces.

    For example, if you’re out of baking soda, Substitute baking soda with baking powder, sprinkle it on a damp sponge for a quick wipe-down of countertops or use it to remove mild odors from small containers or mix baking powder with a little lemon juice to create a cleaning paste that’s good for rubbing on tiles While it’s not as versatile or powerful as baking soda, baking powder can serve as a backup option for minor cleaning jobs.

    Baking Soda vs. Baking Powder for cleaning – Key Differences

    Here’s a quick side-by-side comparison to understand how baking powder and baking soda differ when it comes to cleaning:

    FeatureBaking SodaBaking Powder
    CompositionPure sodium bicarbonate (NaHCO₃)Sodium bicarbonate mixed with an acid and starch
    pH LevelStrongly alkalineMildly alkaline
    EffectivenessHighly effective for removing stains, odors, and grimeLess effective due to neutralized reactivity
    Common UsesDeodorizing carpets, cleaning ovens, scrubbing sinksLight odor removal, mild cleaning of delicate areas
    ReactivityReacts strongly with acids (e.g., lemon juice, vinegar)Milder reaction due to built-in acid component
    StorageStable when kept dryRequires dry storage to maintain effectiveness
    CostInexpensiveSlightly more expensive due to added ingredients
    VersatilityHighly versatile for various cleaning tasksLimited versatility, suitable only for light tasks

    Why Baking Soda Is the Superior Choice?

    When it comes to baking soda vs baking powder for cleaning, baking soda is the clear winner. Its strong alkaline properties, affordability, and versatility make it ideal for tackling tough kitchen stains, stains, odors, and grime.

    Baking powder, while useful in the kitchen, simply doesn’t have the cleaning power or versatility to compete. For effective and affordable cleaning solutions, baking soda should always be your go-to option!

    7 Ways to Use Baking Soda in Your Cleaning Routine

    A person wearing yellow gloves pours baking soda into a kitchen sink drain for cleaning purposes.

    Baking soda is a versatile natural cleaner, providing powerful solutions for a wide range of household chores. Here are seven practical ways to incorporate it into your cleaning routine:

    1. Deodorize Refrigerators

    Got a smelly fridge? Baking soda can neutralize unpleasant odors instead of just masking them. Simply fill a cup with baking soda and place it in the back of your fridge. This trick helps keep your refrigerator smelling fresh and clean for weeks. Replace the baking soda every 1–2 months for the best results.

    2. Remove Tough Stains from Stovetops

    Stuck-on food and grease can make stovetops look grimy. Create a paste by mixing baking soda with water and scrub the surface gently. The mild abrasiveness of baking soda will lift away tough stains without scratching your stovetop, leaving it looking spotless

    3. Unclog Drains

    Baking soda works wonders for clearing clogged drains. Pour 1/2 cup of baking soda down the drain, followed by 1/2 cup of white vinegar. The fizzing reaction helps break down debris. Cover the drain, let it sit for 30 minutes, and then flush it with hot water. Avoid using this method in closed containers, as the reaction produces gas, also avoid using too much baking soda.

    4. Freshen Toilet Bowls

    For a natural and eco-friendly toilet cleaner, sprinkle baking soda into the bowl and let it sit for 15 minutes. Scrub with a toilet brush to remove stains and odors, leaving your toilet bowl fresh and clean.

    5. Remove Shoe Odors

    Neutralize unpleasant shoe smells by sprinkling baking soda inside the shoes. Let it sit overnight, then shake out the powder before wearing. Your shoes will smell fresher in no time.

    6. Carpet Stain Remover

    Got stubborn carpet stains? Cover the stain with a thin layer of baking soda. Spray a 1:1 vinegar and water solution over it and let it sit for an hour. Once dry, scrub the area with a brush and vacuum up the residue. This method uses the power of carbonic acid, created during the reaction, to lift stains effectively.

    7. Keep Stainless Steel Sinks Shiny

    Restore the sparkle to your stainless steel sink by sprinkling baking soda onto a soft cloth. Rub it into the surface using a bit of elbow grease, then rinse well. The same trick works for stainless steel and aluminum cookware too, keeping your kitchen shining like new.

    Safety Tips

    While baking soda is a safe and versatile cleaning agent, it’s essential to avoid mixing it with certain chemicals:

    • Hydrogen Peroxide (in closed containers): The reaction can build pressure and cause explosions as hydrogen peroxide is an acidic ingredient and upon mixing baking soda it releases carbon dioxide gas and foam.
    • Ammonia or Chlorine Bleach: These combinations release toxic gases that are harmful to your health.
    • Alcohol and Chemical Cleaners: Mixing baking soda with these can create harmful fumes or hazardous reactions.

    When to Call in the Professionals?

    A person carrying a blue bucket filled with various cleaning supplies, including spray bottles, cloths, and brushes, in a brightly lit space.

    While baking soda is a versatile and effective cleaning agent, there are times when it simply isn’t enough to handle the job.

    For instance, heavy grime buildup on kitchen surfaces or stubborn stains on upholstery may require more than a simple scrub with baking soda. Similarly, significant mold growth, which can pose health risks, often demands professional-grade cleaning solutions and expertise.

    Another scenario where DIY falls short is deep carpet cleaning. Baking soda and vinegar can help with small stains, but for dirt and allergens embedded deep within the fibers, professional tools and techniques are necessary to restore your carpet’s freshness.

    Additionally, situations like post-illness sanitation or cleaning delicate surfaces (such as marble or antique wood) require specialized products and skills to ensure proper care without causing damage.

    Why Professional Cleaning Makes Sense?

    Calling in professionals not only guarantees a thorough and effective cleaning but also saves you the time and effort of tackling these challenging tasks on your own. Professional cleaners use advanced equipment and products designed to handle the toughest jobs while being mindful of your home’s unique needs.

    Whether it’s deep cleaning or regular maintenance, Modern Maids offers a professional touch that leaves your home looking its best. Let us take care of the tough jobs so you can focus on what matters most!

    Reach Out to Modern Maids for Your House Cleaning Needs

    When it comes to keeping your home spotless, Modern Maids is the trusted provider of professional cleaning services in Dallas. Our team is dedicated to transforming your living space into a clean, tidy, and welcoming environment. Whether you need help tackling tough cleaning tasks, maintaining a sparkling home, or preparing for guests, we’ve got you covered.

    Skip the hassle and let Modern Maids take care of your home. With our reliable and thorough services, you can enjoy peace of mind knowing every corner will be cleaned with precision and care.

    Don’t wait—take the first step toward a cleaner, stress-free home today! Book your service now on Modern Maids’ Booking Page or call us directly at (469)-430-8860 to schedule your appointment. Experience the Modern Maids difference and see why so many Dallas residents trust us for their cleaning needs!

    FAQs

    Can I put baking powder in my washing machine?

    While baking powder might seem like a substitute for baking soda, it’s not ideal for your washing machine. Baking powder contains additional ingredients like acid and starch, which could leave residue on your clothes or in the machine. For effective cleaning and deodorizing, stick to baking soda, as it helps whiten fabrics and neutralizes odors without any unwanted buildup.

    What happens if you use baking powder instead of baking soda?

    Using baking powder instead of baking soda for cleaning won’t deliver the same results. Baking powder has a milder chemical reaction due to its neutralized acid and base mixture, making it less effective for tackling stains, grime, and odors. Baking soda’s stronger alkaline properties make it the better choice for most cleaning tasks.

    Can I use baking powder and vinegar to clean?

    Yes, you can use baking powder and vinegar to clean, but the results will be less effective compared to using baking soda. The reaction between baking powder and vinegar produces carbon dioxide gas and bubbles, which can help loosen debris in light cleaning tasks, such as unclogging drains. However, baking soda’s stronger reaction makes it more effective for such purposes.

    Can I use expired baking powder?

    Expired baking powder may lose its effectiveness as a leavening agent but can still be used for light cleaning tasks. It can help with mild odor removal or gentle scrubbing of delicate surfaces. To check if it’s still active, mix a small amount with vinegar—if it fizzes, it can still work for some cleaning purposes!

  • Standard Cleaning vs Deep Cleaning: Which Do You Need?

    Standard Cleaning vs Deep Cleaning: Which Do You Need?

    A clean home isn’t just about appearances—it plays a big role in your health and comfort. Did you know your kitchen sink harbors more germs than your toilet? That’s why regular cleaning is essential, but sometimes, a simple wipe-down isn’t enough.

    Many homeowners struggle to decide between standard cleaning vs deep cleaning. A regular cleaning service keeps surfaces tidy, while a deep cleaning service goes further, tackling hidden dirt and hard-to-reach areas. But where exactly does deep cleaning lie in comparison to standard cleaning?

    Understanding the key differences between these services helps you choose the right option for your home’s needs. Whether you’re preparing for a special occasion, moving out, or simply wanting a fresh start, knowing when to opt for a professional deep cleaning service can make all the difference.

    Let’s break it down step by step.

    What is Standard Cleaning?

    Two cleaners in uniforms are tidying up a living room, with one mopping the floor and the other arranging cushions on a couch.

    Standard cleaning is the routine house cleaning service that keeps your home neat, hygienic, and comfortable. It focuses on surface-level cleaning, tackling everyday messes without diving into deep-seated dirt or hard-to-reach areas.

    While it helps maintain cleanliness, it doesn’t involve the in-depth cleaning required to eliminate accumulated dirt or grime buildup.

    Dusting Surfaces

    Dusting goes beyond a quick wipe—it ensures dusting surfaces, electronics, baseboards and frames, decorative items, and books to remove allergens and prevent buildup.

    Vacuuming and Mopping Floors

    Keeping hard floors and carpets clean is crucial. Routine cleaning tasks include:

    Cleaning Bathrooms

    Bathrooms require special attention to maintain hygiene. Cleaning bathrooms in a standard cleaning service includes:

    • Cleaning mirrors to remove streaks and smudges.
    • Wiping counters and fixtures to prevent soap scum and bacteria buildup.
    • Mopping floors to keep the space fresh and sanitary.

    Wiping Kitchen Surfaces

    Since kitchens surely accumulate dirt, wiping cabinets, kitchen countertops, and sinks is essential. Standard cleaning includes:

    • Sink scrubbing to remove stains and bacteria.
    • Cleaning appliances externally.
    • Floor cleaning to eliminate spills and crumbs.

    Taking Out the Trash

    Neglecting trash can lead to bad odors, pest infestations, and bacteria growth. Regular disposal prevents hidden dirt and contributes to a healthier living environment.

    While standard cleaning is enough for routine upkeep, it doesn’t cover the deeper cleaning required for neglected areas or deep-seated dirt—which is where deep cleaning comes in.

    What is Deep Cleaning?

    A professional cleaner wearing pink gloves is vacuuming a dark sofa in a well-decorated room.

    Deep cleaning is a thorough cleaning process that goes beyond standard cleaning by addressing hidden dirt, neglected areas, and deep-seated grime. Unlike routine cleaning tasks, deep cleaning tackles spots that often go unnoticed, such as behind appliances, under furniture, and inside cabinets and drawers.

    It’s essential for maintaining a truly sanitary and healthier living environment.

    Deep Cleaning in the Kitchen

    A deep cleaning service in the kitchen involves in-depth cleaning of surfaces and appliances to eliminate grease buildup, grout stains, and hidden crumbs. Tasks include:

    • Cleaning inside appliances such as the oven, fridge, and microwave to remove spills and odors.
    • Cleaning the stove hood and filter to get rid of grease and smoke residue.
    • Scrubbing grout on backsplashes and countertops to remove stains and bacteria.
    • Cleaning fridge coils to enhance efficiency and extend lifespan.
    • Disinfecting small kitchen appliances, including coffee makers and toasters.
    • De-cluttering and wiping inside cabinets and drawers to prevent dust and pest accumulation.

    Deep Cleaning in the Bathroom

    Bathrooms require professional deep cleaning services to tackle soap scum, limescale, and bacteria buildup. Tasks include:

    • Scrubbing grout lines to remove mold and mildew.
    • Cleaning wastebaskets and disinfecting their interiors.
    • Removing soap scum and limescale from fixtures and showerheads.
    • Cleaning baseboards and door frames to eliminate dust and grime.
    • Cleaning inside medicine cabinets and vanities to remove spills and residue.
    • Disinfecting handles on doors, cabinets, and fixtures.
    • Thoroughly cleaning the toilet base to remove accumulated dirt.
    • Cleaning shower doors, curtains, and crevices where mold and grime tend to collect.

    Additional Deep Cleaning Tasks

    Deep cleaning isn’t limited to just kitchens and bathrooms—it covers the entire home:

    • Washing the interior of every window to remove dirt and streaks.
    • Removing couch and chair cushions to clean hidden dirt, crumbs, and pet hair within creases.
    • Moving and cleaning underneath couches and rugs to eliminate dust and debris from neglected areas.

    Key Differences Between Standard and Deep Cleaning

    While standard cleaning is all about routine maintenance, deep cleaning focuses on detailed attention to ensure every corner is spotless. Let’s analyze standard cleaning vs deep cleaning.

    AspectStandard CleaningDeep Cleaning
    Scope of WorkMaintains visible surfaces and general tidiness. Focuses on regular cleaning tasks like dusting surfaces, vacuuming, and cleaning bathrooms.Targets hard-to-reach spots, hidden dirt, and deep-seated grime. Involves in-depth cleaning like scrubbing grout, washing windows, and cleaning appliances inside out.
    CostTypically ranges from $0.12 to $0.20 per square foot.Generally costs $0.15 to $0.25 per square foot due to the intensive work involved.
    Time TakenUsually takes around 1-2 hours for an average-sized home.Can take anywhere from 4-8 hours for a comprehensive deep clean of a similar space.
    FrequencyIdeal for weekly or bi-weekly schedules to maintain a clean home.Recommended quarterly or semi-annually to tackle neglected areas and accumulated dirt.
    Tools & SuppliesBasic cleaning supplies like mild cleaners and dusters.Requires specialized equipment such as steam cleaning tools and stronger cleaning agents for stubborn grime.

    Both Regular and deep cleaning play vital roles in keeping your home clean and comfortable. While standard cleaning keeps everything running smoothly day-to-day, a deep clean provides a fresh start, reaching into the corners and crannies that often go overlooked.

    When to Choose Standard Cleaning?

    If you’re someone who prefers a tidy and organized home but struggles to find the time for daily upkeep, standard cleaning is the perfect solution. Regular house cleaning ensures your home stays fresh, clean, and welcoming without requiring deep scrubbing or extensive labor.

    Perfect for Busy Individuals and Families

    Between work, errands, and family time, finding the energy for routine cleaning tasks can be a challenge. A regular cleaning service helps maintain cleanliness, so you don’t have to worry about coming home to dusting surfaces, mopping floors, or wiping kitchen countertops.

    Ideal for Homes That Are Already Well-Maintained

    If your home is already in good shape and just needs routine cleaning to prevent hidden dirt from building up, standard cleaning is the way to go. For example:

    • You vacuum weekly and keep bathroom surfaces clean, but need help with the details like wiping cabinets or dusting light fixtures.
    • Your kitchen stays organized, but you’d rather not spend time scrubbing kitchen countertops or taking out the trash regularly.

    A Simple Solution for Routine Upkeep

    For those who don’t need a deep cleaning checklist but want to keep their home looking its best, standard cleaning offers a stress-free way to maintain cleanliness. Whether you opt for a weekly, bi-weekly, or monthly schedule, it helps ensure a fresh and inviting space without requiring extra effort on your part.

    When to Opt for Deep Cleaning?

    If your home hasn’t been professionally cleaned in a while, deep cleaning is the best way to bring it back to a pristine condition.

    Unlike standard cleaning, which focuses on surface-level maintenance, a deep cleaning service tackles accumulated dirt, neglected areas, and hard-to-reach spots to create a truly sanitary and healthier living environment.

    Deep cleaning is particularly beneficial in these situations:

    Preparing for or recovering from an event

    Whether you’re hosting a gathering or cleaning up after a party, a thorough cleaning ensures your space looks and feels fresh.

    After home renovations

    Construction dust and debris can settle into hidden areas. Deep cleaning involves detailed dusting, scrubbing grout, and washing windows to restore cleanliness.

    Seasonal cleaning

    A spring cleaning session eliminates deep-seated dirt that builds up over time, making it easier to maintain cleanliness throughout the year.

    Move-in/move-out cleaning

    When changing homes, a professional deep cleaning service ensures a fresh start by tackling kitchen appliances, bathroom surfaces, and window frames to remove any traces of previous occupants.

    Addressing health concerns

    If you or a family member suffer from allergies, dust mites, or respiratory issues, deep cleaning tasks like scrubbing grout, cleaning air vents, and steam cleaning carpets help improve indoor air quality.

    Visible dirt and neglected spaces

    If you notice soap scum, dusting surfaces that never seem clean, or grime in hard-to-reach areas, it’s time for a professional cleaner to restore freshness.

    7 Benefits of Professional Cleaning Services

    A close-up of a cleaning checklist being marked off, with a mop and cleaning supplies visible in the background.

    Keeping a home spotless takes time, effort, and the right skills. While regular cleaning helps maintain cleanliness, nothing compares to the expertise of professional cleaning services.

    Whether it’s a standard cleaning or a deep cleaning service, hiring trained professionals ensures a thorough cleaning with consistent results.

    Expertise That Delivers Superior Results

    Professional cleaners are trained to handle cleaning tasks more efficiently than most homeowners. They know how to tackle hard-to-reach areas, remove deep-seated dirt, and use effective cleaning techniques to ensure every part of your home is spotless.

    Specialized Equipment and Cleaning Products

    Unlike everyday cleaning supplies, professionals use specialized tools and products designed for deep cleaning tasks. From steam cleaning carpets to scrubbing grout, these advanced methods help eliminate stubborn stains, reduce allergens, and maintain indoor air quality.

    Time-Saving Convenience

    Cleaning takes time—something many busy homeowners don’t have. A professional cleaning service allows you to focus on work, family, or leisure while experts handle the routine cleaning tasks. Instead of spending hours mopping floors or dusting surfaces, you can enjoy a clean home without lifting a finger.

    Thorough and Consistent Cleaning Standards

    A reliable cleaning company ensures your home is cleaned with attention to detail every time. Unlike DIY cleaning, where tasks might be skipped, professionals follow a deep cleaning checklist or regular cleaning service plan, ensuring no neglected areas are left behind.

    A Healthier Living Environment

    Dirt, dust, and bacteria can accumulate quickly, affecting the indoor air quality of your home. A professional deep cleaning service eliminates hidden dirt, disinfects bathroom surfaces, and removes allergens from window sills, air vents, and kitchen appliances, contributing to a healthier home.

    Cost-Effective in the Long Run

    While some may see hiring cleaners as an expense, it actually saves money by preserving furniture, flooring, and appliances. Deep cleaning involves removing buildup that can cause long-term damage, ensuring your home stays in top condition.

    A Worthwhile Investment

    Whether for routine cleaning or in-depth cleaning, professional services provide a level of cleanliness that’s hard to achieve alone. By investing in professional deep cleaning services, you not only maintain a clean home but also enjoy reduced stress, improved hygiene, and more free time—making it well worth the investment.

    Reach Out to Modern Maids for Your House Cleaning Needs

    A clean home is more than just a luxury—it’s essential for comfort, health, and peace of mind. Whether you need routine upkeep or a deep cleaning service, Modern Maids is your trusted provider in Dallas.

    Our team of professional cleaners is dedicated to making homes spotless, tidy, and welcoming, so you can enjoy a fresh, stress-free space without the hassle.

    Why Choose Modern Maids?

    • Expertise in standard cleaning vs deep cleaning—tailored to your specific needs.
    • Trained professionals using specialized equipment for a thorough cleaning.
    • Easy, hassle-free booking and reliable service.
    • Commitment to high-quality standards, ensuring consistent results every time.

    Book Your Cleaning Today!

    Don’t let dust and clutter take over—let Modern Maids handle the work for you! Schedule your cleaning service now through our easy-to-use booking page or call (469)-430-8860 to speak with our team.

    Experience the convenience of a professionally cleaned home with Modern Maids—where cleanliness meets comfort.

  • How to Clean Ceiling Fan Quickly and Easily Without the Mess

    How to Clean Ceiling Fan Quickly and Easily Without the Mess

    Ceiling fans are unsung heroes in keeping your home cool and comfortable, but they often go unnoticed until dust buildup becomes impossible to ignore. A clean ceiling fan does more than just enhance air quality—it helps your fan function efficiently, extending its lifespan and reducing energy consumption.

    However, let’s face it: cleaning a ceiling fan can be a tricky, messy task. From balancing on a step stool or ladder to dealing with falling dust, the whole process can feel like a hassle. Still, skipping this chore can lead to dust buildup, which not only gathers on the blades but also circulates into the air you breathe.

    With a few practical tools and simple techniques, you can clean ceiling fans without turning your room into a dusty disaster. Keeping them spotless is worth the effort, ensuring a healthier, dust-free environment for you and your family.

    How To Clean Ceiling Fan: 3 Simple Steps

    A person wearing a face mask and glasses cleaning a black ceiling fan with a cloth.

    1. Take a Ladder and Detach the Fan from the Ceiling Hook

    Cleaning a ceiling fan thoroughly often requires detaching it from the ceiling, especially if dust buildup has accumulated inside the motor housing or on the blades. Before starting, ensure safety by turning off the power to the fan at the circuit breaker. Use a voltage tester to confirm there’s no electricity flowing to the wires.

    It’s also important to clean the ceiling fan light fixture, including the glass components, to prevent dust buildup and ensure it remains functional.

    Set up a sturdy step ladder or step stool that provides enough height to comfortably reach the ceiling fan. Gather essential tools such as a screwdriver, wire stripper/cutter, adjustable wrench, and pliers. Begin by gently unscrewing the canopy that connects the ceiling fan to the ceiling hook. Carefully support the fan with one hand while detaching it from the hook.

    Use the pliers and wire cutter to disconnect the electrical wires, ensuring you mark them for easy reassembly. An adjustable wrench may be needed to loosen bolts or brackets. Always place the fan on a flat surface or drop cloth to prevent scratches and to contain any loose dirt or dust that may fall off during cleaning.

    Prioritize safety by wearing gloves to protect your hands and taking extra care not to overreach while on the ladder. If you’re unsure about handling wires, or other tools, consider consulting a professional for this step.

    2. Unscrew the Fan Blades from the Fan Head

    Once the ceiling fan is safely detached and placed on a flat surface, the next step is to remove the ceiling fan blade from the fan head. This allows for a deeper and more thorough cleaning, ensuring dust buildup, dirt, and grime are completely eliminated. Leaving the blades attached makes cleaning more difficult and risks leaving areas untouched, especially around the screws and edges.

    Here’s how to do it:

    • Gather Your Tools: You’ll need a screwdriver (usually a Phillips or flathead) and a damp cloth or microfiber cloth to wipe the blades later.
    • Locate the Screws: Examine where the blades connect to the fan head. You’ll typically find screws near the base of each blade.
    • Unscrew Carefully: Use the screwdriver to loosen and remove the screws holding the blades. Make sure to keep the screws in a safe place for reassembly. As you detach each blade, gently pull it away from the fan head.

    This process ensures the fan blades can be cleaned individually without spreading dust onto the motor housing or other components. Removing the blades also helps you inspect for any wear and tear, such as loose dirt or damage to the edges. Once detached, lay the blades flat on a soft surface like paper towel or a drop cloth to dry completely prevent scratching.

    By cleaning each blade thoroughly, you can maintain the fan’s performance and keep your room dust-free. Properly cleaned blades also help improve air circulation, making the fan more efficient when reassembled.

    3. Cleaning Procedure to Clean Ceiling Fans

    In this section, we’ll guide you through the proper steps to clean your ceiling fan, ensuring every part—from the blades to the motor—is spotless and functioning efficiently. You’ll learn how to remove loose dust, use appropriate cleaning tools, and avoid common mistakes that could damage your fan.

    Caution: What Not to Do While Cleaning a Ceiling Fan

    Before diving in, there are a few safety tips to keep in mind:

    • Do not use harsh chemicals: These can damage the finish on the blades and motor housing.
    • Avoid soaking components: Excess moisture can cause rust or short circuits. Always use a damp cloth and ensure parts are completely dry before reassembly.
    • Don’t neglect the motor: Dust buildup inside the motor can reduce efficiency and cause overheating.

    Cleaning the Motor

    The motor is the heart of your ceiling fan, and skipping its cleaning can lead to dust accumulation inside, affecting performance. Use compressed air to blow out dust inside and wipe the motor housing gently. Follow up by wiping the exterior with warm water and a dry microfiber cloth. Never spray cleaning solution directly onto the motor or other electrical parts.

    Cleaning Specific Fan Types

    A man in a red shirt installing or adjusting a wooden-blade ceiling fan.

    1. Standard Ceiling Fans

    Standard ceiling fans are the most common and generally the easiest to clean. Use a dry microfiber cloth or pillowcase method to clean blades and motor housing. Regular maintenance prevents dust buildup and keeps the fan running efficiently.

    Always finish by drying the blades completely to avoid streaks or water damage. If your ceiling fan has light fixtures, remember to remove and clean the glass globes. Properly washing and drying the glass globes ensures optimal lighting and fan performance.

    2. Fans with Retractable Blades

    Fans with retractable blades require extra care as dust can gather in the blade hinges. Gently extend each blade to clean with a damp cloth. Pay attention to hinges where dust can accumulate, and dry blades completely before retracting.

    3. High Ceiling Fans

    High ceiling fans can be challenging to clean due to their height, but with the right tools, the task becomes manageable. Use an extendable duster or a secure step ladder for safe cleaning.

    For deep cleaning, consider professional assistance to avoid safety risks. Clean ceiling fans prevent dust from circulating in the air and maintains the fan’s performance in large spaces.

    How to Clean a Ceiling Fan Without a Ladder

    Extendable Dusters

    Cleaning a ceiling fan without a ladder is not only possible but also simple with the help of an extendable duster. These tools come with a microfiber head that efficiently traps dust without scattering it into the air.

    • Reach High Ceilings: Extendable dusters are designed to adjust to various lengths, allowing you to clean fans on high ceilings without the need for a ladder.
    • Ease of Use: Simply extend the duster to the required height and swipe it gently across each blade. The microfiber cloth head clings to loose dust and dirt, ensuring thorough cleaning.
    • Cost-Effective Solution: These dusters are an affordable and reusable cleaning tool. Their lightweight design makes them convenient for quick and regular maintenance.

    For fans with severe dust buildup, lightly spray the duster head with a cleaning solution before use. This method helps remove stubborn grime while keeping the process ladder-free, making it ideal for anyone prioritizing safety and convenience.

    Ceiling Fan Cleaning Brushes

    A ceiling fan cleaning brush is a light, specialized tool designed for how to clean ceiling fan to make cleaning quick and efficient. Its unique U-shaped design fits snugly around the fan blades, allowing you to clean both sides at once.

    • Effortless Cleaning: The U-shaped brush eliminates the need to clean each side of the blade separately, saving time and effort.
    • Extendable Handle: Equipped with an extendable handle, these brushes are perfect for reaching high ceiling fans without the need for a ladder.
    • Effective Dust Removal: The soft bristles gently remove dust and dirt without damaging the blades, leaving them spotless.
    • Versatility: These brushes are not only ideal for ceiling fans but can also be used to clean other hard-to-reach areas like shelves or light fixtures.

    Using a ceiling fan cleaning brush is a smart investment for maintaining a dust-free home with minimal hassle.

    Pillowcase Method

    The pillowcase method is a simple and mess-free way to clean your ceiling fan blades effectively. Here’s how it works:

    • Step-by-Step Process:
      1. Take an old pillowcase and lightly spray the inside with a cleaning solution or dampen it with soapy water for better dust removal.
      2. Slide the pillowcase over each fan blade, pressing the fabric against both sides.
      3. Gently pull the pillowcase back while trapping the dust inside, preventing it from falling onto furniture or the floor.
    • Safety Tips:
      • Wear a mask to avoid inhaling dust particles.
      • Use safety glasses to protect your eyes from falling dust.
      • Cover your hair with a scarf or cap to keep it clean during the process.

    This method is not only efficient but also keeps the cleaning process neat, ensuring your room stays spotless while your fan gets a thorough clean.

    Tips to Prevent Fan Dust from Falling Everywhere

    A close-up view of a dusty ceiling fan blade covered in thick layers of dust.

    Use a Drop Cloth

    Place a drop cloth or old sheets directly beneath the fan before starting the cleaning process. This will catch any falling dust, making cleanup faster and easier.

    Try the Pillowcase Method

    The pillowcase method is a mess-free solution that traps dust inside the fabric as you clean each blade, preventing it from scattering into the air or onto furniture.

    Lightly Spray Dusting Tools

    Lightly spray your extendable duster or microfiber cloth with a cleaning solution to reduce loose dust particles from flying around while wiping the blades.

    Turn Off HVAC Systems

    If your fan is located near an air vent, turn off your HVAC system to prevent airflow from circulating the dust around the room as you clean.

    These tips ensure a cleaner, hassle-free experience while keeping your home dust-free.

    Let Modern Maids Handle Your House Cleaning Needs

    A clean and welcoming home is just a step away with Modern Maids, your trusted provider of professional house cleaning and maid services in Dallas. Our dedicated team ensures every corner of your home is spotless, tidy, and inviting, allowing you to focus on what truly matters.

    Ready to experience hassle-free cleaning? Book your professional cleaning service today through our convenient booking page or call us directly at (469)-430-8860. Let us take care of your home while you enjoy peace of mind.

    FAQs

    1. How do I keep dust from collecting on my ceiling fan?

    Regular cleaning is key to preventing dust buildup. Wipe the blades dry with a microfiber cloth every two weeks and lightly spray them with an anti-dust solution to repel dust. Running your fan regularly can also help reduce dust accumulation by keeping the air moving.

    2. How often should you clean ceiling fan blades?

    Ceiling fan blades should be cleaned at least once a month to prevent dust buildup. For fans in high-traffic areas or homes with pets, consider cleaning them every two weeks for optimal performance.

    3. How do you get dust out of a fan without taking it apart?

    Use an extendable duster or the pillowcase method to remove dust from blades without disassembling the fan. You can also use compressed air to blow out dust from the motor housing and hard-to-reach areas.

    4. What causes a ceiling fan to collect dust so quickly?

    Dust collects on ceiling fans due to static electricity generated by the rotating blades. Fans also gather dust from the air, especially in rooms with poor ventilation or high levels of activity. Regular cleaning minimizes this buildup.

  • Where Should Cleaning Supplies Be Stored? Best Practices for Safety

    Where Should Cleaning Supplies Be Stored? Best Practices for Safety

    Keeping your cleaning supplies properly stored isn’t just about tidying up – it’s about creating a safer and more efficient home. From preventing hazardous reactions caused by cleaning chemicals to maximizing storage space, thoughtful organization has benefits that go far beyond appearances. Imagine reaching for your glass cleaner or toilet cleaner without rummaging through a cluttered closet – sounds convenient, right?

    In this guide, we’ll explore smart ways to organize cleaning supplies, from utilizing laundry room cabinets and wire shelving to optimizing vertical space with practical tools like S-hooks. Whether it’s bathroom cleaning supplies or larger cleaning tools like vacuum cleaners, we’ll share tips to keep your supplies easily accessible and safely stored. Let’s dive in and transform how you store and organize your cleaning essentials!

    Why Proper Storage of Cleaning Supplies Matters?

    Safety Concerns

    A bucket filled with various cleaning tools and supplies, including gloves, brushes, sponges, and spray bottles, placed on a wooden floor.

    Improper storage of cleaning supplies can pose serious risks, especially in homes with children or furry friends as these are reactive and flammable chemicals Accidental ingestion of cleaning chemicals or exposure to toxic fumes can result in severe health hazards.

    Additionally, certain combinations of cleaning products can cause hazardous reactions, releasing harmful gases. For example, mixing acids like chlorine or hydrogen peroxide with other chemicals can lead to highly corrosive outcomes, causing serious burns or damage.

    Storing these items in a well-ventilated area and keeping them out of children’s reach is essential to prevent accidents and maintain a safe living environment.

    Product Longevity

    Did you know that cleaning products stored in areas prone to extreme temperature fluctuations can lose their effectiveness over time? Conditions like high humidity or exposure to direct sunlight can degrade cleaning solutions and flammable materials, making them less efficient or even unsafe.

    To prolong the shelf life of products like glass cleaner, toilet cleaner, and kitchen cleaners, it’s vital to store them in dry spaces, away from hot pipes or HVAC intake vents.

    Efficiency

    An organized storage system saves more time than you think. When cleaning products are neatly arranged with clear labels or stored in small bins, it’s easier to quickly grab what you need. Imagine effortlessly finding your spray bottles or bathroom cleaners without rummaging through cluttered shelves.

    Utilizing tools like lazy Susans or wire shelving in your laundry area or utility room can help streamline your cleaning routine and improve work operations, leaving you with more time to enjoy your clean home.

    Proper storage isn’t just practical; it’s a necessary step in creating a safe, efficient, and well-maintained home.

    How to Categorize Cleaning Supplies for Safe and Efficient Storage

    Chemical Cleaning Products

    An assortment of colorful chemical cleaning products in spray bottles and containers, displayed alongside sponges and brushes against a bright background.

    Chemical cleaners like bleach, window cleaners, disinfectants, and hydrogen peroxide are essential for deep cleaning but require careful handling. Storing reactive chemicals such as ammonia and bleach together can lead to dangerous reactions that release harmful fumes.

    For instance, a spill involving both can create toxic chloramine gas, posing severe health risks. Always store these chemicals separately in their original, labeled containers to avoid confusion or misuse.

    Choose a cool, dry, and well-ventilated area—preferably a safety cabinet—to keep these products away from heat and direct sunlight, which can degrade their effectiveness or cause hazardous reactions.

    Tools and Equipment

    Proper storage of cleaning tools like brooms, mops, dustpans, and vacuum cleaners not only keeps them organized but also prolongs their lifespan. Hang brooms and mops on wall-mounted hooks to prevent bristle damage and free up floor space.

    Vacuum cleaners should be stored in a closet or utility room, with accessories neatly arranged in bins or bags for easy access. Always ensure tools like mops are thoroughly dry before storing them to avoid mold growth or unpleasant odors.

    Protective Gear

    Items like gloves, masks, aprons, and safety goggles are essential for personal protection during cleaning tasks. Keep these stored in a clean, dry drawer or box near the cleaning supplies they’re frequently used with. For hygiene, replace disposable items like gloves and masks regularly and check reusable gear for wear and tear.

    Everyday Cleaning Essentials

    Frequently used items like sponges, microfiber cloths, paper towels, and spray bottles of mild cleaners should be easily accessible for quick clean-ups. A portable caddy is an ideal solution, allowing you to carry these supplies from room to room effortlessly.

    To prevent cross-contamination, always separate clean and dirty cloths, and replace sponges as needed to maintain cleanliness.

    Organizing your cleaning supplies into these categories ensures safety, efficiency, and ease of use, making your cleaning routine smoother and stress-free.

    9 Practical Ways to Store Cleaning Supplies at Home

    1. Under the Sink Cabinet

    The under-sink area is a practical spot for storing cleaning supplies because of its easy accessibility in most homes. To maximize this space, use pull-out organizers or stackable bins to keep items neatly arranged. For instance:

    • Group frequently used items like dishwashing soap, sponges, and surface sprays in one caddy.
    • Store less commonly used products, such as wood polish or oven cleaner, in a separate bin.

    To make the most of this space, attach adhesive hooks to the inside of cabinet doors to hang gloves, scrub brushes, or small towels. For homes with children or pets, consider installing childproof locks on the cabinet doors or opting for a locking mechanism on the caddy itself to ensure safety.

    This setup keeps your supplies organized, safe, and easily accessible without creating clutter.

    2. Dedicated Cleaning Closet

    A dedicated cleaning closet is an excellent way to keep your home clutter-free by providing a centralized space for all your cleaning tools and supplies. This ensures everything is in one place, making your cleaning routine more efficient.

    To organize it effectively, install adjustable shelves to separate items by category:

    • Use the top shelf for hazardous chemicals, keeping them safely out of children’s reach.
    • Reserve the middle shelf for everyday cleaning products, ensuring quick access to frequently used items.
    • Store heavy items like buckets or large containers of cleaner on the bottom shelf for stability.

    Maximize vertical space by adding hooks or a pegboard to the inside of the closet door, perfect for hanging mops, brooms, or dusters. To maintain order, use labeled bins or baskets for specific supplies, such as “Bathroom Cleaning Supplies” or “Kitchen Essentials”.

    With this setup, your cleaning closet becomes a functional and organized hub for all your cleaning needs.

    3. Over-the-Door Organizers

    Using over-the-door organizers is a smart way to maximize unused vertical space, especially in homes with limited storage options. These organizers are versatile and help keep smaller items within reach while staying neatly out of sight.

    Opt for multi-pocket organizers with clear pockets to store lightweight items like sponges, microfiber cloths, and can also hang spray bottles. This allows you to see what you need at a glance, saving time and effort. However, avoid placing heavy or bulky items in the pockets, as they can strain the hooks or cause the organizer to become unbalanced.

    These organizers work best on utility room or bathroom doors, offering quick access to frequently used cleaning supplies while maintaining a tidy appearance. It’s a simple yet effective solution for decluttering small spaces.

    4. Wall-Mounted Racks

    Wall-mounted racks are an efficient way to store bulky cleaning tools like brooms, mops, and dusters. By keeping them off the floor, you create a tidy, ventilated storage area that prevents damage and clutter.

    Install tool grippers or hooks to securely hold the handles of mops, brooms, and dusters. For additional functionality, consider wall brackets to hang lightweight buckets or stackable cleaning caddies. This not only saves floor space but also keeps your tools easily accessible.

    The best place for wall-mounted racks is in the garage or utility area, keeping heavy-duty cleaning tools out of living spaces while ensuring they’re neatly organized and ready to use. This solution combines practicality with a clean aesthetic.

    5. Caddies or Bins

    Using caddies or bins is a practical and portable solution for keeping cleaning supplies handy, especially when cleaning multiple rooms. These storage options ensure your tools are organized and always within reach.

    For efficiency, create room-specific caddies to streamline your cleaning routine. For instance:

    • A bathroom caddy can include essentials like toilet cleaner, scrub brush, glass cleaner, and microfiber cloths.
    • A kitchen caddy might hold dish soap, degreaser, surface cleaner, and sponges.

    For bulk supplies or larger items, stackable bins with transparent lids are ideal. They provide easy visibility, making it simple to locate what you need without rummaging.

    Store your caddies in a central location, such as a utility room or under the sink, ensuring they are always accessible and ready to grab for quick cleaning tasks. This method keeps your supplies organized while saving time and effort.

    6. Laundry Room Shelves

    The laundry room often has untapped storage potential, making it an ideal spot for keeping cleaning supplies organized and within easy reach. By installing shelving units, you can create space for essentials like fabric softeners, cleaning sprays, and detergents. Choose between open or closed shelves based on your preference for visibility or a tidier appearance.

    To maximize functionality, add broom holders to the walls for mops and brooms, keeping them off the floor and preserving their condition. Additionally, small bins can be used to organize smaller items such as sponges, brushes, and cleaning cloths, ensuring everything has a designated place.

    This setup transforms your laundry room into a well-organized hub for cleaning tools and supplies, leveraging existing space efficiently.

    7. Garage or Utility Room

    The garage or utility room is perfect for storing large or heavy-duty cleaning supplies that aren’t used daily. This space allows you to keep bulky items organized and safely out of living areas.

    Set up heavy-duty shelves to hold large containers of cleaning chemicals, buckets, and specialized equipment. These shelves provide a sturdy base for heavier items, reducing clutter on the floor. To further optimize the space, install wall hooks for hanging tools like power washers, hoses, or outdoor cleaning brushes, keeping them easily accessible.

    For safety, store hazardous chemicals, such as pesticides or industrial cleaners, in a locked cabinet, ensuring they are secure and out of reach from children or pets. This setup ensures both efficiency and safety while leveraging the garage or utility room’s spaciousness.

    8. Drawer Dividers for Small Items

    wooden dividers designed for organizing small items.

    Using drawer dividers is a smart way to keep small, frequently used cleaning items neat and easily accessible. By adding compartmentalized dividers, you can separate essentials like sponges, scrub brushes, and cleaning gloves, ensuring they’re always organized and ready to grab.

    This method works well for drawers in key locations like the kitchen, bathroom, or utility room, where quick access to cleaning tools is often needed. To enhance organization further, use labels or tags on each section, making it easier to identify and locate items at a glance.

    Drawer dividers not only save time but also help maintain a clutter-free, organized storage solution for smaller cleaning essentials.

    9. High Cabinets

    High cabinets are an excellent storage solution for keeping hazardous chemicals like bleach and ammonia safely out of reach of children and pets. This ensures a secure environment while still providing easy access for adults.

    Use the top shelf for storing strong or dangerous chemicals, keeping them well-separated from other household items. To prevent accidents, line the shelves with non-slip mats, which help stabilize bottles and prevent them from tipping over.

    For safe access, keep a small step stool nearby, allowing you to retrieve items without straining or risking a fall. High cabinets combine safety and practicality, making them an ideal choice for storing potentially dangerous cleaning supplies.

    Experience a Spotless Home with Modern Maids

    At Modern Maids, we’re dedicated to transforming your home into a spotless, tidy, and welcoming space. Whether you need a one-time deep clean or regular maid services, our team in Dallas is committed to delivering exceptional results that make your home shine.

    Booking a professional cleaning service has never been easier. Visit our booking page to schedule your cleaning in just a few clicks, or call us at (469)-430-8860 to speak with our team directly. Let Modern Maids handle the cleaning so you can focus on what matters most.

    FAQs

    Where should cleaning supplies be stored in a restaurant?

    Cleaning supplies in a restaurant should be stored in a designated area separate from food storage or preparation zones to prevent contamination. Use well-ventilated spaces like utility rooms or cabinets for chemicals and ensure they are clearly labeled. Avoid placing cleaning products near hot pipes or HVAC intake vents. Store tools like mops and brooms off the floor using hooks or racks to maintain hygiene.

    Where should cleaning products and chemicals be stored in your workplace?

    In workplaces, cleaning products and chemicals should be stored in dedicated storage cabinets or utility rooms, clearly labeled and organized.

    Place hazardous chemicals in locked cabinets or areas with restricted access to ensure employee safety. Follow guidelines for ventilation and avoid placing chemicals near hot pipes or HVAC intake vents to prevent accidents.

    What are the OSHA guidelines for chemical storage?

    OSHA requires that chemicals be stored in properly labeled containers in well-ventilated areas. Employers must maintain Safety Data Sheets (SDS) for all chemicals and ensure they are accessible.

    Hazardous chemicals should be stored based on their hazard class, avoiding mixing incompatible substances to prevent hazardous reactions. Additionally, employees must receive training on safe handling and storage practices.

    Where should cleaning cloths be stored when not in use?

    Cleaning cloths should be stored in a dry, well-ventilated area to prevent mold and unpleasant odors. Keep them separated into clean and dirty bins to avoid cross-contamination.

    For easy access, use clear bins or designated shelves in a utility room or laundry area, and ensure they are washed and dried thoroughly after each use.

  • The Hardest Things to Clean in a House and Why

    When it comes to cleaning a home, there are tasks that are straightforward and those that are downright challenging. Whether you’re tackling your regular cleaning routine or facing a deep-cleaning session, there are certain areas in a house that demand extra time, attention, and sometimes, specialized tools. At Modern Maids, we understand the intricacies of a truly deep clean. From sticky grime on kitchen appliances to the stubborn buildup in bathrooms, we’re here to help you tackle those tough spots.

    In this blog post, we’ll explore the hardest things to clean in a house and offer tips on how to approach these tasks. Whether you’re a DIY enthusiast or considering professional help, these insights will make your cleaning routine more manageable.

    1. Oven and Stove Grates

    The kitchen is often the heart of the home, but it’s also the area where cleaning can become the most difficult. One of the toughest appliances to clean in any kitchen is the oven. Over time, baked-on grease, food spills, and even burnt crumbs accumulate on the oven’s interior and stovetop. Here are some reasons why the oven and stove grates are especially hard to clean:

    • Built-Up Grease and Food Residue: Grease splatters, oil drips, and food particles can cling to surfaces, especially in areas that are not easily wiped down after every use.
    • Hard-to-Reach Areas: The grates and burners on a stove are full of nooks and crannies where grime can hide.
    • Tough to Scrape Surfaces: Cleaning the interior of the oven is challenging because it often requires scrubbing off baked-on food and grease, which can require a lot of elbow grease or harsh chemicals.

    Tips for Cleaning:

    • For ovens, consider using an oven cleaner specifically designed to break down grease and grime. For natural cleaning, a paste of baking soda and water applied overnight can work wonders.
    • Stove grates can often be soaked in soapy water or a mixture of vinegar and water to help loosen dirt, followed by scrubbing with a tough brush.

    2. Shower and Bathtub Surfaces

    Bathrooms are one of the most frequently used rooms in the house, which also means they accumulate dirt, soap scum, mold, and mildew very quickly. The shower and bathtub surfaces are especially difficult to clean due to:

    • Soap Scum and Hard Water Stains: Soap scum can form a stubborn film on glass, tiles, and shower doors. Hard water stains can leave unsightly marks on faucets, showerheads, and even the tub itself.
    • Mold and Mildew: Damp environments make it easy for mold and mildew to take hold in the grout lines, corners, and along the edges of tubs and showers.
    • Grout Lines: The grout between bathroom tiles is porous and prone to absorbing moisture, which leads to staining, dirt accumulation, and mold growth.

    Tips for Cleaning:

    • For soap scum, use a mixture of white vinegar and water to dissolve it. For tougher stains, a store-bought cleaner specifically designed for soap scum can be used.
    • Prevent mold and mildew by keeping the bathroom well-ventilated and wiping down surfaces after every shower.
    • For grout, use a cleaning solution made of equal parts baking soda and water and apply it directly to the grout lines, allowing it to sit before scrubbing.

    3. Windows (and Window Tracks)

    Clean windows can dramatically enhance the appearance of your home, letting in more natural light and offering a beautiful view. However, window cleaning is one of the most time-consuming tasks, especially if you have many windows or your home is located near a lot of dust or pollen. The challenges of cleaning windows include:

    • Streaks and Smudges: Achieving a streak-free shine can be difficult, especially with certain glass cleaners that leave behind residue.
    • Dust and Debris in Tracks: Window tracks tend to collect dust, dirt, and debris over time, which can be tough to remove. The grime often builds up in places that are hard to reach, requiring extra tools like brushes or vacuums to clean.
    • Exterior Windows: Cleaning the outside of windows can be dangerous if you have windows on higher floors, making it more challenging to do yourself.

    Tips for Cleaning:

    • For streak-free windows, use a microfiber cloth or squeegee with a mix of water and vinegar. Avoid cleaning windows on hot, sunny days to prevent streaks.
    • Use a vacuum attachment or small brush to clean out debris from window tracks before wiping them down with a damp cloth.

    4. Carpets and Upholstery

    Carpets and upholstery are magnets for dirt, dust, pet hair, and stains. Unlike hard floors, they require more time and effort to clean effectively. Whether you have a living room couch or a carpeted bedroom, the challenges include:

    • Pet Hair: Pet owners know that hair can get deeply embedded in fibers, making it difficult to remove completely.
    • Stains and Spills: Liquids, food, and other substances can leave stains that require special treatments to remove. Carpet stains, in particular, can sometimes seep into the fibers and pad, making them harder to get out.
    • Odors: Carpets and upholstery can trap odors, which makes it more difficult to keep the space smelling fresh.

    Tips for Cleaning:

    • Use a vacuum with a HEPA filter to effectively remove dust, dirt, and pet hair from carpets and upholstery.
    • For stains, blot the affected area with cold water and a cloth, and then use a gentle detergent or commercial cleaner designed for fabric.
    • Consider renting or hiring a professional steam cleaner to deeply clean carpets and upholstery if stains and odors persist.

    5. Microwave and Refrigerator Interiors

    The microwave and refrigerator are appliances that require regular cleaning but can quickly accumulate grime. Both of these areas present unique challenges:

    • Microwave: Food splatters from cooking and spills inside the microwave can be difficult to clean, especially if the stains have dried or baked on over time.
    • Refrigerator: Food spills, sticky surfaces, and expired items contribute to a messy refrigerator. The shelves, drawers, and corners often collect spills, making it a challenge to keep the fridge looking clean and hygienic.

    Tips for Cleaning:

    • For the microwave, heat a bowl of water with vinegar in it for a few minutes to loosen up grease and food particles. Then wipe it down with a cloth.
    • For the fridge, empty the fridge first and use a mild cleaner or a mixture of water and vinegar to wipe down the shelves. For tough spills, use baking soda and water.

    6. Ceiling Fans and Light Fixtures

    High-up surfaces like ceiling fans and light fixtures can be a real challenge. These areas are often overlooked during regular cleaning routines but can accumulate dust, cobwebs, and grime over time.

    • Ceiling Fans: The blades of ceiling fans collect dust, especially in homes with high ceilings, making them difficult to clean. The dust tends to fly everywhere when disturbed, making the job even messier.
    • Light Fixtures: Over time, light fixtures collect dust and bugs, which can result in dimmer lighting and a dusty home. Cleaning these areas requires a bit of elbow grease and the proper tools.

    Tips for Cleaning:

    • To clean ceiling fan blades, use a step ladder, a pillowcase, and a mild cleaner to wipe off the dust without spreading it around the room.
    • For light fixtures, carefully remove them if possible and wash them with warm water and dish soap. For chandeliers, use a microfiber cloth to gently wipe away dust and grime.

    7. Baseboards and Trim

    Baseboards and trim are often overlooked during regular cleaning routines but can accumulate dust, dirt, and even pet hair. Because they are located along the floor and often in high-traffic areas, they can be especially difficult to keep clean.

    Tips for Cleaning:

    • Use a microfiber cloth or duster to gently wipe down baseboards and trim, being careful to reach into the corners where dust accumulates.
    • For stubborn dirt, use a cleaning solution of warm water and a mild detergent.

    Conclusion

    Cleaning a home can be an overwhelming task, especially when it comes to the hardest-to-clean areas like ovens, bathtubs, and carpets. At Modern Maids, we understand that some cleaning jobs require extra time, effort, and care. That’s why we offer professional cleaning services to help tackle even the toughest cleaning challenges in your home.

    By following the right cleaning methods, using the right tools, and having a bit of patience, you can conquer even the hardest cleaning tasks. Whether you decide to do it yourself or hire a professional, your home will thank you for the effort you put into maintaining its cleanliness.

    If you’re ready to tackle the tough spots in your home, contact Modern Maids today. Our team is ready to help you make your home shine!

  • Do Maids Do Your Dishes?

    When you hire a professional cleaning service like Modern Maids, you want to be sure that you’re getting a comprehensive cleaning that leaves your home looking spotless. While many people know that professional maids can handle tasks like dusting, vacuuming, and scrubbing floors, one question often comes up: Do maids do your dishes?

    The answer to that question depends on the type of service you’re hiring, the scope of work, and your expectations. In this blog post, we’ll explore whether maids will wash your dishes, how they handle dishwashing, and what you can expect when you schedule a cleaning with Modern Maids.

    1. What Do Maids Typically Do During a Cleaning?

    Before diving into the specifics of whether maids do dishes, it’s important to understand what a typical cleaning includes. At Modern Maids, our professional cleaning services cover a wide range of tasks, depending on the type of service you choose. Some of the common tasks our maids perform include:

    • Dusting and wiping down surfaces
    • Vacuuming carpets and rugs
    • Mopping hard floors
    • Cleaning bathrooms, including scrubbing toilets, tubs, and sinks
    • Making beds and tidying up bedrooms
    • Wiping down kitchen counters and surfaces
    • Emptying trash cans

    But what about dishes? Let’s take a closer look at how professional cleaning services typically handle this chore.

    2. Do Maids Wash Dishes?

    When it comes to dishes, the short answer is yes, maids may wash your dishes, but there are some caveats.

    Hand-Washing Dishes

    If you have a small number of dirty dishes, or if there are items that can’t go in the dishwasher, some cleaning services may wash your dishes by hand. This could include washing dishes left on countertops, in sinks, or any other areas in the kitchen. However, this will depend on the specifics of the cleaning package you’ve chosen and the policies of the maid service. It’s a good idea to clarify your expectations with your cleaning provider in advance to ensure there’s no confusion.

    Using the Dishwasher

    In most cases, Modern Maids and other professional cleaning services will happily load your dishwasher for you. If your dirty dishes can be placed in the dishwasher, maids are likely to do so as part of their standard cleaning. They’ll ensure that the dishwasher is properly loaded to maximize its efficiency and clean your dishes thoroughly. Once the dishwasher cycle is complete, however, it’s important to note that maids typically do not unload the dishwasher or put the clean dishes away.

    3. Why Do Maids Not Put Away Dishes?

    While it’s certainly convenient to have someone come into your home and clean every inch of it, there are a few practical reasons why maids generally do not put away clean dishes:

    Personal Preference and Organization

    Everyone has their own system for organizing their kitchen. From how you stack plates in the cupboard to where your utensils are stored, putting dishes away requires a certain level of familiarity with the household’s unique system. Maids, no matter how skilled, might not know where you prefer each item to be placed, and putting dishes away could inadvertently disrupt your organization system.

    Efficiency and Time Constraints

    While cleaning services like Modern Maids aim to offer thorough, high-quality cleaning, maids typically work within a set time frame. The time spent putting away dishes, which can vary from household to household, could take away from other important cleaning tasks like scrubbing surfaces, vacuuming, and dusting. Cleaning services usually prioritize tasks that are more universally applicable, such as wiping down kitchen counters, cleaning appliances, and ensuring that all surfaces are spotless.

    Liability Concerns

    There can be liability issues if a maid accidentally breaks or damages a dish while putting it away. Even the most experienced cleaning professionals can sometimes encounter fragile items or breakables, and some cleaning services prefer to avoid this risk altogether by sticking to tasks that are less likely to result in accidents.

    4. What Can You Expect Instead?

    While your maid may not put away the clean dishes, there are still many ways they will help maintain a tidy kitchen during a cleaning session. Here’s what you can expect:

    • Dishwasher Loading: As mentioned earlier, maids will often load your dirty dishes into the dishwasher, saving you time and effort. They will make sure to place items correctly to ensure they get thoroughly cleaned during the wash cycle.
    • Kitchen Surface Cleaning: Maids will wipe down counters, clean your stovetop, and sanitize other surfaces in the kitchen. This ensures that your kitchen remains hygienic and clutter-free.
    • Cleaning the Sink: After your dishes have been loaded into the dishwasher, maids will typically clean the sink and remove any remaining food debris. This leaves your kitchen looking fresh and tidy.
    • General Kitchen Tidying: Even if dishes aren’t put away, maids will often organize the kitchen by putting items back in their place on counters and making sure everything is neat. They may also clean small appliances like the coffee maker, toaster, or microwave.

    5. How to Make Sure Your Dishes Are Taken Care Of

    If dishes are a priority for you during a cleaning, there are a few steps you can take to ensure that your needs are met:

    Set Clear Expectations

    Before scheduling your cleaning, talk to your cleaning service to clarify what you’d like done with the dishes. You can let them know if you want them to wash dishes by hand or load the dishwasher. Clear communication will help both you and the maid service understand exactly what needs to be done.

    Use the Dishwasher

    If you’re planning on having your maids load the dishwasher, try to have it ready to go with the dirty dishes already placed inside. This will save time and ensure that the cleaning team can get straight to work.

    Leave a Note for Special Requests

    If you need help with specific items, such as putting away dishes or handling fragile pieces, leave a note for the maid team to ensure that they know your preferences. This way, they can address any concerns or special instructions without confusion.

    6. Why You Should Trust Modern Maids

    At Modern Maids, we pride ourselves on providing high-quality cleaning services that make your life easier. Our team is professional, thorough, and respectful of your space. Whether you’re looking for a regular cleaning service, a deep clean, or a one-time refresh, we’re here to help.

    While we may not put away dishes, we will always take care to clean your kitchen thoroughly, ensuring that it looks spotless and is ready for you to use. Our team will wash your dishes, load your dishwasher, and clean the sink and surfaces to leave your kitchen sparkling.

    With our personalized services, we are happy to tailor each cleaning to your specific needs. If dishes are an important part of your cleaning routine, we’ll make sure to do everything we can to help without disrupting your household’s organization system.

    Conclusion

    The question of whether maids do dishes ultimately depends on the type of service you request and your personal preferences. While professional cleaning services like Modern Maids are happy to wash dishes and load the dishwasher, putting away dishes is typically not part of the service. By setting clear expectations, using your dishwasher effectively, and communicating your preferences, you can ensure that your maid service is as convenient and thorough as possible.

    If you’re ready to enjoy a sparkling clean home and a more relaxed lifestyle, Modern Maids is here to help. Whether it’s dishes, countertops, or the entire home, we’ve got you covered!

  • What is the Best Day for Maid Services?

    Hiring a professional maid service is one of the most effective ways to keep your home clean and organized without taking up valuable time on your already packed schedule. Once you’ve decided that a maid service is the solution for you, one important question remains: What is the best day for maid services? The truth is, the best day for a cleaning will depend on various factors including your personal routine, type of cleaning required, and when you need the most help. Whether you’re looking for a one-time deep clean or a regular housekeeping service, the right timing can make a world of difference.

    At Modern Maids, we’re here to help you figure out the optimal day and time for your maid service. We’ll explore why certain days may work better than others and provide insight into how you can make your cleaning experience as seamless as possible.

    1. Consider Your Weekly Schedule: What Works for You?

    One of the first things to consider when selecting the best day for maid services is your personal schedule. A cleaning day should ideally align with your lifestyle to ensure minimal disruption while giving the cleaning team the best opportunity to do a thorough job.

    Weekdays for Busy Professionals

    If you have a typical 9-5 work schedule, weekdays might be the best option for you. Many people opt for a weekday cleaning because they are out of the house for work, making it easier for the cleaning team to get the job done efficiently. If you book your cleaning during work hours, you can come home to a freshly cleaned home at the end of the day, without needing to take time out of your day to supervise the process.

    Weekday cleanings are also beneficial for people who want a more relaxed weekend. By getting your cleaning out of the way on a weekday, you free up your weekend to relax or focus on activities you enjoy.

    Weekends for Families and Busy Households

    For families with children or people who work from home, weekend maid services might be the best option. Cleanings on Saturday or Sunday can ensure that the entire family is out of the way, giving the cleaners full access to the house. This is especially important if you have a large home or if the family has a lot of daily activities, which can create a mess throughout the week.

    However, weekends tend to be in high demand for cleaning services. Because many people prefer to schedule cleanings on the weekend, you’ll want to plan ahead and book early to secure a spot.

    2. Morning vs. Afternoon: Which Time Works Best?

    When choosing the best day for maid services, the time of day also plays a crucial role. Both morning and afternoon appointments have distinct advantages depending on your needs.

    Morning Cleanings: Fresh Start to Your Day

    Morning cleanings are an excellent choice for people who like to start their day in a clean environment. If you work from home, or if you prefer the quiet of the early morning, this could be a great time to book your cleaning. Morning appointments also allow the cleaning team to get started early, leaving plenty of time for them to thoroughly clean your home without feeling rushed. Additionally, you can enjoy the rest of your day knowing that everything is taken care of.

    Another reason morning cleanings are popular is that they allow your home to be cleaned while you’re away at work or running errands. This makes it easier for the team to move around without any interruptions, ensuring the best possible results.

    Afternoon Cleanings: Convenience and Flexibility

    Afternoon cleanings offer more flexibility if you have a more unpredictable schedule. If you work from home, are retired, or have flexible hours, an afternoon cleaning can be convenient as it gives you more time to prepare and be around when the cleaning team arrives. If you don’t mind sharing your space with the cleaners, afternoon cleanings can also be a great option to help maintain the momentum of a productive day.

    In some cases, afternoon cleaning slots may also be less expensive due to lower demand, so this could be a budget-friendly option for many customers.

    3. After Major Events or Activities: The Ideal Time for a Deep Clean

    Life can get messy, especially after large events or family gatherings. If you’ve had a busy weekend or a festive occasion, your home may need a little extra TLC. Scheduling your cleaning service right after a major event or weekend activity can help bring things back to normal quickly.

    For example:

    • Post-Party Cleanings: If you’ve hosted a party, birthday, or family gathering, your house may be filled with leftover dishes, spills, and clutter. Scheduling a cleaning the next day will save you from dealing with the mess and ensure that your home is spotless once again. The cleaning team can take care of all the heavy lifting, such as washing dishes, wiping down countertops, and vacuuming up debris.
    • Holiday Weekend Cleanings: Similarly, if your home has been bustling with holiday guests or celebrations, scheduling a cleaning after the event allows you to relax while the cleaners restore order. You won’t have to worry about the lingering mess after enjoying family time.

    4. Why Monday or Friday Might Be the Best Days for Maid Services

    In addition to weekends and weekdays, two specific days—Monday and Friday—stand out for different reasons. Here’s why they might be the best days to schedule your maid service:

    Monday: Start the Week with a Fresh, Clean Home

    For many people, Monday is the beginning of a new week, and there’s no better way to start your week than with a fresh, organized home. A Monday cleaning is particularly helpful if you’ve spent the weekend with family or friends, and your home is feeling a little out of order. With everything cleaned up on Monday, you’ll have a clutter-free space to focus on the tasks ahead.

    Monday cleanings also set a positive tone for the rest of the week. You can begin your workweek without distractions, knowing that your home is in top condition. This can improve productivity and reduce stress during the week. Additionally, since many people schedule cleanings for Fridays or Saturdays, Monday can often be a less busy day for cleaning services, making it easier to find an available time slot.

    Friday: End the Week with a Clean Slate

    If you’re someone who loves to relax and unwind after a busy week, then Friday may be the best day for your maid service. After a hectic workweek, coming home to a clean house on a Friday evening is the perfect way to kick off the weekend. You won’t have to worry about cleaning over the weekend, and you can enjoy your time off without thinking about household chores.

    For families or individuals with busy weekend plans, Friday cleanings ensure that you can return to a neat home after the chaos of the workweek. Additionally, Friday cleanings provide a clear separation between the workweek and the weekend, creating a peaceful transition into your days off.

    5. Opt for a Regular, Recurring Cleaning Service

    If you’d like to keep your home consistently clean without the hassle of scheduling each visit, a recurring cleaning service is a fantastic option. Modern Maids offers weekly, bi-weekly, or monthly cleaning plans tailored to your needs.

    • Weekly Cleanings: Weekly services are ideal for busy households that need regular attention. A weekly cleaning ensures your home is always in good shape without accumulating clutter or dust.
    • Bi-Weekly Cleanings: For those who don’t need a cleaning every week but still want to maintain cleanliness, bi-weekly visits are a great balance.
    • Monthly Cleanings: If you’re generally tidy but want professional cleaners to handle the heavy-duty tasks, a monthly cleaning is perfect for deep cleans and maintenance.

    6. Why You Should Trust Modern Maids

    At Modern Maids, we understand that choosing the right day and time for your maid service is essential to making the process convenient and stress-free. Our team of expert cleaners is flexible and can work around your schedule to ensure your home is always in its best condition. Whether you prefer a Monday morning cleaning or a Friday afternoon refresh, we’re here to accommodate your needs.

    We also prioritize eco-friendly cleaning methods to ensure a safe environment for your family and pets. Our team members are fully trained and dedicated to providing a high-quality service that you can rely on.

    Conclusion

    Choosing the best day for maid services depends on your unique needs, schedule, and preferences. While weekday mornings work well for busy professionals and weekday afternoons suit more flexible schedules, there are additional reasons why Monday or Friday might be ideal options. Starting your week fresh with a Monday cleaning or ending it on a high note with a Friday cleaning can provide a perfect balance of cleanliness and convenience.

    If you’re ready to enjoy a beautifully clean home without the hassle, contact Modern Maids to schedule your next cleaning service. We’re committed to providing you with exceptional service, so you can focus on the things that matter most in life.

  • The Top 10 Vacuum Cleaners of 2024: A Comprehensive Comparison

    Keeping your home clean is essential for comfort and hygiene, and a reliable vacuum cleaner is a crucial tool in achieving that goal. With a myriad of options available on the market, it can be overwhelming to choose the right one for your needs. This blog post dives deep into the top 10 vacuum cleaners of 2024, offering detailed descriptions, pros and cons, and pricing information to help you make an informed decision.

    1. Dyson V15 Detect

    Description: The Dyson V15 Detect is the latest in cordless vacuum technology, showcasing Dyson’s commitment to innovation. Equipped with advanced laser technology, this vacuum reveals microscopic dust particles that are often invisible to the naked eye. The powerful digital motor ensures deep cleaning across multiple surfaces, from carpets to hardwood floors.

    Pros:

    • Exceptional Suction Power: With a powerful motor and laser technology, it effectively captures dirt and dust.
    • Smart Features: The vacuum automatically adjusts suction based on the type of surface being cleaned, optimizing performance and battery life.
    • User-Friendly Design: Lightweight and easy to maneuver, making it ideal for all types of users.

    Cons:

    • High Price Tag: The premium features come at a cost, making it one of the more expensive options available.

    Price: Approximately $699.


    2. Shark Navigator Lift-Away

    Description: The Shark Navigator Lift-Away is a versatile upright vacuum designed to tackle both big messes and everyday cleaning. It features a detachable canister that allows for portable cleaning, making it easy to clean stairs, upholstery, and hard-to-reach areas.

    Pros:

    • Affordable and Effective: Offers strong suction power at a reasonable price.
    • Lightweight Design: Easy to carry, making it suitable for users of all ages.
    • HEPA Filtration: Traps allergens and dust, making it ideal for households with allergies.

    Cons:

    • Short Cord: While the vacuum is versatile, the cord length may limit cleaning in larger spaces without needing to switch outlets.

    Price: Around $199.


    3. iRobot Roomba i7+

    Description: The iRobot Roomba i7+ is a cutting-edge robotic vacuum designed for convenience and efficiency. It features advanced smart mapping technology that learns the layout of your home, allowing for targeted cleaning. The self-emptying base means you can forget about the dustbin for up to 60 days.

    Pros:

    • Smart Technology: Can be controlled via smartphone, enabling scheduled cleanings and on-demand requests.
    • Self-Emptying Feature: The vacuum automatically empties its dustbin into a base, reducing maintenance efforts.
    • Powerful Cleaning: Offers strong suction capabilities and can handle various surfaces, including carpets and hard floors.

    Cons:

    • Higher Price Point: While convenient, the cost may not be justifiable for all users compared to traditional vacuums.

    Price: Approximately $949.


    4. Bissell CleanView Swivel Pet

    Description: Specifically designed for pet owners, the Bissell CleanView Swivel Pet vacuum features a tangle-free brush roll that effectively removes pet hair without getting stuck. Its swivel steering makes it easy to navigate around furniture, while the powerful suction ensures a deep clean.

    Pros:

    • Budget-Friendly: Offers great performance without breaking the bank.
    • Pet-Friendly Features: Specialized tools for removing pet hair and odors.
    • Easy to Maintain: The dustbin is simple to empty, and the filter is washable.

    Cons:

    • Heavier Build: The vacuum is a bit bulkier than some competitors, which may make it less convenient for some users.

    Price: Around $129.


    5. Miele Complete C3

    Description: The Miele Complete C3 is a high-end canister vacuum known for its exceptional cleaning performance and build quality. It features a powerful motor and various attachments for different cleaning tasks, making it a versatile choice for discerning users.

    Pros:

    • Outstanding Durability: Built to last, with a reputation for longevity and reliability.
    • Quiet Operation: Designed to operate quietly, making it perfect for households with children or pets.
    • Multiple Attachments: Comes with specialized tools for carpets, hard floors, and upholstery.

    Cons:

    • Expensive: The premium quality comes with a premium price, making it a significant investment.

    Price: Approximately $1,200.


    6. Hoover PowerDrive Pet

    Description: The Hoover PowerDrive Pet vacuum is designed to meet the needs of pet owners, featuring a powerful motor and a variety of tools to tackle pet hair and stubborn messes. Its lightweight design and ease of use make it a practical choice for everyday cleaning.

    Pros:

    • Cost-Effective: Offers strong performance at a competitive price.
    • Lightweight and Easy to Use: The design makes it easy to maneuver around the house.
    • Versatile Cleaning Tools: Includes specialized attachments for tackling pet hair and cleaning upholstery.

    Cons:

    • Noisy Operation: Some users may find it louder than other models.

    Price: Around $159.


    7. Ecovacs Deebot Ozmo T8 AIVI

    Description: The Ecovacs Deebot Ozmo T8 AIVI is an innovative robot vacuum that combines vacuuming and mopping functions. Its advanced AI technology allows it to recognize and avoid obstacles while mapping your home for efficient cleaning.

    Pros:

    • Dual Functionality: Cleans and mops simultaneously, saving time.
    • Smart Navigation: Uses advanced sensors for efficient cleaning patterns.
    • App Control: Allows you to schedule cleanings and monitor progress from your smartphone.

    Cons:

    • Higher Price: While advanced, the price may deter some budget-conscious consumers.

    Price: Approximately $599.


    8. Black+Decker Dustbuster Handheld

    Description: The Black+Decker Dustbuster is a compact handheld vacuum designed for quick cleanups and versatility. Its lightweight design makes it easy to grab and use for small messes, making it a practical addition to any household.

    Pros:

    • Portable and Lightweight: Ideal for quick cleanups, whether in the car or around the house.
    • Affordable Price: A budget-friendly option for those who need a secondary vacuum.
    • Easy to Empty: The dustbin can be emptied with minimal hassle.

    Cons:

    • Limited Battery Life: The handheld design may result in shorter cleaning sessions before needing a recharge.

    Price: Around $49.


    9. Tineco Pure One S12

    Description: The Tineco Pure One S12 is a smart cordless vacuum that adapts its suction power based on real-time data. This vacuum features a sleek design and intuitive controls, making it easy to use while providing thorough cleaning performance.

    Pros:

    • Smart Features: Monitors performance in real-time and adjusts suction power accordingly.
    • Strong Suction: Effective on both carpets and hard floors.
    • User-Friendly: Lightweight and easy to maneuver, with a user-friendly interface.

    Cons:

    • Learning Curve with the App: Some users may find the app less intuitive than expected.

    Price: Approximately $499.


    10. Oreck Commercial XL2100RHS

    Description: The Oreck Commercial XL2100RHS is a commercial-grade upright vacuum known for its lightweight design and powerful cleaning capabilities. This vacuum is built for heavy-duty use but remains easy to handle, making it suitable for residential cleaning as well.

    Pros:

    • Ultra-Lightweight: Weighs only 8 pounds, making it easy to carry and use.
    • Powerful Cleaning: Designed for effective deep cleaning of various surfaces.
    • Durable Design: Built to withstand regular use.

    Cons:

    • Lacks Modern Features: Unlike some newer models, it does not come with HEPA filtration or advanced attachments.

    Price: Around $149.


    Conclusion

    When it comes to choosing the right vacuum cleaner, it’s essential to consider your specific needs, budget, and the size of your home. For those with pets, models like the Bissell CleanView Swivel Pet or Hoover PowerDrive Pet offer affordable yet powerful solutions. If you prefer the convenience of automated cleaning, the iRobot Roomba i7+ and Ecovacs Deebot Ozmo T8 AIVI stand out for their smart features.

    For users looking for high-end performance, the Dyson V15 Detect and Miele Complete C3 are top-notch choices, although they come with a higher price tag. Whatever your needs, investing in a quality vacuum cleaner can significantly enhance your home’s cleanliness and comfort.

    Evaluate the features that matter most to you, and choose the vacuum that fits your lifestyle best. With the right tool, cleaning can be less of a chore and more of a straightforward task. If you prefer not to evaluate these features you can rely on a profession cleaning service like Modern Maids who provides house cleaning in Austin, maid service in Dallas and many more services. Happy cleaning!

  • Cleaning Hacks: How to Tackle Stubborn Stains

    Stubborn stains can be one of the most frustrating challenges in maintaining a clean home. Whether it’s a red wine spill on your carpet, grease splatter on your kitchen countertop, or ink marks on your favorite shirt, tackling these blemishes can feel daunting. However, with the right techniques and a bit of know-how, you can remove even the most persistent stains. In this guide, we’ll explore effective cleaning hacks to help you manage and eliminate stubborn stains, restoring your belongings to their former glory.

    Understanding Stains: Types and Causes

    Before diving into cleaning techniques, it’s essential to understand the different types of stains and their causes. This knowledge will help you choose the most effective cleaning method.

    1. Organic Stains

    These stains come from natural sources and include substances like food, drinks, and bodily fluids. Common examples include:

    • Red Wine: Caused by the tannins in grapes.
    • Coffee: The acids and oils in coffee can leave dark stains.
    • Fruit Juices: The pigments in fruits can cause discoloration.

    2. Inorganic Stains

    Inorganic stains often result from substances that contain minerals or chemicals. Examples include:

    • Rust: Caused by oxidation of metal surfaces.
    • Ink: Typically from pens and markers, containing dyes and solvents.
    • Grease: Often found in kitchens, originating from cooking oils and fats.

    3. Dye Stains

    These stains are caused by colored substances that penetrate fabrics or surfaces. Examples include:

    • Grass Stains: Contain chlorophyll, which can cling to fibers.
    • Paint: Especially oil-based paints can leave significant marks.

    4. Miscellaneous Stains

    These are stains that don’t fit into the above categories, such as:

    • Blood: Can coagulate and leave a mark if not treated quickly.
    • Mud: Can be both organic and inorganic, depending on the soil content.

    Understanding these categories will guide your cleaning efforts and help you select the best cleaning agents.

    Essential Cleaning Supplies for Stubborn Stains

    Before tackling any stain, having the right cleaning supplies on hand is crucial. Here are some must-have items for effective stain removal:

    1. Absorbent Cloths and Paper Towels

    For blotting stains, having a good supply of absorbent materials is essential. Microfiber cloths work well for this purpose because they trap dirt and liquids effectively.

    2. Cleaning Solutions

    Invest in a range of cleaning solutions to cover different stain types:

    • All-Purpose Cleaner: Great for general cleaning and mild stains.
    • Vinegar: A natural disinfectant that can help with odors and stains.
    • Baking Soda: An effective abrasive for scrubbing tough stains.
    • Hydrogen Peroxide: Works well for organic stains and disinfecting.

    3. Specialized Stain Removers

    Sometimes, specialized stain removers are necessary, especially for tough stains like grease, ink, or red wine. Look for products labeled specifically for these types of stains.

    4. Brushes and Scrubbing Tools

    Soft-bristled brushes are useful for scrubbing without damaging surfaces. A toothbrush can work well for tight spots or delicate fabrics.

    5. Plastic Scraper

    For substances like gum or paint, a plastic scraper can help lift the stain without scratching the underlying surface.

    Effective Techniques for Tackling Common Stains

    Now that you’re equipped with the right tools, let’s explore effective techniques for tackling specific stubborn stains.

    1. Red Wine Stains

    Red wine stains can be particularly troublesome, but a quick response can make a big difference. Here’s how to tackle them:

    Materials Needed:

    • Salt
    • White wine or club soda
    • Clean cloths

    Method:

    1. Blot the Stain: Use a clean cloth to blot the stain, absorbing as much wine as possible. Do not rub, as this can spread the stain.
    2. Apply Salt: Sprinkle a generous amount of salt on the stain. The salt will absorb the wine.
    3. Pour White Wine or Club Soda: Pour a small amount of white wine or club soda over the salt. This will help lift the stain.
    4. Blot Again: After a few minutes, blot the area again with a clean cloth.
    5. Rinse and Wash: Rinse the area with cold water and launder if the stain is on fabric.

    2. Grease Stains

    Grease stains from cooking can cling to fabrics and surfaces. Here’s how to remove them effectively:

    Materials Needed:

    • Baking soda or cornstarch
    • Dish soap
    • Clean cloths

    Method:

    1. Absorb the Grease: Sprinkle baking soda or cornstarch on the stain to absorb the grease. Let it sit for 15-20 minutes.
    2. Brush Off the Powder: After it has absorbed the grease, brush off the powder with a soft brush.
    3. Apply Dish Soap: Mix a few drops of dish soap with warm water and apply it to the stain with a clean cloth.
    4. Scrub Gently: Using a soft-bristled brush, gently scrub the area in a circular motion.
    5. Rinse and Launder: Rinse the area with warm water and wash the fabric as usual.

    3. Ink Stains

    Ink stains can be tricky due to the permanent nature of many inks. However, they can often be removed with the right approach.

    Materials Needed:

    • Rubbing alcohol or hand sanitizer
    • Cotton balls or clean cloths

    Method:

    1. Place a Cloth Underneath: Lay a clean cloth or paper towel underneath the stained area to catch any ink that seeps through.
    2. Apply Rubbing Alcohol: Dampen a cotton ball with rubbing alcohol or hand sanitizer and gently dab the ink stain. Avoid rubbing, as this can spread the ink.
    3. Blot the Stain: After dabbing, use a clean cloth to blot the area until the ink begins to lift.
    4. Repeat if Necessary: You may need to repeat this process several times, using a fresh cotton ball each time.
    5. Rinse and Wash: Rinse the area with cold water and launder as appropriate.

    4. Blood Stains

    Blood stains are most effective to remove when treated promptly. Here’s how to address them:

    Materials Needed:

    • Cold water
    • Salt or hydrogen peroxide
    • Clean cloths

    Method:

    1. Rinse with Cold Water: Rinse the stained fabric under cold running water to remove as much blood as possible.
    2. Apply Salt or Hydrogen Peroxide: If the stain persists, create a paste with salt and cold water or apply hydrogen peroxide directly to the stain.
    3. Let it Sit: Allow the salt paste or hydrogen peroxide to sit for 10-15 minutes.
    4. Blot and Rinse: Blot the area with a clean cloth and rinse thoroughly with cold water.
    5. Launder: Wash the fabric as usual.

    5. Grass Stains

    Grass stains, particularly on clothing, can be persistent but can be treated effectively.

    Materials Needed:

    • Dish soap
    • White vinegar
    • Clean cloths

    Method:

    1. Pre-Treat the Stain: Mix equal parts dish soap and white vinegar, and apply the mixture directly to the grass stain.
    2. Gently Scrub: Use a soft brush or cloth to gently scrub the stain, working from the outside in.
    3. Let it Sit: Allow the solution to sit for 15-30 minutes.
    4. Rinse and Launder: Rinse the area with cold water and wash the fabric as usual.

    Additional Tips for Stubborn Stains

    1. Test Cleaning Solutions First: Always test any cleaning solution on a small, inconspicuous area of the fabric or surface to avoid damage.
    2. Act Quickly: The sooner you address a stain, the easier it will be to remove. Try to act within a few minutes of the spill.
    3. Avoid Heat: Heat can set stains, so avoid using hot water or drying fabrics in the dryer until you’re sure the stain is gone.
    4. Consult Professionals for Tough Stains: If you’ve tried multiple methods and the stain persists, it may be time to consult a professional cleaning service.
    5. Keep Your Cleaning Supplies Handy: Having a well-stocked cleaning kit can help you address stains as soon as they occur, reducing the chance of permanent marks.

    Conclusion

    Stubborn stains don’t have to ruin your fabrics or surfaces. By understanding the type of stain and using the right techniques and cleaning supplies, you can effectively tackle even the most challenging blemishes. Remember to act quickly, and don’t hesitate to consult professional house cleaners when necessary.

    With the cleaning hacks outlined in this guide, you’ll be well-equipped to restore your home and belongings to a pristine condition. Keep this guide handy for future reference, and enjoy the satisfaction of a clean, stain-free environment! Happy cleaning!