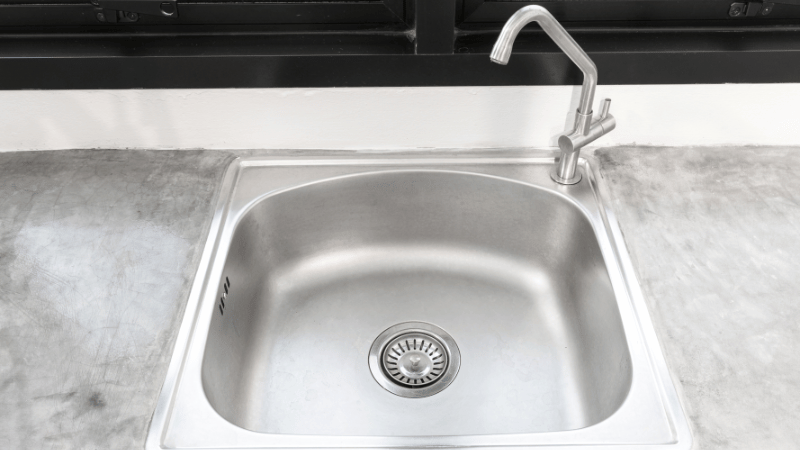
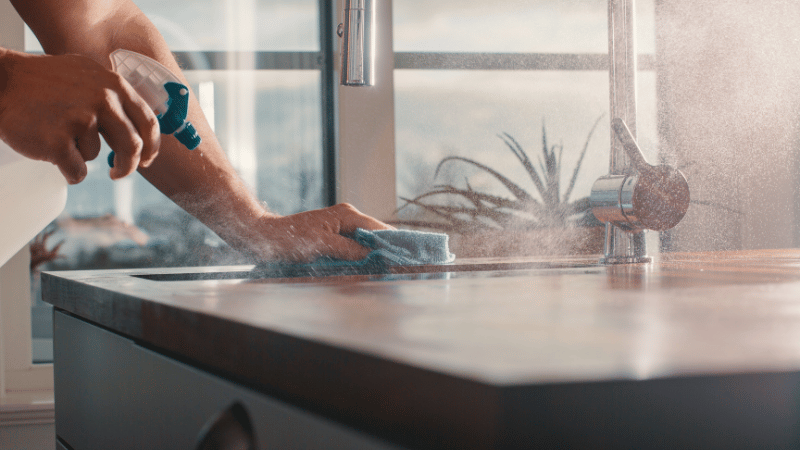
Your stainless steel sink works hard every day—catching spills, handling food particles, and putting up with metal utensils clanking against its surface. But over time, that once-gleaming steel sink can start looking dull, covered in water spots, stubborn stains, and mineral deposits.
Worse, if left unchecked, bacteria can linger for up to 48 hours, turning your kitchen’s clean zone into a hidden germ hotspot.
The good news? You don’t need fancy products or harsh chemicals to restore its shine. Whether you’re tackling rust spots, grime buildup, or tough stains, these seven effective cleaning methods will leave your stainless steel kitchen sink looking spotless.
From baking soda and white vinegar to trusted stainless steel cleaners, we’ve got the best tips for a deep clean that keeps your sink in top shape.
Say goodbye to a dull sink’s surface—it’s time to bring back the shine!
7 Best Methods to Clean a Stainless Steel Sink
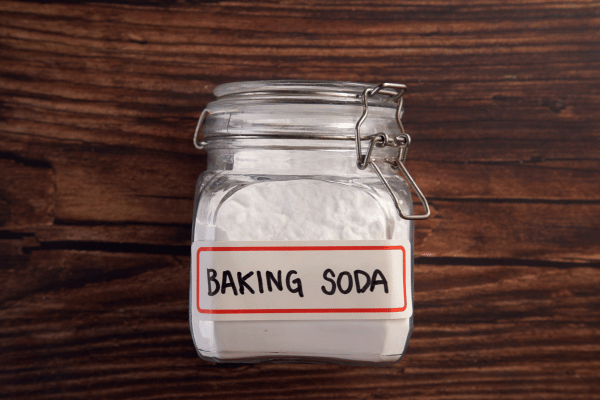
1. Baking Soda and Vinegar – The Best DIY Scrub
Think of baking soda and vinegar as the ultimate cleaning dream team.
Baking soda isn’t just for cookies—it’s a mild abrasive that lifts grime without scratching your stainless steel sink.
White vinegar? It’s the powerhouse that dissolves mineral deposits, tackles stubborn stains, and wipes out bacteria on contact.
Together, they create a fizzy reaction that cuts through buildup like magic—no harsh chemicals needed.
Why It Works
Ever noticed how a little baking soda sprinkled on a greasy pan makes scrubbing effortless? That same principle applies here.
The gentle abrasiveness of baking soda breaks down food particles and grime, while vinegar reacts with it to loosen residue and kill lingering bacteria. This method is safe for daily cleaning or a deep clean when your stainless steel kitchen sink needs extra love.
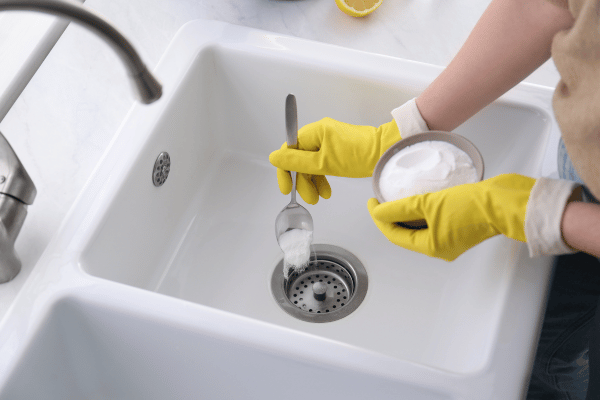
How to Use
Start by sprinkling baking soda evenly across the sink’s surface—don’t be shy, give it a generous coat.
Next, pour distilled white vinegar over the powder and watch it bubble up like a science experiment gone right.
Let this sit for about five minutes, allowing the fizz to break down tough stains.
Then, grab a soft sponge or brush and gently scrub every inch, paying extra attention to any stained areas. Once done, rinse thoroughly with warm water and dry with a microfiber cloth to prevent water spots from dulling the shine.
If your sink could talk, it would thank you for this fresh-scented, chemical-free spa treatment—all with ingredients straight from your pantry!
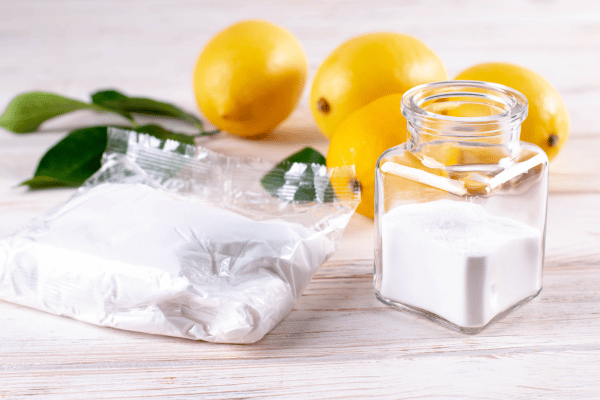
2. Lemon and Salt – Natural Degreaser and Stain Remover
Ever cut a lemon and accidentally sprayed juice all over the place? Annoying for your clothes, but a game-changer for your stainless steel sink.
Who knew your secret to a spotless steel sink was hiding in the fruit bowl all along?
That citrusy zing isn’t just great in lemonade—it’s a natural degreaser that can wipe out stubborn stains and water spots without a drop of harsh chemicals. Pair it with salt, and you’ve got a powerful scrub that makes grime disappear while leaving behind a fresh scent.
Why It Works
Think of lemon juice as nature’s liquid sandpaper—its acidity breaks down mineral deposits, grease, and limescale, while salt adds just the right amount of grit to gently scrub away buildup.
Unlike bleach or other strong cleaners, this combo is tough on stains but safe for your stainless steel finish, making it a perfect go-to for daily cleaning or a deep clean when your sink needs extra care.
How to Use
Slice a lemon in half and sprinkle salt directly into the sink’s surface.
Then, grab the lemon halves and use them as scrubbers, rubbing in circular motions over the entire surface to lift food particles and grime.
Let it sit for 20 minutes, giving the lemon juice time to dissolve rust spots and tough stains. Finally, rinse thoroughly with warm water, wipe dry with a clean cloth, and admire the citrus-powered shine.
3. Dish Soap and Warm Water – The Simple Daily Cleaner
Some things in life just work—like coffee in the morning, a comfy hoodie on a cold day, and dish soap and warm water for a quick, effortless sink cleanup.
While it might not have the drama of a baking soda fizz or the zest of a lemon scrub, this classic combo is a stainless steel kitchen sink’s best friend for daily cleaning. It cuts through grease, lifts fingerprints, and leaves your sink’s surface looking fresh without any fuss.
Why It Works
If stainless steel had a love language, it would be gentle care.
Dish soap is mild yet effective, breaking down food particles and light stains without damaging the stainless steel finish. Paired with warm water, it dissolves leftover grime, keeping your sink from turning into a sticky, streaky mess.
It’s the go-to method when you don’t need a full deep clean but want to keep things looking fresh.
How to Use
Fill a bowl with warm water and mix in a few drops of dish soap.
Dip a soft sponge or clean cloth into the mixture and wipe down the entire surface, paying extra attention to stuck-on food and greasy spots.
For a little extra oomph, sprinkle baking soda on stubborn areas before scrubbing—this adds a gentle abrasive boost. Once clean, rinse thoroughly with clean water, then dry with a microfiber towel to prevent water spots.
Simple? Yes. Effective? Absolutely. Your stainless steel sink will thank you for this quick refresh.
4. Club Soda – The Secret to a Streak-Free Shine
Who knew your favorite fizzy drink had a side hustle as a stainless steel sink polisher?
Club soda isn’t just great for cocktails—it’s also a secret weapon for keeping your stainless steel kitchen sink looking brand new.
Thanks to its carbonation, it lifts stains, breaks down grease, and leaves behind a flawless, streak-free shine—all without a single harsh chemical in sight.
Why It Works
Ever poured club soda over a stubborn stain on your clothes? That same bubbly magic works on stainless steel appliances, effortlessly dissolving water spots and grime.
The carbonation helps lift stubborn stains, while its mineral-free composition ensures a polished look without streaks or residue. Unlike powder cleaners or strong acids, club soda is gentle yet effective, making it perfect for a quick refresh.
How to Use
Forget the spray bottles—just pour club soda directly onto a microfiber cloth and wipe the entire surface of your steel sink.
Give extra attention to stained areas or rust spots, letting the carbonation do the work. Once the sink looks spotless, rinse with clean water, then buff dry for that mirror-like finish.
Pro Tip: Never use club soda on a drain that recently had bleach poured down it—the reaction can create dangerous gases or cause bleach buildup to resurface. Keep your cleaning safe and your sink’s surface sparkling!
5. Hydrogen Peroxide and Cream of Tartar – The Dynamic Duo for Stubborn Stains
If your stainless steel sink has seen better days—think hard water stains, soap scum, and even rust spots—it’s time to bring out the big guns.
But don’t worry, no harsh chemicals here. Instead, we’re talking about a powerhouse combo: hydrogen peroxide and cream of tartar.
One is a natural stain remover, the other a mild scrub that works like a charm. Together, they take on stubborn stains without damaging your stainless steel finish.
Why It Works
Hydrogen peroxide is like the gentler, more responsible cousin of bleach—it kills 99.9% of bacteria and mold spores while lifting stains, all without the toxic fumes.
Meanwhile, cream of tartar (yep, the stuff you probably have in your spice rack) acts as a non-abrasive scrub, perfect for tackling mineral deposits and tough stains without scratching your sink’s surface.
How to Use
Start by mixing two tablespoons of cream of tartar with a few drops of hydrogen peroxide to form a thick paste.
Apply it directly to stained areas and let it sit for 10 to 30 minutes—the more stubborn the stain, the longer you wait.
Then, grab a soft sponge and scrub gently before rinsing with clean water.
For extra-tough stains, soak a clean cloth or non-abrasive sponge in hydrogen peroxide and scrub the problem spots.
Dealing with rust stains? Switch up the ratio—mix two parts cream of tartar to one part hydrogen peroxide for a stronger paste. Just remember to keep the area well-ventilated, especially when using hydrogen peroxide in enclosed spaces.
6. Stainless Steel Cleaner – The Professional Choice
Sometimes, you just want to skip the DIY potions and go straight for the big leagues—that’s where a stainless steel cleaner comes in.
Designed specifically for stainless steel appliances and sinks, these cleaners don’t just clean; they polish, protect, and prevent future grime from building up.
If you want your stainless steel kitchen sink to look like it just walked off a showroom floor, this is the way to go.
Why It Works
Unlike home remedies, stainless steel cleaners contain protective polymers that do more than remove water spots, fingerprints, and smudges—they also create a barrier that repels stains and slows down oxidation.
Think of it as a shield for your sink, keeping it gleaming for longer and making future cleanings a breeze.
How to Use
Resist the urge to spray the cleaner directly onto your sink’s surface—instead, spritz a microfiber cloth with the cleaner first. This prevents over-saturation and ensures even application.
Then, wipe the sink in the direction of the grain, covering the entire surface to avoid streaks.
Finish by buffing it dry for that mirror-like stainless steel finish.
7. Flour Polishing – The Unexpected Trick for a Brilliant Shine
Flour: great for baking cookies, thickening sauces, and… polishing your stainless steel sink? Sounds bizarre, but it works like a charm.
No need for fancy cleaning sprays or harsh chemicals—just some all-purpose flour and a little buffing action, and your stainless steel kitchen sink will gleam like never before.
Best of all? There’s barely any elbow grease involved, and it costs next to nothing.
Why It Works
Think of flour as a super-fine, ultra-gentle powder cleaner. Its tiny particles absorb grease and fingerprints, leaving behind a polished, streak-free finish.
Metal utensils or steel wool can scratch your stainless steel finish but flour is soft enough to polish without causing any damage.
How to Use
Start by giving your sink a proper wash with warm, soapy water or a spray kitchen cleaner.
Once clean, grab a dry towel and buff the sink dry—seriously, don’t skip this step! If there’s any moisture left, the flour will turn into a sticky, pasty mess, and things will go downhill fast.
Once dry, sprinkle flour evenly across the sink’s surface, making sure to reach the sides and around the drain.
Then, take a clean, dry cloth and buff in circular motions until the entire surface shines. When done, simply wipe away excess flour with another clean cloth, and voilà—your stainless steel sink is polished to perfection.
Mastering How to Clean a Stainless Steel Sink: Keep It Spotless with the Right Method
Learning how to clean stainless steel sink the right way ensures it stays spotless, gleaming, and free from water spots and stains. Whether you’re tackling daily maintenance or need a deep clean, the right approach makes all the difference.
Dish soap and warm water handle everyday messes, while baking soda and vinegar or hydrogen peroxide with cream of tartar remove stubborn stains. For a streak-free shine, try club soda or flour polishing, and if you want long-term protection, a stainless steel cleaner will keep your sink’s surface looking flawless. No matter the level of mess, there’s a solution that fits your needs.
A clean sink is just the beginning—why not let Modern Maids make your whole home sparkle? As a trusted maid service in Dallas, we specialize in spotless, welcoming spaces without the hassle. Whether it’s a deep clean or regular upkeep, our expert team is ready.
Book your cleaning today at (469)-430-8860 or schedule online. Go ahead—enjoy your free time. We’ll handle the mess!
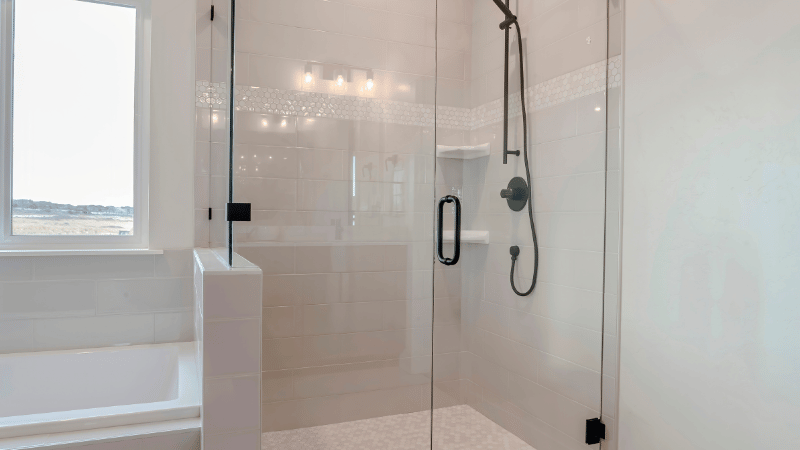
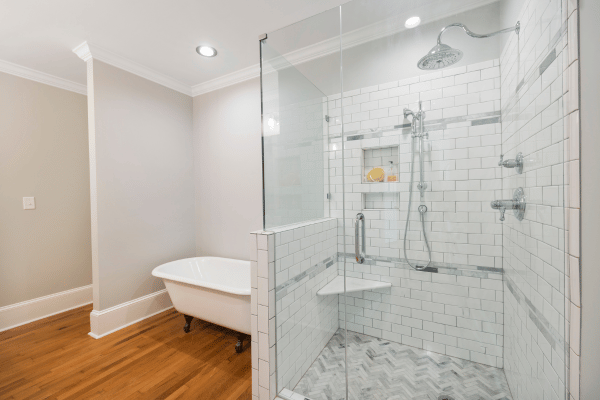
Your glass shower door should be transparent—not a crime scene of water stains and soap scum. Yet, thanks to hard water deposits, what was once a sparkling shower glass now looks like it’s been through a dust storm.
You’re not imagining it—85% of U.S. households have hard water, so unless you’re showering in bottled distilled water, those pesky mineral deposits are here to stay… or are they?
Ignore them for too long, and they’ll do more than just make your shower door look grimy. They etch into the glass, turning a cleaning job into a permanent regret. But don’t grab the harsh chemicals just yet—there’s a better way.
This guide will reveal seven foolproof methods—from natural cleaners to powerhouse solutions—that make hard water stains vanish. Get ready to reclaim that crystal-clear shower glass!
7 Best Methods to Clean Hard Water Stains from Glass Shower Doors
1. White Vinegar and Baking Soda – The Natural Power Cleaner
If your glass shower door is covered in hard water stains, don’t waste time with a basic glass cleaner—you need something with real muscle.
Enter white vinegar and baking soda, the dynamic duo of DIY cleaning. With a pH of 2-3, vinegar breaks down stubborn mineral deposits, while baking soda steps in as a gentle abrasive, lifting stains without scratching the surface.
Why It Works
Think of vinegar as the “melter” and baking soda as the “scrubber.”
The acidic vinegar dissolves calcium and magnesium buildup, while baking soda tackles the soap scum that clings to your shower glass like an unwelcome guest. It’s like giving your glass door a full detox—minus the expensive spa treatment.
How to Use
Start by mixing equal parts white vinegar and warm water in a spray bottle. Generously spray the solution onto the glass, making sure to coat the worst spots.
Let it sit for at least 10-15 minutes—if the stains are extra stubborn, give it 30 minutes to work its magic.
Next, grab a dish sponge and sprinkle baking soda onto it. Using circular motions, scrub the shower door, paying extra attention to areas with mineral deposits and soap residue.
Once you’re satisfied, rinse the surface with warm water and finish by drying with a microfiber cloth.
For an extra streak-free shine, follow up with distilled water to prevent new water spots from forming.
2. Lemon and Salt – A Natural Acidic Solution
If vinegar isn’t cutting it and your shower glass still looks like it’s wearing a foggy disguise, it’s time to bring in a citrus-powered solution.
Lemon juice isn’t just for lemonade—it’s a natural acid that works wonders on mineral buildup and soap scum, while salt adds just the right amount of grit to lift stubborn stains.
As a bonus, your glass shower door will smell as fresh as a sun-kissed orchard.
Why It Works
Ever noticed how citrus-based cleaners dominate the cleaning aisle?
That’s because lemon juice is naturally acidic, breaking down hard water deposits the way a squeeze of lemon cuts through grease on a plate. Pair that with salt’s mild abrasiveness, and you’ve got a dynamic duo ready to tackle soap residue and mineral stains without resorting to harsh chemicals.
How to Use
Slice a lemon in half, sprinkle salt onto the cut surface, and rub it directly onto the glass shower in circular motions.
Let the lemony magic work for about five minutes before rinsing with warm water.
To prevent streaks, wipe dry with a microfiber cloth.
Want to keep those stains from making an unwelcome return?
Spritz a little fresh lemon juice on the glass door after cleaning to create a protective barrier against future water spots.
If the stains are extra stubborn, try squeezing lemon juice directly onto the affected area, sprinkle salt over it, and rub the mixture together to let the citric acid penetrate deeper.
3. Dish Soap and White Vinegar – The Daily Maintenance Spray
If you’re tired of scrubbing your glass shower door every week, it’s time to play smarter, not harder.
Imagine cutting hard water buildup by 70%—all with a simple daily shower spray. No more exhausting deep cleans, no more panic when guests are coming over.
This DIY maintenance hack keeps your shower glass looking pristine day after day, and it takes just seconds to use.
Why It Works
This duo is like the Batman and Robin of bathroom cleaning.
Dish soap fights soap scum head-on, breaking down the greasy film that clings to your shower walls. Meanwhile, white vinegar dissolves hard water stains before they have a chance to turn into a stubborn mineral buildup nightmare.
The best part? It’s an effortless habit that prevents stains before they start—no harsh chemicals required.
How to Use
Mix equal parts distilled white vinegar and water in a spray bottle, then add a teaspoon of dishwashing liquid—something like Dawn dish soap works wonders.
Give it a good shake, and your magic potion is ready.
After your shower, spritz the solution onto the glass door while the surface is still glass wet.
Let it sit for 15 minutes, then simply wipe it down with a squeegee or microfiber cloth. No scrubbing, no soaking, no elbow grease—just a streak-free, sparkling shower glass every single day.
Consistency is key. Make this a habit, and you’ll minimize buildup, keep water stains at bay, and say goodbye to those exhausting deep cleans.
4. Hydrogen Peroxide and Baking Soda – Tough Stain Remover
Some hard water stains are just plain stubborn—like that one guest who overstays their welcome.
If your glass shower door still looks cloudy no matter what you throw at it, it’s time to bring in the heavy hitters.
Hydrogen peroxide isn’t just for first aid kits—it’s a natural bleaching agent that works wonders on water stains and mold, while baking soda adds a gentle scrubbing action to lift mineral buildup without damaging your shower glass.
Why It Works
Think of hydrogen peroxide as the secret weapon that breaks down mineral deposits, while baking soda acts as the cleanup crew, scrubbing away the mess.
Together, they cut through soap scum, limescale, and hard water deposits, leaving your shower glass looking crystal clear—no harsh fumes, no scratches, just results.
How to Use
Mix 1 cup of baking soda with 1/4 cup of hydrogen peroxide to create a slightly runny paste.
Apply the mixture directly onto the hard water stains and let it sit for at least 30 minutes—this gives the peroxide enough time to break down the mineral deposits.
Once the wait is over, grab a non-abrasive sponge and gently scrub the area. Rinse well with warm water, then dry using a microfiber cloth to prevent streaks.
For those extra tough stains that refuse to budge, mix hydrogen peroxide and rubbing alcohol in a spray bottle, spritz it onto the glass door, let it sit for 10 minutes, then scrub and rinse.
The best part? This method not only removes stains but also helps prevent mold and mildew—because nobody wants an uninvited science experiment growing in their shower.
5. Commercial Hard Water Stain Removers – The Fastest Option
Let’s be honest—not everyone has the patience for DIY cleaning experiments.
If you’d rather not play mad scientist with vinegar and baking soda, commercial hard water stain removers are your best bet.
These powerhouse formulas work up to 3x faster than homemade solutions, cutting through mineral buildup and soap scum in record time. The best part? No elbow grease required.
Why It Works
Unlike natural cleaners, commercial products are specifically formulated to dissolve mineral deposits on contact—no excessive scrubbing needed.
They contain acidic agents strong enough to break down hard water stains, but safe enough for glass surfaces when used correctly.
Think of them as the pressure washers of shower cleaning: fast, effective, and perfect for when you need results ASAP.
Recommended Products
If you’re going the store-bought route, stick with tried-and-true options that get the job done:
CLR (Calcium, Lime, Rust Remover) – Great for hard water areas where mineral deposits are relentless.
Bio-Clean Hard Water Stain Remover – A non-toxic powerhouse that cuts through soap residue and water stains with ease.
Bar Keepers Friend Soft Cleanser – Perfect for glass shower doors, tile, and fixtures, tackling limescale and water spots without scratching.
How to Use
Squeeze or pour a small amount of cleaner onto a sponge or microfiber cloth.
Rub in circular motions over the stained areas, letting the solution sit for about 5 minutes to break down mineral buildup.
Afterward, rinse thoroughly with warm water and wipe dry with a microfiber towel to prevent streaks. If you’re in a hard water area, using a water softener can help slow down future buildup, reducing cleaning time in the long run.
6. Magic Eraser – The Quick Scrub Method
This little sponge may look unassuming, but it’s basically a dirt-lifting ninja for your glass shower door.
Made from micro-abrasive melamine foam, it acts like an ultra-fine sandpaper, lifting mineral deposits and soap residue without the need for harsh chemicals. It’s the ultimate shortcut to clean glass—quick, effective, and oddly satisfying.
Why It Works
Unlike traditional bathroom cleaners, a Magic Eraser relies on physical scrubbing power rather than chemical breakdown.
The melamine foam is porous yet abrasive, meaning it grips onto hard water stains and gently lifts them off the shower glass—kind of like an eraser rubbing away pencil marks. No mixing, no waiting, just instant results.
How to Use
Dampen a Magic Eraser with warm water and squeeze out the excess.
Gently scrub the shower door in circular motions, focusing on areas with stubborn mineral deposits.
The hard water stains should disappear like magic—hence the name!
In some cases, you won’t even need to rinse, but if residue remains, a quick wipe with a microfiber cloth will do the trick.
Want to go the extra mile? Follow up with distilled water to prevent water spots from forming again.
7. Rain-X or Car Wax – Prevent Future Stains
Cleaning your glass shower door is one thing, but wouldn’t it be nice to not have to do it so often?
That’s where a water-repellent coating comes in. Think of it like a raincoat for your shower glass—instead of letting hard water stains and soap scum settle in, the water just beads up and rolls away.
In fact, using a product like Rain-X or car wax can cut down hard water buildup by up to 80%—which means less scrubbing for you.
Why It Works
These coatings create a thin, invisible barrier on the glass door, preventing mineral deposits from sticking in the first place.
It’s the same science that keeps rain from smearing across a windshield—except now, your shower glass gets the VIP treatment.
The result? Fewer water spots, less soap residue, and an overall cleaner look for longer.
How to Use
Before applying Rain-X or car wax, make sure your shower doors are completely clean—use any of the methods above to remove hard water stains and soap scum.
Once dry, take a microfiber cloth, apply a small amount of Rain-X or car wax, and gently rub it onto the glass shower in circular motions.
Let it sit for a few minutes, then buff the surface until you see a streak-free shine.
And that’s it—your shower glass is now protected. Next time you turn on the water, you’ll notice it simply slides off instead of clinging to the surface.
Less buildup, less cleaning time, and more time to enjoy a spotless shower. Sounds like a win, right?
How to Keep Glass Shower Doors Clean Longer?
Wouldn’t it be great if your glass shower door could just stay clean forever?
While we’re still waiting on self-cleaning glass, there’s good news—a little daily maintenance can go a long way.
In fact, using a squeegee after every shower can reduce water stains by up to 90%. That’s right—90%! If that’s not the easiest cleaning hack ever, we don’t know what is.
If there’s one thing you take away from this, let it be this: use a small squeegee every day.
It takes all of 30 seconds and stops water droplets from drying into mineral deposits. Less water spots, less soap residue, and way less scrubbing later.
Your shower glass isn’t just battling hard water stains—it’s also up against humidity.
A poorly ventilated bathroom traps moisture, making it easier for water spots and mildew to form. Keep a window open, run an exhaust fan, or leave the shower door slightly ajar to reduce moisture buildup.
For extra protection, apply a water-repellent sealant like Rain-X every few months. This creates a barrier that makes it harder for minerals and soap scum to stick to the glass door in the first place.
Think of it as armor for your shower glass—because the best way to clean is to not have to clean as often.
Keep Your Shower Doors Sparkling – Try These Methods Today!
At this point, you’re practically a glass shower door-cleaning expert. You know how to clean glass shower doors with hard water stains, battle soap scum, and keep hard water spots all at bay. Whether you’re team vinegar and baking soda, swear by the Magic Eraser, or let commercial cleaners do the dirty work, one thing is clear—your bathroom deserves to shine.
But let’s be real—keeping up with bathroom cleaning can feel like an endless loop of scrubbing, rinsing, and repeating. Why not skip the hassle and let the pros handle the hard work?
Imagine walking into a sparkling clean home without lifting a finger. Modern Maids is here to make that a reality. From deep bathroom cleaning to full-home maid services, we’ll make your space look fresh, tidy, and effortlessly inviting.
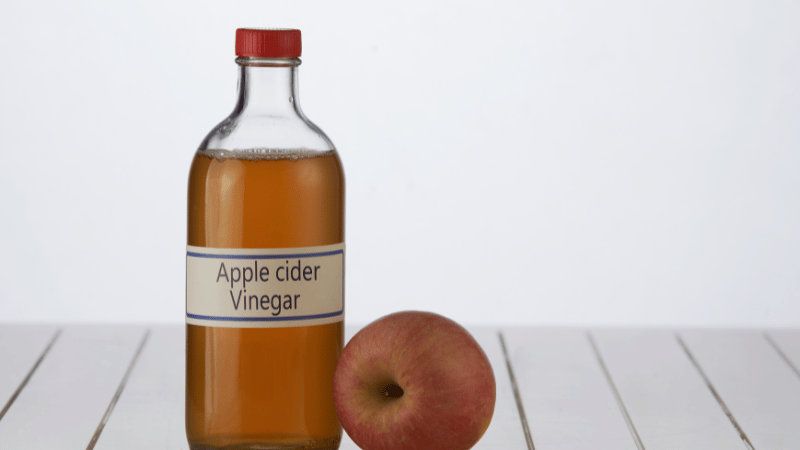
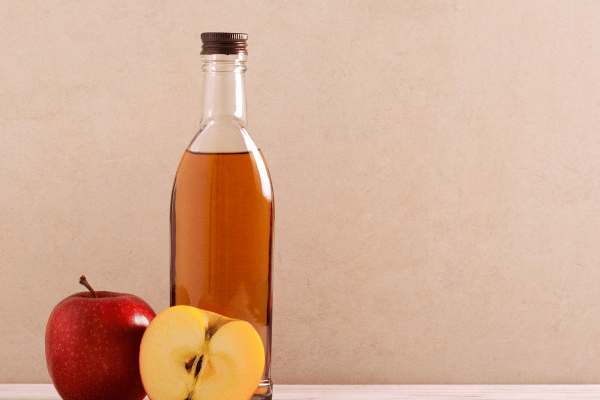
That bottle of apple cider vinegar in your pantry? It’s not just for drizzling over salads—it’s a cleaning powerhouse in disguise! While your usual cleaners come packed with unpronounceable ingredients, this natural alternative can tackle grime, grease, and soap scum without the headache-inducing fumes.
Blame it on acetic acid—the magic ingredient that dissolves hard water stains, mildew, and offensive (but equally potent) odors with ease. Whether it’s stains on counters, the stovetop, or even fruit flies invading your kitchen, this pantry MVP is ready to step in. Plus, it’s safe around kids and pets, making it a no-brainer swap for that basket full of chemicals.
So, how can you clean with apple cider? Stay tuned—because we’re about to turn this pantry staple into your go-to cleaning hack!
7 Best Uses for Apple Cider Vinegar in Cleaning
1. All-Purpose Surface Cleaner
Forget those chemical-laden sprays that promise the world but leave behind a sticky residue (or an overpowering scent).
Apple cider vinegar is the natural non-toxic cleaner your kitchen and bathroom have been waiting for. Thanks to its acetic acid content, it cuts through grease, grime, and bacteria without the harsh side effects of commercial cleaners.
How to Use: Combine equal parts apple cider vinegar and water in a spray bottle. Spritz it on your kitchen counters, tables, or bathroom sinks, then wipe it down with a microfiber cloth for a spotless, streak-free finish.
Dealing with a mess that laughs in the face of regular cleaners? Use a slightly stronger solution with more cider vinegar and less water.
What It’s Great For: Kitchen counters, tables, bathroom sinks—basically, anywhere grease and grime like to hang out.
What to Avoid: As much as we love cleaning with apple cider, it’s not a one-size-fits-all solution. Skip using it on marble, granite, and other natural stone surfaces, as the acidity can cause damage.
Also, steer clear of grout, stainless steel, waxed wood, cast iron, electronics, and rubber gaskets—because no one wants a ruined countertop or a corroded dishwasher.
And that’s just one way to ditch those chemical cleaners—we’ve got six more game-changing uses coming up!
2. Glass and Window Cleaner
Ever looked out your window and wondered if the world suddenly got gloomier? Nope, that’s just grime, water stains, and fingerprints clouding up your view.
Instead of reaching for a cleaner packed with questionable ingredients, clean with apple cider vinegar—a natural way to get streak-free shine without the overpowering fumes.
Why does it work so well? Acetic acid does the heavy lifting, breaking down hard water stains and built-up grime without leaving behind streaks or residue.
Even better, it’s a natural alternative that won’t leave you battling harsh chemical smells.
How to Use: Mix one part apple cider vinegar with two parts water in a spray bottle, mist the glass, and wipe it down using a lint-free cloth or newspaper (yes, old-school, but it works!).
If you’re dealing with stubborn spots, diluted apple cider vinegar will not work.
Best For: Windows, mirrors, and glass tabletops—because nothing should come between you and a crystal-clear reflection.
3. Cutting Board and Kitchen Sanitizer
Your cutting board might be the unsung hero of your kitchen, but it’s also a hotspot for germs, grease, and lingering odors. In fact, studies show that it can harbor 200% more bacteria than a toilet seat—and that’s a thought no one wants while prepping a sandwich.
Instead of scrubbing it with a basket full of chemicals, use apple cider vinegar to tackle stains, smears, and those offensive but equally potent smells (looking at you, garlic and onion).
Why does it work? Apple cider vinegar effectively cleans by breaking down grease, food residue, and bad odors without leaving behind an artificial chemical taste.
Plus, it’s a natural, non-toxic cleaner, meaning your food stays fresh without any questionable residues.
How to Use: Spray undiluted apple cider vinegar directly onto the cutting board. Let it sit for five minutes—just enough time to scroll through your phone—then rinse with warm water.
Whether it’s butter smears, fishy scents, or that stubborn mayo streak, this natural alternative has your cutting board covered. And trust us, your next meal will thank you.
4. Floor Cleaner
Nothing ruins the joy of walking barefoot at home like stepping on mystery stickiness.
Whether it’s a dropped juice box, spilled coffee, or that unidentifiable goo, your floors deserve better. Instead of coating them with synthetic fragrances and questionable chemicals, clean them with apple cider vinegar for a streak-free, grime-busting finish.
Why does it work? Cider vinegar for cleaning dissolves dirt, grease, and sticky spills while being gentle enough for wood, tile, and laminate when properly diluted.
The acidity of apple cider vinegar helps cut through buildup without leaving a residue—so you’re left with nothing but a fresh, clean floor.
How to Use: Mix 1 part apple cider vinegar with 1 or 2 parts water, depending on how tough the mess is. Dip your mop in, wring it out well, and start swiping.
Best For: Tile, vinyl, hardwood, and laminate—because clean floors should feel as good as they look.
5. Bathroom Cleaner & Shower Descaler
If your showerhead is spraying in every direction but down, or your toilet bowl looks like they’ve been dusted with chalk, congratulations—you’ve met hard water buildup.
Since 85% of U.S. households deal with it, it’s no surprise that limescale, mildew, and soap scum love to claim your bathroom as their personal playground. Instead of scrubbing endlessly, let apple cider vinegar do the dirty work.
Why does it work? Cider vinegar effectively cleans because its acetic acid content breaks down hard water stains, mineral deposits, and mildew without harsh chemicals. It also clean drains.
Plus, it’s a natural alternative that deodorizes while it cleans—because no one wants a bathroom that smells like last week’s gym bag.
How to Use: Mix equal parts apple cider vinegar and water in a spray bottle, coat your tiles, showerheads, and faucets, and let it sit for 10 minutes.
Then, scrub away the grime like a cleaning superhero. You can also try combining it with soap and lemon juice for added effectiveness.
What to Avoid: As much as cider vinegar for cleaning is a powerhouse, it doesn’t play nice with marble, granite, natural stone surfaces, grout, stainless steel, waxed or unfinished wood, cast iron, electronics, rubber gaskets, or hoses. (Translation: Unless you want an accidental renovation, keep it off those surfaces.)
6. Laundry Booster & Fabric Softener Alternative
If your towels feel like sandpaper, your gym clothes still carry yesterday’s workout, or your pet’s bedding has developed its own distinct aroma, it’s time to bring in apple cider vinegar.
No, it won’t replace detergent, but it will work as a secret weapon for softer fabrics, fresher smells, and brighter laundry—without coating your clothes in synthetic softeners.
Why does it work? Cider vinegar effectively cleans by breaking down detergent residue, neutralizing odors, and acting as a natural softener.
Unlike conventional fabric softeners that leave behind a chemical-heavy scent, using organic apple cider and vinegar keeps things fresh without artificial fragrances or waxy buildup.
How to Use: Pour ½ cup of apple cider vinegar into the fabric softener dispenser or add it during the final rinse cycle.
It softens fabrics, eliminates bad smells, and even helps brighten whites—because dingy clothes are nobody’s vibe.
Best For: Towels that need fluffing, gym clothes that need deodorizing, and pet bedding that needs a serious refresh.
7. Pet-Friendly Cleaner for Pet Stains and Odors
Let’s be honest—pets are adorable, but their messes? Not so much.
Whether it’s an unfortunate accident on the carpet or a litter box that smells like a science experiment gone wrong, apple cider vinegar is here to save the day (and your nose). This organic apple cider vinegar is safe around kids and pets, making it a worry-free way to freshen up your home.
Why does it work? Cider vinegar for household cleaning doesn’t just cover up offensive but equally potent pet odors—it neutralizes them at the source.
Its acetic acid content breaks down pet urine stains, lingering smells, and bacteria, so your home smells like home again (instead of a kennel).
How to Use: Mix equal parts apple cider vinegar and water in a spray bottle, spritz it on the stain, and blot with a clean towel. For tougher messes, let the cleaning solution sit for a few minutes before wiping.
Bonus tip? Spraying undiluted vinegar in litter boxes can help prevent pesky bugs from showing up uninvited.
Best For: Carpets, pet bedding, litter boxes—basically, anywhere your furry friend has claimed as their own.
Now that your home smells fresh and clean, it’s time to ditch those chemical cleaners for good. Who knew cider vinegar could do so much?
When Should You Avoid Using Apple Cider Vinegar for Cleaning?
As much as apple cider vinegar is a cleaning MVP, it’s not invincible.
There are some surfaces where using it is like inviting a bull into a china shop—things won’t end well. While it works wonders on grime, odors, and stains, certain materials can’t handle its acidity and may end up damaged, dull, or discolored.
If you’re thinking about using apple cider vinegar on your waxed or unfinished wood furniture, think again. The acidity can strip finishes, leaving your once-polished surfaces looking dull and lifeless.
And if you’ve got granite or marble countertops, vinegar can etch the surface, creating permanent marks that no amount of scrubbing can undo. Stainless steel? That’s another risky area—vinegar can tarnish and damage the protective coating, making your appliances lose their sleek shine.
Planning to clean your laptop screen or smartphone with cider vinegar? Abort mission.
The acidity can damage protective coatings, leading to permanent streaks or foggy displays. When it comes to electronics, stick to dry cloths or screen-safe cleaners—not pantry solutions.
While cider vinegar for cleaning has antibacterial properties, it’s no match for hospital-grade disinfectants.
If you’re handling raw meat, cleaning food prep areas, or disinfecting in high-risk spaces, stick to stronger sanitizers—because some bacteria need more than a natural alternative to be fully eliminated.
Vinegar-based cleaners should never be used on porous surfaces, as they can seep in and cause long-term damage. Grout, for example, can become weaker over time, leading to crumbling and water damage—not exactly the deep clean you were hoping for.
Conclusion: Is Apple Cider Vinegar the Right Cleaner for You?
So, can apple cider vinegar be used for cleaning? Absolutely—but only if you know when and where to use it. This pantry staple tackles grime, neutralizes odors, and wipes out soap scum while keeping things safe around kids and pets.
Whether you’re shining up windows, freshening laundry, or waging war against pesky bugs, cider vinegar for household cleaning is a natural, non-toxic cleaner that earns its spot in your cleaning arsenal.
But before you start spraying it on everything in sight, remember—not all surfaces are vinegar-friendly. Waxed wood, natural stone, and electronics? Hard no. If you’re dealing with stubborn bacteria in food prep areas, apple cider vinegar means well, but it’s no substitute for medical-grade disinfectants.
At the end of the day, cleaning with apple cider vinegar is like having a Swiss Army knife in your pantry—versatile, reliable, and great for everyday messes. Just use it wisely, and you’ll never look at that bottle the same way again!
Ever noticed how you feel calmer and more focused in a clean space? There’s science behind it. According to Stanford research, an uncluttered home or office makes you less irritable, improves productivity, and sharpens focus.
But keeping a space clean isn’t just about appearances—it’s about overall sanitation and livability.
That’s where regular cleaning and deep cleaning come in. One keeps your home fresh and livable, while the other involves a complete rubdown—getting into the often neglected and hard-to-reach spots like light fixtures, window sills, and carpets. With over 9,000 types of bacteria and fungi lurking in the average home, cleaning isn’t optional—it’s survival.
So, should you tidy up or go all in? This guide breaks down regular cleaning vs. deep cleaning explained—so you can choose the right one without second-guessing. Let’s get started!
What Is the Difference Between Regular Cleaning and Deep Cleaning?
Regular Cleaning – What Does It Include?
Imagine walking into your home after a long day. The floors are swept, the countertops wiped, and the air smells fresh.
That’s the beauty of regular cleaning—it keeps your space consistently tidy without requiring a deep scrub every time. This type of cleaning is all about maintenance—it’s your home’s version of daily self-care.
Regular cleaning focuses on surface-level upkeep to prevent dirt and grime from accumulating. It’s the reason your kitchen doesn’t smell like last night’s dinner and your bathroom stays fresh enough for unexpected guests.
Whether done daily, weekly, or bi-weekly, it helps maintain a certain level of cleanliness without taking up your entire weekend.
Tasks Included in Regular Cleaning
A professional house cleaning service or a DIY routine typically covers:
Floors: Sweeping, vacuuming, and mopping to keep dust, pet hair, and dirt in check.
Surfaces: Dusting and wiping down tables, countertops, and shelves to remove fingerprints and spills.
Bathroom Maintenance: A quick scrub of sinks, toilets, and showers to prevent soap scum and grime buildup.
Kitchen Upkeep: Wiping appliances, clearing countertops, and cleaning pots and pans.
General Tidying: Making the bed, picking up clutter, and emptying the trash.
Windows and Mirrors: A quick wipe to keep things streak-free and presentable.
Depending on the home’s size and level of mess, a regular house cleaning typically takes 30 minutes to two hours—short enough to squeeze into a busy schedule but effective enough to keep things under control.
Think of regular cleaning as the first line of defense against dirt and bacteria. It doesn’t just keep your space visually appealing—it contributes to overall sanitation and livability.
Plus, maintaining cleanliness around your house reduces the need to deep clean or for frequent deep cleanings, saving time and effort in the long run.
But while regular house cleanings will cost less time and energy, it won’t address those often neglected and hard-to-reach spots. That’s where deep cleaning ensures a more thorough approach—but more on that in the next section.
Deep Cleaning – What Does It Include?
If regular cleaning is your daily skincare routine, deep cleaning is like an intense facial—it goes beyond the surface, unclogs hidden grime, and leaves everything feeling fresh.
Unlike regular cleaning, which tackles everyday mess, deep cleaning ensures that even the often neglected and hard-to-reach spots get a thorough scrub. It’s not just about making your home look tidy; it’s about tackling built-up dirt, bacteria, and allergens that standard cleaning often misses.
Since deep cleaning is a more rigorous process, it’s not something you do every weekend. Most people schedule a deep clean seasonally, quarterly, or before big events like holidays, move-ins, or when trying to impress potential buyers.
A deep cleaning service covers everything in a regular cleaning routine and then some. This process involves a complete rubdown and giving attention to:
Furniture & Hidden Dust: Cleaning behind and under sofas, beds, and cabinets where dust bunnies thrive.
Floors & Surfaces: Scrubbing grout, washing baseboards, and tackling hard water stains that have overstayed their welcome.
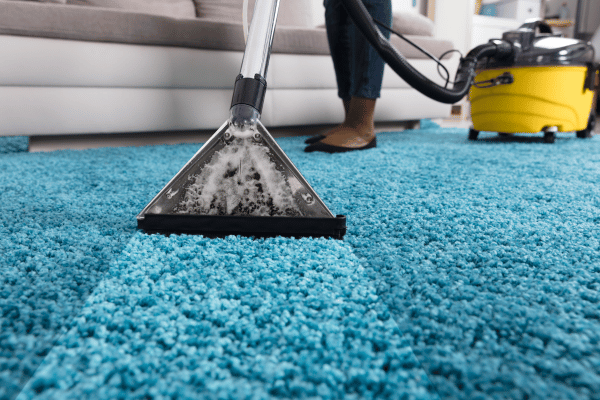
Carpets & Upholstery: Steam-cleaning carpets and mopped carpets to remove trapped dirt and allergens.
Walls & Ceilings: Wiping down walls, washing ceiling fans, and clearing cobwebs from corners.
Kitchen & Appliances: Deep scrubbing inside microwaves, ovens, and refrigerators, eliminating grease buildup and soap scum.
Air Quality & Ventilation: Cleaning air vents and filters to improve overall sanitation and livability.
Deep cleaning isn’t a quick job.
Depending on the home’s size and how long it’s been since the last deep clean, it can take several hours or even a full day. But the effort pays off—deep cleaning can reduce allergens by up to 60%, making it a must for anyone with asthma or allergies.
Regular house cleanings will cost less time, but compared to deep cleanings, they won’t eliminate e.g., mold, mildew, etc. lurking in humid areas. Deep cleaning helps maintain a certain level of cleanliness that supports a healthier home.
Key Differences Between Regular Cleaning and Deep Cleaning
When to Choose Regular Cleaning?
You wouldn’t wait for your car to break down before getting an oil change, right?
The same goes for your home—regular cleaning is your routine maintenance plan, keeping things tidy between deep cleans. It’s the go-to option if you:
Have a busy lifestyle: Whether you’re balancing work, kids, or both, a professional house cleaning service ensures your home stays clean without adding to your to-do list.
Have kids or pets: With little hands and paws bringing in dirt, food crumbs, and mystery stains, regular house cleaning helps maintain hygiene.
Live in a rental property or shared space: If you want to keep your security deposit intact, hiring a cleaning service for routine cleaning is a smart move.
Run an office or commercial space: Clean work environments boost productivity and employee well-being—most cleaning companies offer office cleaning as part of their wide range of services.
Want to maintain cleanliness between deep cleans: Regular cleaning keeps your home fresh until it’s time for a deeper scrub.
When to Choose Deep Cleaning?
You know that moment when sunlight hits your furniture just right, and suddenly, you see a layer of dust you didn’t even know existed?
That’s your home begging for a deep clean. Unlike regular cleaning, which keeps things tidy, you need a deep clean where cleaning ensures every often neglected and hard-to-reach spot gets the attention it deserves.
Deep cleaning is ideal for:
Seasonal Resets: Spring cleaning or preparing for colder months when homes are shut tight.
Moving in or out: Whether you’re settling into a new place or trying to get your security deposit back, a deep cleaning service makes a difference.
Post-renovation cleanups: Construction dust has a way of sneaking into every corner. A complete rubdown is necessary to restore overall sanitation and livability.
Allergy-prone households: If dust mites, pet dander, and pollen are making your home feel like an allergy test, scheduling a deep clean every few months can help.
Before special occasions: Hosting guests? Impress them with a spotless space.
After long periods without cleaning: When the usual weekly cleaning tasks just won’t cut it, a deep clean resets everything.
Can You Combine Regular and Deep Cleaning?
Think of regular and deep cleaning like brushing and flossing your teeth—you need both to keep things in top shape.
Regular cleaning takes care of the daily mess, while deep cleaning ensures that the grime hiding in hard-to-reach spots doesn’t turn into a long-term problem.
Combining both creates a cleaning routine that keeps your home consistently fresh, hygienic, and allergen-free.
Suggested Cleaning Schedule
Regular Cleaning: Done daily or weekly, depending on household activity. This keeps surfaces, floors, and bathrooms clean and livable.
Deep Cleaning: Scheduled every 3–6 months to tackle deep-seated dirt, dust buildup, and stubborn stains. If you have pets, allergies, or live in a high-traffic home, you may need it more often.
Most cleaning companies offer customizable plans, so you can mix and match both types of cleaning to suit your needs.
By maintaining a certain level of cleanliness with regular cleaning and deep-cleaning periodically, you’re not just keeping your home spotless—you’re ensuring long-term overall sanitation and livability without ever reaching a point where cleaning feels overwhelming.
Because let’s face it—no one wants to wake up one day and realize their home has turned into a deep-cleaning horror story. Stay ahead of the mess, and your future self will thank you!
Choose the Right Cleaning Based on Your Needs
Still unsure which cleaning style fits your needs? Think of regular cleaning as your everyday coffee—keeps you going, but sometimes, you need an espresso shot of deep cleaning to reset everything.
At the end of the day, a clean home isn’t just about appearances—it’s about comfort, hygiene, and peace of mind. Whether you need regular cleaning to stay on top of everyday messes or a deep cleaning service to tackle built-up grime, finding the right balance is key to maintaining a certain level of cleanliness without stress.
Take a moment to assess your home. Are you looking for weekly cleaning tasks to keep things tidy, or do you need a complete rubdown to give your space a fresh start? If life feels too busy to keep up, hiring a cleaning service ensures that your home stays spotless—without adding another chore to your list.
Don’t stress over the mess! Whether you need a quick refresh or a full-on deep clean, our experts at Modern Maids have you covered. Let’s turn your home into the clean, stress-free sanctuary you deserve—so you can focus on what truly matters.
FAQs
Why is a deep clean more expensive?
A deep cleaning service is more expensive because it involves a complete rubdown, tackling hard-to-reach spots like baseboards, light fixtures, and even window frames and sills. It requires more time, effort, and specialized cleaning supplies to remove soap scum, grease buildup, and allergens. Compared to deep cleanings, regular house cleanings will cost less since they focus on surface maintenance rather than detailed scrubbing.
Is it worth paying for a deep clean?
Absolutely! If your home hasn’t been cleaned beyond the surface in a while, scheduling a deep clean can restore hygiene levels, improve air quality, and eliminate dust and allergens. Deep cleaning ensures your space is spotless, especially before events, moving in/out, or after renovations. Plus, hiring a cleaning service saves time and guarantees a thorough job.
How long should it take to deep clean a whole house?
It depends on the size of your home and the level of cleaning required. On average, a deep clean can take anywhere from 4 to 8 hours. Larger homes or those needing extra attention—like removing hard water stains, cleaning air vents, or scrubbing grout—may take a full day. Professional cleaners streamline the process while ensuring overall sanitation and livability.
Ever walked into a home and felt the air was just… lighter? That’s the magic of deep cleaning—a step beyond your regular cleaning routine. It’s not just about wiping down glass surfaces and dusting picture frames; it’s about removing deeply accumulated grime, allergens, and bacteria hiding in hard-to-reach areas.
A one-time deep cleaning can eliminate up to 99% of bacteria and viruses from surfaces, reducing indoor allergens by 50%. That means fewer dust mites, less pet hair, and a fresher, healthier space for you. Think of it as a fresh start for your home—one that scrubs away the invisible gunk your normal cleaning routine misses.
But what exactly is included in a deep clean? Buckle up—we’re about to break it down, room by room, so you know when, why, and how to give your home the detailed cleaning it truly deserves.
What Does a Deep Clean Include?
A deep house cleaning isn’t just about making your home look spotless—it’s about tackling all the dirt lurking in the places you don’t clean on a weekly basis.
From scrubbing shower doors to wiping down window sills, this type of cleaning ensures your home feels refreshed and truly germ-free.
Unlike standard cleaning, which focuses on surface-level tidiness, deep cleaning services dig deeper. Expect thorough dusting and wiping of hard-to-reach areas, including ceiling fans, door frames, and even refrigerator coils—the sneaky spots where dust loves to hide.
High-touch areas like light switches, remote controls, and trash cans get the full sanitization treatment. Even overlooked details, such as picture frames, window frames, and inside cabinets, get cleaned to remove dust and dirt buildup.
Did you know a one-time deep cleaning can improve indoor air quality by up to 50%? By eliminating pet hair, soap scum, and other gunk, your home becomes a healthier place to breathe.
And this is just the beginning. Next, we’ll walk through a room-by-room breakdown, giving you a clear picture of what a professional deep cleaning service covers.
Deep Cleaning Room-by-Room Breakdown
Kitchen Deep Cleaning Tasks
Think about all the meals prepared in your kitchen—chopping, cooking, spills, and splatters. Now imagine the buildup left behind in hard-to-reach areas like refrigerator coils, kitchen appliances, and even cabinet corners.
Studies show that the kitchen sink harbors more bacteria than a toilet bowl, making deep cleaning essential for a germ-free space.
A thorough deep cleaning follows a top-down approach, ensuring that dust and grime from ceiling fans and light fixtures don’t land on already-cleaned surfaces.
Here’s what’s covered in a professional deep cleaning service for your kitchen:
Scrubbing and disinfecting countertops and backsplashes.
Cleaning inside and outside of kitchen appliances, including the oven, microwave, refrigerator, and dishwasher.
Removing grease buildup from stovetops and range hoods for a cleaner cooking space.
Sanitizing sinks and garbage disposals, eliminating hidden bacteria.
Organizing pantry and cabinets and wiping down shelves to prevent dust and dirt accumulation.
Washing floors, including under appliances, where crumbs and spills tend to collect.
Bathroom Deep Cleaning Tasks
If there’s one place that demands a thorough cleaning, it’s the bathroom.
With over 200,000 bacteria per square inch, this space can quickly turn into a breeding ground for soap scum, mold, and other gunk. A quick wipe-down won’t cut it—deep cleaning requires scrubbing every surface to ensure a truly germ-free environment.
The real troublemakers? Tile grout and shower doors, where mildew and buildup love to hide. A proper deep cleaning process means scrubbing those lines until they’re fresh again.
Toilet bowls, sinks, tubs, and shower drains get fully disinfected, while mirrors, light fixtures, and exhaust fans are wiped down to remove dust and grime.
Even the small details matter—inside cabinets and drawers often collect dust and dirt, so they get a proper wipe-down too.
And if your shower liner has seen better days? Replacing it is the finishing touch to a fresh start in your bathroom.
Bedroom Deep Cleaning Tasks
There’s nothing quite like sinking into a tidy home at the end of the day, but if your bedroom isn’t part of your deep cleaning schedule, you might not be breathing as easily as you think.
Regular deep cleaning can reduce dust mites by 60%, making a huge difference for allergies and respiratory health.
If your idea of a sparkly dream home includes a restful, allergen-free space, it’s time to go beyond basic tidying.
Here’s how to give your bedroom the deep cleaning it deserves:
Launder all bedding, including pillows and comforters, to remove dust and dirt buildup.
Vacuum and flip the mattress to eliminate deeply accumulated allergens.
Dust and polish furniture, focusing on light fixtures and ceiling fans where dust collects.
Clean inside closets and drawers, decluttering items you no longer need.
Wash curtains, blinds, and windows, ensuring no pet hair, pollen, or grime lingers.
Living Room and Common Area Deep Cleaning
Your living room is the heart of your home—where movie nights unfold, family gathers, and lazy Sundays feel just right.
But while the space may feel cozy, your upholstered furniture could be hiding hundreds of thousands of dust mites, affecting air quality and respiratory health. A deep cleaning ensures that your home stays both inviting and allergen-free.
Here’s how to refresh your entire home’s shared spaces:
Vacuum and steam-clean upholstery to eliminate pet hair, stains, and built-up dust.
Clean and polish wooden furniture to restore its shine and remove fingerprints.
Dust and disinfect remote controls, electronics, and light fixtures, tackling high-touch areas.
Wipe down baseboards, walls, and light switches, removing fingerprints and smudges.
Declutter and organize bookshelves, entertainment units, and decor, making the space feel open and refreshed.
Additional Areas That Need Deep Cleaning
Deep cleaning doesn’t stop at the front door.
Your garage, storage areas, and outdoor spaces often accumulate the most dust, dirt, and other gunk, yet they’re the last places on a cleaning schedule. Giving them a proper refresh ensures every corner of your entire home stays in top shape.
Garage & Storage Spaces
Ever opened your garage only to wonder when it turned into a storage unit for everything you might need one day? It happens to the best of us.
A proper deep cleaning starts by emptying and sorting through items—because let’s be honest, if you haven’t used it in years, do you really need it?
Declutter and organize storage bins, keeping essentials within easy reach.
Sweep and power wash the floors, eliminating built-up dust and dirt.
Wipe down workbenches and shelving units, ensuring no deeply accumulated grime lingers.
A clean, well-organized garage or storage area doesn’t just free up space—it makes it easier to find what you actually use.
Outdoor Spaces
Outdoor areas take a beating from the elements, collecting up to 40% more pollen and dirt than indoor furniture.
That means your patio set might be harboring more than just memories of last summer’s barbecue.
Power wash patios, decks, and outdoor furniture, blasting away grime for a sparkly dream home feel.
Sweep driveways and walkways, keeping outdoor areas looking fresh.
Scrub down outdoor grills and fire pits, because a clean cooking space makes every barbecue better.
A little constant cleaning care for these often-overlooked areas makes a big difference—not just in looks, but in keeping your entire home truly germ-free and ready for anything.
How Often Should You Schedule a Deep Cleaning?
If deep cleaning feels like a once-in-a-blue-moon task, you’re not alone. Unlike scrubbing kitchen appliances or taking out trash cans, this isn’t something you need to do every weekend.
But waiting too long? That’s when deeply accumulated dust and bacteria start to take over.
The right cleaning schedule depends on your household:
Homes with pets or kids: Every 3-4 months—because between pet hair, snack crumbs, and sticky fingerprints, messes build up fast.
Standard households: Every 6 months, keep things fresh without letting grime settle in.
Allergy sufferers: Every 3 months cut down on allergens like dust mites and pollen.
A smart approach? Pair regular cleaning with scheduled one-time deep cleaning sessions. Studies show that deep cleaning just twice a year can reduce illness-causing bacteria by 40%, giving your home a cleaner, healthier feel.
A Cleaner Home, A Healthier You: The Power of Deep Cleaning
A truly tidy home isn’t just about what you can see—it’s about clearing out the dust and dirt you don’t notice. Deep cleaning ensures a healthier space by reducing allergens, eliminating bacteria, and tackling the hidden grime that builds up over time.
Whether it’s scrubbing shower doors, disinfecting toilet bowls, or vacuuming upholstery, a proper deep house cleaning does more than refresh—it protects your home and your health.
Why do it alone when you can leave the detailed cleaning to the pros? A professional cleaning company takes care of hard-to-reach areas, ensuring every inch of your space is spotless without the hassle.
Ready to ditch the dust and level up your home’s clean game? Schedule your one-time deep cleaning today and let us handle the mess—so you don’t have to. Book your expert cleaning now! → Modern Maids
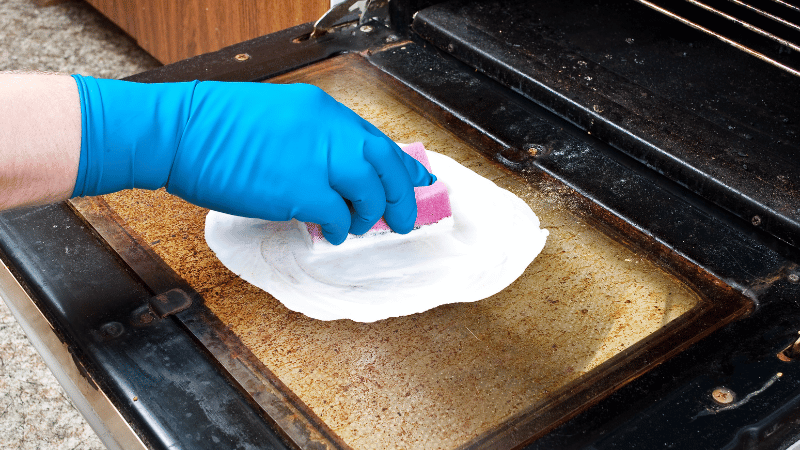
Ever opened your oven door only to be hit with smoke or a sharp, burnt smell? That’s burnt-on food clinging to your oven floor, messing with heat distribution and turning every meal into an unevenly cooked gamble. Over time, baked-on grime and burnt residue not only make your oven inefficient but can also release odors, attract bacteria, and even set off your fire alarm.
Neglecting your oven’s upkeep can lead to stubborn burnt spots that require serious elbow grease to clean. But don’t worry—you don’t need harsh chemicals or hours of scrubbing to restore your oven. In this guide, we’ll cover how to remove burnt-on food from oven floor, using easy DIY fixes with baking soda and vinegar to commercial solutions that get the job done.
Let’s bring back that spotless shine.
7 Effective Methods for Cleaning Burnt-on Food from Oven
1. Baking Soda and Vinegar Paste
A simple yet powerful method for tackling burnt-on food involves two pantry staples: baking soda and vinegar. This approach requires some patience, but the results are worth it.
Start by mixing baking soda and water in a small bowl to create a spreadable paste—thick enough to cling to surfaces but easy to apply. Using a damp cloth or a plastic spatula, spread the paste across the oven floor, walls, and oven racks, avoiding the heating elements. For deep-set burnt residue, let the paste sit overnight to break down stubborn baked-on grease.
Next, fill a spray bottle with white vinegar and lightly mist the surfaces. As the vinegar reacts with the remaining baking soda, it will foam up, loosening any remaining burnt-on grime. Use a wet paper towel or a clean damp cloth to wipe away the mixture, revealing a fresher, clean oven. For extra shine, rinse with warm water and dry with paper towels before replacing the oven racks.
2. Lemon and Hot Water Steam Method
Who knew a little yellow fruit could be your secret weapon against baked-on grease? Lemon juice is packed with natural citric acids that break down grime, eliminate odors, and kill bacteria—all without the need for harsh chemicals.
To start, preheat your oven to 250°F. Slice a lemon into thirds and squeeze the juice into a small bowl of hot water, dropping the rinds in afterward. Place the bowl on an oven rack and let it bake for about 30 minutes, allowing the steam to loosen stubborn burnt-on food and grease. Keep an eye on the mixture to prevent it from boiling over.
Once time’s up, turn off the oven and let the water cool slightly. Dip a non-scratch scouring pad or damp cloth into the lemon-infused water and scrub the oven floor, walls, and oven door. The softened grime should wipe away effortlessly. Finish by drying everything with a clean rag to restore a streak-free shine—and enjoy the fresh citrus scent lingering in your kitchen!
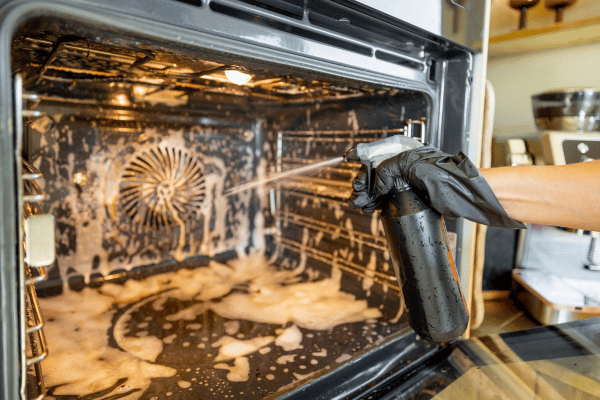
3. Commercial Oven Cleaners
When burnt-on grease and stubborn spots refuse to budge, a commercial oven cleaner can save you time and effort. Brands like Easy-Off, Zep, Krud Kutter, and Goo Gone are formulated to tackle burnt food and baked-on grime without requiring excessive elbow grease.
There are different types of oven cleaners, including aerosol sprays, foaming solutions, and gel-based formulas. Choose one specifically labeled for oven floors, as some products may be too harsh for certain surfaces. Since many of these cleaners contain strong chemicals, make sure to work in a well-ventilated area—open windows or turn on your kitchen vent fan to minimize exposure to fumes.
To use, spray or apply the cleaner directly onto the burnt oven bottom, focusing on areas with heavy buildup. For gel-based cleaners, spread the product evenly across the surface and let it sit for 10-20 minutes. Once the cleaner has had time to break down the burnt residue, use a sponge, scrub brush, or non-abrasive cloth to wipe away the grime.
Finally, wipe clean with a damp cloth, ensuring no cleaner remains. Allow the oven to air dry or pat it dry with a paper towel before using it again.
4. Ammonia Overnight Soak
If you’re dealing with stubborn grease and baked-on grime, an ammonia overnight soak is one of the most effective ways to break down tough residues without excessive elbow grease. The strong alkaline properties of ammonia work by dissolving grease and loosening burnt-on food from metal surfaces.
Start by removing the oven racks and placing them inside a sealed plastic bag. Pour two cups of household ammonia into each bag, ensuring the liquid can coat as much of the rack surface as possible. Seal the bag tightly and let it sit overnight, allowing the fumes to do the heavy lifting. The burnt-on grease will soften, making it much easier to remove.
The next morning, put on protective gloves and eyewear before opening the bag—ammonia fumes can be strong, so keep your face away while unsealing it. Using a stiff-bristled nylon brush or a melamine eraser, scrub both sides of the oven racks to remove loosened grime. Once clean, rinse thoroughly with a garden hose, sink sprayer, or by submerging them in a bathtub filled with warm water.
Let the racks dry completely before placing them back in the oven.
5. Dish Soap and Boiling Water
A simple yet effective way to loosen baked-on grease and burnt-on food is by using dish soap and hot water. While boiling water alone isn’t the best option—since it can be hazardous and ineffective against stubborn grime—combining it with a degreasing dish soap makes all the difference.
Start by filling a small bowl with hot water (not boiling) and adding a few drops of dish soap. Stir the mixture until it forms a mild soapy water solution. Dip a scouring pad or non-abrasive sponge into the mixture and scrub the oven floor, oven door, and burnt oven bottom. The warm water helps loosen stuck-on foods, while the soap works to remove grease.
For tougher burnt residue, let the soapy water sit on the burnt spots for a few hours before scrubbing. You can also use a plastic spatula to gently lift off any softened grime. Finish by wiping everything down with a damp cloth, ensuring no soap residue remains. Let the oven air dry or use paper towels before using it again.
6. Salt and Baking Soda Scrub
The combination of baking soda’s mild abrasive properties and salt’s natural scrubbing power effectively loosens grime without damaging your oven floor or glass surfaces.
To make the scrub, mix baking soda, salt, and water in a small bowl until you get a thick paste with the consistency of cake icing. If needed, add ½ tablespoon of water at a time until it reaches the right texture. This amount will be enough for the oven floor, but if you plan to clean the oven walls, ceiling, and door, consider tripling the recipe.
Using a plastic spatula, spread the paste evenly over the burnt oven bottom, avoiding the heating elements. Close the oven door and let the mixture sit overnight in a cold oven to allow it to break down tough burnt residue. By morning, the paste will have hardened.
To remove, use a rubber spatula to scrape off the dried mixture, then wipe down the oven with warm, wet paper towels. The baking soda and salt will lift away burnt food and reveal a stain-free surface underneath. For any remaining stubborn spots, a final wipe with soapy water will restore your oven’s original shine.
7. Razor Blade Scraper for Stubborn Spots
When burnt-on grease refuses to budge, a razor blade scraper can be the ultimate fix. This method is ideal for stubborn spots that survive even the strongest cleaning solutions. With precision and care, you can lift away baked-on grime without damaging your oven’s interior.
Start by spraying the affected area with a cleaning solution like baking soda and water or a commercial oven cleaner to lubricate the surface. Hold a fresh, sharp razor blade at a low angle and gently scrape away the burnt residue, being careful to avoid deep scratches. A dull or used blade may damage the oven floor, so always use a new razor for the best results.
For extra-tough stains, apply a baking soda paste beforehand and let it sit overnight to soften the burnt-on food. Once loosened, scrape away the remaining grime, then wipe clean with a damp cloth. Your oven will look as good as new, free from stuck-on foods and burnt spots.
Let Modern Maids Handle the Tough Cleaning for You
Scrubbing away burnt-on food, baked-on grease, and stubborn spots in your oven takes time and effort—but keeping your entire home spotless is an even bigger challenge. Instead of spending hours deep cleaning, let Modern Maids take care of it for you!
As a trusted provider of house cleaning services in Dallas, Modern Maids is committed to making your home fresh, tidy, and welcoming. Whether you need regular maid services, deep cleaning, or move-in/move-out cleaning, our professional team ensures every corner of your home shines.
Book your hassle-free cleaning service today through our convenient online booking page: Modern Maids Booking. Prefer to speak with someone? Call us at (469)-430-8860, and let’s schedule a cleaning that fits your needs!
FAQs
Can vinegar get rid of burnt food?
Yes, white vinegar is effective in loosening burnt-on food and baked-on grease. When combined with baking soda, it creates a mild chemical reaction that helps lift burnt residue from the oven floor and other surfaces.
What dissolves burnt-on food?
A combination of baking soda and water, lemon juice, white vinegar, or commercial oven cleaners can break down burnt food and grease buildup, making it easier to scrub away.
Does boiling vinegar remove burnt food?
Boiling vinegar can help loosen stuck-on foods, but it’s more effective when used with baking soda paste or a soaking method.
Does baking soda remove burnt stains?
Yes, baking soda works as a mild abrasive that lifts burnt-on grease and stains without damaging surfaces. Letting a baking soda paste sit overnight enhances its cleaning power.
Maintaining a clean and organized home plays a crucial role in creating a stress-free and welcoming environment. While keeping up with daily chores can be challenging amidst busy schedules, professional house cleaning services offer an effective solution to ensure your home remains spotless and comfortable.
House cleaning costs can vary based on factors such as the type of service, cleaning frequency, and even the size of your home. Whether you’re looking for standard cleaning, deep cleaning, or move-out cleaning services, understanding these variables can help you make informed decisions.
Let’s understand how much does house cleaning services cost and what makes professional house cleaning a valuable investment in your well-being and peace of mind.
Average Cost of House Cleaning Services
The cost of house cleaning services in the U.S. typically ranges between $170 and $220 for regular cleaning, while deep cleaning services may cost anywhere from $200 to $400 or more. These averages provide a helpful starting point, but your final cost may vary based on several factors like home size, cleaning frequency, and specific service requirements.
For smaller apartments, cleaning costs generally fall between $80 and $110, making them a budget-friendly option for compact spaces. On the other hand, cleaning larger houses can range from $200 to $400 or more, depending on the number of rooms and square footage. The size of your home is a significant factor in determining house cleaning costs.
House cleaning companies often offer different pricing models to suit varying needs. Hourly rates typically range from $20 to $50 per house cleaner, which is ideal for those needing flexible cleaning schedules or smaller jobs. Alternatively, flat-rate pricing—usually $100 to $170 for single-family homes—is more predictable and common for standard cleaning services. Some services charge per room, with an average cost of $100 for a single bedroom and bathroom, plus an additional $10 to $20 per extra bedroom or bathroom.
Factors Influencing House Cleaning Costs
Size of the Home
The size of your home is one of the most significant factors in determining house cleaning costs. The number of bedrooms, bathrooms, and overall square footage plays a key role in pricing. For standard cleaning, the average cost per square foot typically ranges between $0.10 and $0.20, while deep cleaning may go up to $0.25 per square foot.
Larger homes demand more time, work, and cleaning supplies, resulting in higher house cleaning prices. For instance, a three-bedroom house will likely cost more to clean than a smaller one-bedroom apartment due to the additional areas that need attention.
Type of Cleaning Service
Regular Cleaning
Regular cleaning is the most common and cost-effective option for homeowners. It focuses on maintaining a clean and organized home through tasks like dusting, vacuuming, and wiping surfaces. This service is ideal for weekly or bi-weekly schedules to keep your space tidy and costs less compared to more intensive options.
Deep Cleaning
Deep cleaning is a more thorough service that tackles areas often missed during regular cleaning, such as scrubbing grout, cleaning inside appliances, or washing baseboards. It is typically recommended for homes that need extra care or as a seasonal service. Deep cleaning is more expensive than regular cleaning, with costs starting at around $200 and going up depending on the home size.
Move-In/Move-Out Cleaning
Move-in/move-out cleaning services are specialized options tailored for preparing homes for new occupants or leaving a rental property spotless. These services often include deep cleaning tasks like window washing, thorough cleaning of cabinets, and carpet cleaning. Because of their detailed nature, they are among the costlier services.
Specialty Services
Specialty services focus on specific tasks like carpet cleaning, window washing, or gutter cleaning. These are typically charged as additional cleaning services and vary widely in cost. They are ideal for addressing particular needs but can quickly add to the overall cleaning expenses.
Frequency of Cleaning
Recurring Cleaning Services
The frequency of cleaning significantly impacts the cost of professional cleaning services. Most cleaning companies offer discounted rates for recurring services, such as weekly, bi-weekly, or monthly cleanings.
For example, a weekly cleaning service might cost less per visit compared to a monthly one because the home requires less intensive cleaning each time. Recurring packages also help you save money in the long run by ensuring your home stays consistently clean and avoiding the buildup of dirt and grime.
One-Time Cleaning
If you haven’t had your house professionally cleaned in a while, opting for a one-time cleaning service can cost more. One-time services often require more time and effort to tackle accumulated dust, stains, and neglected areas, resulting in higher prices compared to regular cleaning packages. This is especially true if you’re booking a deep cleaning for a home that hasn’t been cleaned professionally in months.
Location
Regional Cost Differences
The location of your home plays a significant role in determining house cleaning costs. In areas with a higher cost of living, such as major metropolitan cities, cleaning services tend to be more expensive compared to rural or suburban regions. This is due to factors like higher labor costs, increased demand, and elevated prices for cleaning supplies and services in urban centers.
For instance, the hourly rate for house cleaning services in cities like Brooklyn and Queens typically ranges from $60 to $90, while in other high-cost areas, rates can climb as high as $75 to $120 per hour. In contrast, rural or suburban areas often enjoy lower prices due to reduced overhead and living costs.
Local Living Expenses
Your local economy also influences house cleaning prices. A cleaning company in a suburban town may offer competitive pricing, but a similar service in a bustling city might charge a premium due to increased labor costs and operational expenses. These regional variations make it essential to research local cleaning companies to find services that fit your budget.
Additional Services
Professional cleaning services often provide optional add-ons that go beyond standard or deep cleaning. These additional cleaning services cater to specific needs, ensuring every corner of your home is spotless. While these extras can enhance the thoroughness of your cleaning, they may increase the final cost of your house cleaning.
Examples of Add-On Services
Cleaning inside the fridge: Perfect for removing spills, expired items, and stubborn stains.
Cleaning the inside of the microwave: Tackles food splatters and odors for a sparkling, fresh interior.
Cleaning inside the oven: Removes grease and baked-on grime, making your oven look and perform like new.
Window cleaning: Ensures streak-free, clear windows both inside and outside (if specified).
Laundry wash/dry/fold: Handles your laundry chores, leaving you with fresh, neatly folded clothes.
Changing bed linens: Provides freshly made beds, giving your home a polished, hotel-like feel.
Cost Breakdown by Cleaning Type
Regular Cleaning
Regular cleaning focuses on maintaining the cleanliness and organization of your home by covering essential tasks such as scrubbing the bathroom, sweeping and mopping floors, dusting, and wiping down surfaces. It’s the most common and affordable cleaning service, suitable for weekly or bi-weekly schedules.
Cost Options:
Hourly: $20 to $50 per house cleaner
Flat fee: $100 to $170 for a single-family house cleaning job
Per room: $100 for a single bedroom and bathroom, with an extra $10 to $20 for additional rooms
Per square foot: $0.05 to $0.15 for standard cleaning services
Pros:
Affordable and consistent
Keeps your home tidy and manageable over time
Ideal for regular upkeep with minimal effort from homeowners
Cons:
Doesn’t address deeper cleaning needs or neglected areas
May not include optional add-ons like cleaning appliances
Deep Cleaning
Deep cleaning is a more extensive and detailed service designed to address areas that are often overlooked during regular cleaning. This type of cleaning is ideal for homes that have gone without professional cleaning for several months or require extra attention due to heavy use or buildup.
Tasks often include scrubbing hard-to-reach areas, washing baseboards, cleaning inside appliances, and tackling dirtier jobs that demand more effort.
Cost Options:
Hourly: $40 to $100 per hour per cleaner
Flat fee: $200 to $400, depending on the size of the job
Per room: $125 to $200 for a one-bedroom, one-bathroom house, plus an additional $15 to $30 per extra room
Per square foot: $0.13 to $0.17 based on home size and effort required
Pros:
Provides a comprehensive and thorough cleaning
Addresses dirt, grime, and neglected areas effectively
Great for preparing homes for special occasions or seasonal resets
Cons:
More expensive than regular cleaning services
Requires more time and effort, making it less suitable for frequent cleaning needs
Move-In/Move-Out Cleaning
Move-in/move-out cleaning services are tailored for preparing homes for new occupants or ensuring a rental property is left spotless to meet specific move-out criteria. While move-out cleaning is often simpler without furniture in the way, the process can still be detailed and requires meeting landlord or new owner expectations.
Cost Options:
Hourly: $40 to $100 per hour per cleaner
Flat fee: $300 to $400, depending on the cleaning standards required
Per room: $125 to $175 for a single-family home with up to 3 bedrooms and 2 bathrooms
Per square foot: $0.15 to $0.22 based on the home size and cleaning effort
Pros:
Ensures the property is clean and presentable for new occupants
Helps renters secure their deposit by meeting landlord requirements
Removes the stress of cleaning during the hectic moving process
Cons:
One-time service can be costly compared to ongoing cleaning packages
The detailed cleaning required may increase the overall cost, depending on the home’s condition
Eco-Friendly Cleaning Options
Eco-friendly cleaning services prioritize the use of green cleaning products and methods to create a healthier home environment while reducing environmental impact. These services avoid harsh chemicals, opting for eco-friendly cleaning products that are safe for families, pets, and the planet.
Cost Overview: Eco-friendly house cleaning typically costs $25 to $60 per hour, which is about $5 to $10 more per hour than standard cleaning services. The slight increase in cost reflects the premium quality and sustainability of the materials used.
Pros:
Safer for households with children, pets, or allergy-sensitive members
Higher costs compared to traditional cleaning methods
Limited availability in some areas, depending on the cleaning company
House Cleaning Cost by Area
House cleaning costs can vary significantly based on the size of the home, the number of rooms, and the type of cleaning required. Larger homes typically require more time and effort, resulting in higher costs for both standard and deep cleaning services. Below is a cost breakdown based on the square footage of a house, comparing the average prices for regular cleaning and deep cleaning.
House Size (sq ft)
Regular Cleaning Cost
Deep Cleaning Cost
1,000 sq ft
$120
$160
1,500 sq ft
$150–$300
$180–$375
2,000 sq ft
$200–$400
$240–$500
2,500 sq ft
$250–$500
$300–$625
3,000 sq ft
$300–$600
$360–$750
This table serves as a guideline for homeowners to estimate how much does house cleaning cost based on their property’s size and the level of cleaning required. For a more tailored estimate, it’s always recommended to consult with local house cleaning services
DIY Cleaning vs. Professional Cleaning Services
DIY Cleaning
Cleaning your home yourself might seem like a cost-effective option, but it can be extremely time-consuming, especially for working professionals managing busy schedules. Tackling cleaning tasks demands significant physical effort, particularly for larger properties or jobs requiring extensive work, such as deep cleaning or scrubbing hard-to-reach areas.
DIY cleaning often falls short of achieving the level of cleanliness a home truly needs. Without access to specialized tools or techniques, it can be challenging to remove stubborn grime, sanitize surfaces thoroughly, or handle intricate tasks like carpet cleaning or window washing. For larger homes, this can quickly turn into an overwhelming and exhausting chore.
Professional Cleaning Services
Professional cleaning services offer a seamless solution by using the right tools, techniques, and cleaning supplies to ensure your home is spotless.
With their expertise, professional cleaners can tackle everything from regular upkeep to more complex tasks like deep cleaning or move-out cleaning. Their methods not only save you time and effort but also deliver a higher standard of cleanliness.
Why Choose Professional Cleaning?
Time-saving: Free up hours for personal or professional commitments.
Effective cleaning: Professional cleaners achieve a level of cleanliness that’s hard to replicate with DIY efforts.
Customized services: Tailored options like deep cleaning or eco-friendly cleaning cater to specific needs.
Proper tools and products: Access to industry-grade equipment and safe, efficient cleaning solutions.
Tips to Save Money on House Cleaning
1. Book a Regular Cleaning Service
Scheduling a recurring cleaning service is one of the most effective ways to save money in the long run. Many house cleaning companies offer discounts for weekly or bi-weekly services compared to one-time cleanings.
Keeping your home organized and clutter-free between professional cleanings can significantly reduce cleaning time. The less clutter there is, the easier it is for cleaners to focus on actual cleaning tasks, which can lower hourly rates or flat fees.
Simple habits like putting away items daily or decluttering unused belongings can make a noticeable difference in both your home’s cleanliness and your cleaning bills.
3. Repurpose Cleaning Supplies
Save money by repurposing household items as cleaning supplies instead of purchasing expensive products. For example, vinegar and baking soda work wonders for cleaning surfaces, deodorizing, and removing stains.
Old toothbrushes or rags can be repurposed for scrubbing or dusting. Eco-friendly DIY solutions not only cut costs but also reduce chemical use in your home.
4. Focus on High-Traffic Areas
If you’re trying to stay within a budget, prioritize cleaning high-traffic areas such as kitchens, bathrooms, and living spaces. These areas accumulate the most dirt and require the most attention. By focusing on these spaces and leaving less-used rooms for occasional cleaning, you can optimize costs while maintaining a clean and comfortable home.
5. Combine Services or Ask for Bundles
When booking professional cleaners, inquire about cleaning packages or bundled services. Many cleaning businesses offer deals when you combine tasks like window cleaning, carpet cleaning, or move-out cleaning with standard cleaning. Bundling services often results in discounted rates compared to booking them separately.
Hire Modern Maids for Cost-Friendly House Cleaning Service in Dallas & Austin
End your search for reliable and cost-friendly house cleaning services with Modern Maids, your trusted provider in Dallas and Austin. Our commitment to delivering spotless, tidy, and welcoming homes ensures that every cleaning job is performed with professionalism and care.
Whether you need regular upkeep, deep cleaning, or move-out cleaning services, we make the process easy and stress-free. Book your professional cleaning service today through our convenient booking page at modern-maids.com/booking-page or call us at (469)-430-8860 to schedule your next cleaning.
Let Modern Maids transform your space into a cleaner, more comfortable home!
FAQs
How long does it take to clean a house professionally?
The time it takes to clean a house professionally depends on its size, condition, and the type of cleaning service. For example, a standard cleaning of an average-sized home may take 2–4 hours, while a deep cleaning could require 4–6 hours or more. Homes with multiple bedrooms and bathrooms or those requiring extensive work may take longer.
How long should it take to clean a 3-bed house?
Cleaning a three-bedroom house typically takes around 3–5 hours for a standard cleaning, depending on the home’s size and how much cleaning is needed. For deep cleaning, expect a time frame of 5–7 hours. Hiring multiple cleaners can reduce the total cleaning time.
How often should a house be cleaned?
To maintain a clean and healthy home, it’s recommended to have professional cleaning done weekly or bi-weekly. For homes with kids, pets, or high traffic, weekly cleaning ensures better upkeep. A monthly cleaning can also work for households with minimal activity but might require a deeper cleaning each time.
How do professional cleaners clean so fast?
Professional cleaners work efficiently because they are trained in the best cleaning techniques and equipped with the right tools and products. They follow a systematic approach, tackling high-traffic areas first and using time-saving strategies like multitasking and pre-treating surfaces. Their expertise allows them to deliver fast, thorough results.
Keeping your carpets clean is essential for a healthy and welcoming home. Carpets can enhance the comfort and beauty of your space, but they also face daily challenges like tough stains, lingering odors, and dirt buildup. Left unchecked, these issues can lead to worn-out carpet fibers and an uninviting living area.
In this guide, we’ll uncover practical tips and tricks for cleaning carpets effectively, whether you’re dealing with high-traffic areas or treating spills. From quick solutions using household items to deep cleaning techniques with a carpet cleaning machine, you’ll learn how to maintain your carpets without relying on harsh chemicals.
By the end, you’ll have all the tools you need to handle common carpet cleaning challenges and keep your home fresh and inviting. Let’s dive into the best cleaning methods to give your carpets a new lease on life!
Identifying Your Carpet Type
Understanding your carpet type is the first step toward effective cleaning. Most carpets fall into categories like cut pile, loop pile, or a blend of both. You can identify the type by observing its texture: cut pile carpets have soft, individual strands that stand upright, while loop pile carpets feature loops of yarn that create a durable, textured surface.
Additionally, some carpets are made of synthetic materials like nylon or polyester, while others are crafted from natural fibers like wool.
How Carpet Type Affects the Cleaning Method
The type of carpet you have plays a significant role in choosing the right cleaning process. For example, wool carpets require gentle cleaning solutions to protect their fibers, while synthetic carpets can handle tougher cleaning products and methods.
High-pile carpets may trap more dirt and debris, needing a deep clean with a carpet cleaning machine, while low-pile carpets are easier to maintain with regular vacuuming and spot treatments. Knowing your carpet type helps you select the best techniques how to clean carpet to preserve its look and lifespan.
Common Carpet Materials
Understanding the material of your carpet is crucial for choosing the right cleaning method and products. Let’s explore some popular carpet materials and how they impact cleaning practices:
1. Nylon
Nylon is one of the most durable and stain-resistant carpet materials, making it a popular choice for high-traffic areas. It holds up well against wear and tear, making it easy to clean with most methods.
Best Cleaning Methods: Use a carpet cleaning machine with a mild cleaning solution, or spot-treat stains with a vinegar solution or carpet shampoo.
Chemicals to Use: Gentle dish soap or carpet-specific cleaning solutions.
Chemicals to Avoid: Harsh chemicals like bleach, which can damage fibers over time.
2. Polyester
Polyester is known for its vibrant color retention and softness, but it’s less resistant to stains and tends to trap more dirt. It’s ideal for homes without heavy foot traffic.
Best Cleaning Methods: Spot-clean spills with baking soda and a spray bottle, followed by a thorough vacuum. Deep cleaning with warm water is also effective.
Chemicals to Use: Mild detergents or household items like white vinegar.
Chemicals to Avoid: Strong solvents, as they can leave residue or fade the material.
3. Wool
A natural, luxurious option, wool is soft, durable, and naturally resistant to stains. However, it’s highly absorbent, so excess moisture can lead to mold or odors.
Best Cleaning Methods: Use a scrub brush with a gentle cleaning solution and air dry completely. A stain treatment should always be tested on an inconspicuous area first.
Chemicals to Use: Wool-safe carpet cleaners or a mix of plain water and a few drops of dish soap.
Chemicals to Avoid: Bleach or harsh detergents, which can harm the fibers.
4. Acrylic
Acrylic mimics wool but is synthetic and less expensive. It’s stain-resistant and easier to maintain than wool but not as durable as nylon.
Best Cleaning Methods: Spot-treat stains with a mix of equal parts white vinegar and cold water. Vacuum regularly to remove loose dirt and debris.
Chemicals to Use: Mild cleaning solutions and baking soda for deodorizing.
Chemicals to Avoid: Harsh chemicals that can weaken the fibers.
5. Olefin (Polypropylene)
Olefin is highly stain-resistant and affordable, commonly used in outdoor or basement carpets. It resists moisture but can flatten under heavy traffic.
Best Cleaning Methods: Treat spills immediately with a spray bottle and blot dry with old towels. Deep clean with hot water extraction to lift dirt.
Chemicals to Use: Vinegar-based solutions or commercial carpet shampoos.
Chemicals to Avoid: Oily or solvent-based cleaners, which can leave residue.
Identifying Carpet Pile Types
Cut Pile
Cut pile carpets have individual fibers that stand upright, creating a soft and plush surface. They’re popular for their luxurious feel and are often used in bedrooms and living spaces. This type requires regular vacuuming to remove loose dirt and maintain its texture.
Loop Pile
Loop pile carpets feature loops of yarn that are tightly woven, making them highly durable and resistant to wear. They’re ideal for high-traffic areas like hallways and offices. Cleaning involves a thorough vacuum to avoid trapping more dirt in the loops.
Saxony
Saxony carpets are a variation of cut pile with a smooth, even finish, offering a classic look. They’re best cleaned with a gentle vacuum and occasional deep cleaning to refresh the fibers without causing flattening.
Cut-Loop Pile
Cut-loop pile carpets combine both cut and loop fibers, creating textured patterns. They’re stylish and durable but can be tricky to clean. Spot cleaning is often necessary to maintain the design and texture.
How Pile Heights Affect Cleaning Techniques
Low pile carpets are durable and easier to clean, making them perfect for busy households or commercial spaces. A straightforward vacuuming routine is usually sufficient for maintenance.
High pile carpets, such as shag or frieze styles, offer a plush and luxurious feel underfoot. However, their dense fibers can trap more dirt and debris. A carpet cleaning machine and deep cleaning methods are recommended for these types.
Choosing the right cleaning method based on pile type and height ensures your carpets remain fresh, clean, and long-lasting.
Tools and Supplies for Carpet Cleaning
Essential Tools
Vacuum Cleaners
A reliable vacuum cleaner is the cornerstone of carpet care. Look for features like HEPA filters to trap fine dust and allergens, as well as strong suction power to remove loose dirt effectively. Vacuums with adjustable height settings work well for different carpet types.
Steam Cleaners
Steam cleaners are excellent for deep cleaning, as they use hot water to lift dirt and sanitize carpets. They’re ideal for tackling tough stains and high-traffic areas, leaving carpets fresh and deodorized.
Carpet Brushes
A good carpet brush helps scrub dirt and stains from carpet fibers without causing damage. Choose a brush with soft or medium bristles to avoid harming delicate materials like wool.
Stain Removers
Having a high-quality stain remover on hand is essential for quick action on spills and tough stains. Look for products that are safe for your specific carpet type and free from harsh chemicals that might damage the fibers.
Defoamers
Defoamers prevent excess foam buildup when using carpet cleaning machines or shampoos, ensuring a more efficient cleaning process and reducing residue on your carpets.
Microfiber Cloths
Microfiber cloths are perfect for blotting stains and drying treated areas. Their soft, absorbent material helps lift dirt and moisture without leaving behind lint or scratches.
Cleaning Products
Store-Bought Solutions vs. DIY Alternatives
Store-bought carpet cleaning solutions are convenient and effective for tackling tough stains, odors, and dirt. They come pre-formulated to target specific issues like pet stains or high-traffic dirt. However, they can be costly and may contain harsh chemicals that aren’t always safe for children or pets.
DIY alternatives, like baking soda and vinegar, offer a budget-friendly and eco-conscious way to clean your carpets. Baking soda works well for deodorizing, while a mixture of vinegar and water can effectively lift stains and freshen carpet fibers. These household items are gentle yet powerful enough for most cleaning tasks.
Eco-Friendly and Pet-Safe Options
For those who prioritize safety and sustainability, eco-friendly and pet-safe carpet cleaning products are excellent choices. Here are a few popular brands:
Seventh Generation Carpet Cleaner: Made with plant-based ingredients, this cleaner is safe for both pets and the environment.
Puracy Natural Carpet Cleaner: A non-toxic, biodegradable option that works effectively on stains and odors.
Folex Instant Carpet Spot Remover: Highly recommended for its stain-removing power and non-toxic formula.
Routine Carpet Maintenance
Regular Vacuuming
Importance of Vacuuming Frequency
Vacuuming is a cornerstone of carpet care and should be done regularly to prevent dirt and debris from settling into the fibers. For high-traffic areas like hallways, living rooms, or entryways, vacuuming daily or every other day is ideal. Low-traffic zones, such as bedrooms or guest rooms, can be vacuumed once or twice a week. Adjusting the frequency based on usage helps maintain a clean and fresh appearance while extending your carpet’s lifespan.
Techniques for Thorough Cleaning
To achieve the best results, start by dividing your carpet into sections and vacuuming each area slowly, allowing the vacuum to lift dirt effectively. Use overlapping strokes for even coverage, and pay extra attention to high-traffic areas where dirt accumulates more. For deeper cleaning, adjust the vacuum’s height setting to match your carpet pile, and utilize attachments like crevice tools for edges and corners. Regularly empty the vacuum bag or canister to maintain suction power and efficiency.
Quick Action on Spills
Acting quickly is essential to prevent spills from turning into permanent stains. Begin by blotting the spill immediately with a clean cloth or old towels to soak up as much liquid as possible. Once the excess liquid is removed, apply a cleaning solution or a mix of equal parts white vinegar and warm water to the affected area using a spray bottle. Blot again gently to lift dirt and residue, then rinse with plain water and blot dry. Ensure the carpet air dries completely to prevent moisture-related issues.
Common Mistakes to Avoid When Treating Spills
Rubbing the Stain: Scrubbing can spread the stain and damage carpet fibers. Always blot instead of rub.
Using Harsh Chemicals: Strong cleaning products can discolor or weaken your carpet. Test any solution on an inconspicuous area first.
Ignoring the Spill: Delaying cleanup allows stains to set, making them harder to remove.
Over-Wetting the Carpet: Excess water can lead to moisture buildup, odors, and mold. Use only a small amount of cleaning solution and blot thoroughly.
Professional Cleaning
While regular vacuuming and spot treatments are essential, professional carpet cleaning is vital for maintaining your carpet’s longevity and appearance. Experts recommend scheduling professional cleaning every 12 to 18 months, depending on the level of foot traffic and overall use.
Professional cleaners use advanced techniques like steam cleaning or hot water extraction to remove deep-seated dirt, stains, and allergens that standard cleaning methods can’t address. This process rejuvenates your carpet fibers, leaving them looking fresh and extending their lifespan.
Deep Cleaning Carpet Methods
Steam Cleaning (Hot Water Extraction)
Steam cleaning, also known as hot water extraction, involves using a machine to inject hot water and cleaning solution deep into the carpet fibers. The combination of heat and pressure loosens dirt, debris, and tough stains. A powerful vacuum then extracts the water along with loosened particles, leaving the carpet clean and refreshed.
This method is highly effective for deep cleaning, as it removes embedded dirt, allergens, and bacteria that routine vacuuming cannot reach. It also helps restore the carpet’s texture and appearance, making it ideal for high-traffic areas and homes with pets or children.
When and How Often to Use This Method
Steam cleaning is recommended every 12 to 18 months as part of routine carpet maintenance. However, high-traffic spaces or carpets exposed to frequent spills and odors may require more frequent cleaning, such as every 6 to 12 months.
For best results, ensure the entire area of the carpet is vacuumed thoroughly beforehand to remove loose dirt. Allow sufficient drying time after cleaning—typically 8 to 12 hours—to avoid moisture-related issues like mold or mildew.
Steam cleaning is a reliable way to give your carpets a deep, restorative clean, maintaining their freshness and longevity.
Dry Carpet Cleaning
Dry carpet cleaning involves using specialized cleaning powders or compounds that are spread over the carpet and worked into the fibers with a machine or brush. These compounds attract dirt and debris, which are then vacuumed away. Unlike steam cleaning, this method uses minimal to no water, making it ideal for situations where quick drying is essential.
Dry cleaning is suitable for carpets in commercial spaces, high-traffic areas, or homes needing a quick refresh. It’s also a great choice for delicate materials like wool, as it minimizes the risk of over-wetting and damage.
Benefits for Quick Turnarounds and Less Water Usage
One of the biggest advantages of dry carpet cleaning is its rapid turnaround time. Since minimal water is used, carpets can be ready for use almost immediately, often within an hour. This method is especially beneficial for businesses or busy households where downtime needs to be minimized.
Additionally, dry cleaning reduces the risk of mold or mildew growth, which can occur when carpets remain damp for extended periods. It’s an eco-friendly choice in areas with water restrictions or for those seeking a low-moisture alternative.
Dry carpet cleaning offers a convenient and effective solution for maintaining clean carpets with minimal disruption.
Carpet Shampooing
Step-by-Step Guide for Using Carpet Shampooers
Prepare the Carpet Begin by vacuuming thoroughly to remove loose dirt, dust, and debris from the carpet. This ensures the shampooer can focus on deep-cleaning the fibers.
Mix the Cleaning Solution Follow the manufacturer’s instructions to mix carpet shampoo with water in the shampooer’s tank. Use the recommended ratio to avoid overly concentrated or diluted solutions.
Test in an Inconspicuous Area Apply a small amount of the solution to a hidden spot to ensure it won’t discolor or damage your carpet.
Shampoo the Carpet Slowly move the shampooer across the carpet, working in small sections. Overlap strokes for even cleaning and avoid rushing to let the solution penetrate the fibers effectively.
Extract Excess Moisture Use the shampooer’s extraction function to remove as much water as possible. Make multiple passes to ensure the carpet isn’t left overly wet.
Allow the Carpet to Dry Open windows, use fans, or turn on a dehumidifier to speed up the drying process. Ensure the carpet air dries completely before replacing furniture.
Tips to Avoid Overwetting the Carpet
Use the Right Amount of Solution: Stick to the recommended amount of shampoo and water to prevent oversaturating the carpet.
Make Extra Extraction Passes: After shampooing, go over the carpet multiple times with the extractor function to remove excess moisture.
Dry in Sections: If possible, clean and dry one section at a time to monitor moisture levels.
Ensure Proper Ventilation: Always provide good airflow to aid in faster drying and reduce the risk of moisture buildup.
Spot Cleaning Stains
Food and Beverage Stains
Spills like coffee, wine, and juice are common culprits for carpet stains, but quick action and the right methods can minimize damage. Here’s how to tackle these stains using both store-bought and DIY solutions:
1. Coffee Stains
Store-Bought Solution: Use a carpet stain remover designed for tannin-based stains. Apply it to the stain, let it sit for a few minutes, then blot gently with a clean cloth.
DIY Solution: Mix equal parts white vinegar and cold water in a spray bottle. Spray the mixture onto the stain, blot with a white cloth, and repeat until the stain lifts. Rinse with plain water and blot dry.
2. Wine Stains
Store-Bought Solution: Opt for an oxygen-based cleaner or a carpet stain remover labeled for red wine stains. Apply according to the instructions and blot gently.
DIY Solution: Sprinkle baking soda over the stain, then pour a small amount of vinegar over it to create a bubbling reaction. Blot the area with a white cloth until the stain disappears. Rinse with water and blot dry.
3. Juice Stains
Store-Bought Solution: Use an enzyme-based cleaner to break down sugary residues from juice spills. Apply, let it sit, and blot away with a clean towel.
DIY Solution: Combine a few drops of dish soap with warm water and gently dab the mixture onto the stain. Blot with a clean cloth to lift the stain, rinse with water, and blot dry.
Tips for Effective Spot Cleaning
Always blot gently instead of rubbing to avoid spreading the stain or damaging carpet fibers.
Test cleaning solutions in an inconspicuous area before applying them to visible spots.
Work from the edges of the stain inward to contain its spread.
Pet Stains and Odors
Act Quickly Blot the area with a clean cloth or old towels to soak up as much urine as possible. Avoid rubbing, as it can push the liquid deeper into the carpet fibers.
Apply a Cleaning Solution
Store-Bought Option: Use an enzymatic cleaner specifically designed for pet stains. These cleaners break down the proteins in urine, eliminating both stains and odors.
DIY Solution: Mix equal parts white vinegar and cold water in a spray bottle. Spray the affected area generously, then blot with a clean cloth to lift the stain.
Rinse and Extract Rinse the area with plain water and blot dry to remove any cleaning solution residue. You can also use a wet vacuum to extract excess moisture for faster drying.
Neutralizing Odors
Use Baking Soda After treating the stain, sprinkle a generous amount of baking soda over the area to absorb lingering odors. Let it sit for several hours or overnight, then vacuum thoroughly.
Apply an Odor Neutralizer For stubborn smells, use a pet-safe odor neutralizer spray or a mixture of a few drops of essential oil (like lavender) with water. This will leave your carpet smelling fresh.
Ventilate the Room Open windows and use fans or a dehumidifier to improve airflow and reduce moisture, which can trap odors.
Tips for Pet Stains and Odors
Avoid Ammonia-Based Cleaners: Ammonia can mimic the scent of urine, encouraging pets to mark the same spot again.
Test Cleaning Products: Always check a small, inconspicuous area of the carpet before applying a new product.
Deep Clean Periodically: For homes with pets, schedule professional cleaning every 6-12 months to maintain carpet freshness.
Oil-Based Stains
Oil-based stains, such as grease, ink, and cosmetics, can be tricky to remove due to their tendency to cling to carpet fibers. Here’s how to tackle these stains effectively:
1. Grease Stains
Blot First: Start by blotting the stain with a clean cloth or paper towel to absorb as much grease as possible. Avoid pressing too hard to prevent spreading.
Apply Cleaning Solution: Use a mixture of dish soap and warm water (a few drops in a spray bottle). Spray the solution onto the stain and let it sit for a minute.
Blot Again: Gently blot the area with a clean microfiber cloth to lift the grease. Rinse with plain water and blot dry.
Store-Bought Option: Use a carpet cleaner specifically designed for grease stains, following the manufacturer’s instructions.
2. Ink Stains
Apply Rubbing Alcohol: Dab a small amount of rubbing alcohol onto a clean white cloth and gently blot the ink stain. Avoid scrubbing to prevent spreading.
Blot with Water: Once the stain starts to lift, blot with a cloth dampened with plain water to remove any residue.
Store-Bought Option: Use an ink-removing carpet spray or a multi-purpose spot cleaner designed for ink stains.
3. Cosmetic Stains (e.g., lipstick, foundation)
Remove Excess Product: Carefully scrape off any solid residue with a dull knife or spoon to prevent smearing.
Apply Dish Soap Solution: Mix a few drops of dish soap with warm water and dab the solution onto the stain with a clean cloth.
Rinse and Blot: Use plain water to rinse the area, then blot dry with a clean towel.
Store-Bought Option: Look for a carpet stain remover labeled for cosmetics or oil-based stains for extra cleaning power.
Tips for Removing Oil-Based Stains
Use a White Cloth: Avoid colored cloths that may transfer dye onto the carpet.
Blot, Don’t Rub: Always blot to lift the stain without pushing it deeper into the fibers.
Test First: Test any cleaning solution in an inconspicuous area to ensure it won’t discolor your carpet.
Preventive Measures for Clean Carpets
1. No-Shoes Policy
One of the simplest and most effective ways to keep your carpets clean is by implementing a no-shoes policy indoors. Shoes can track in dust, dirt, oil, and other contaminants, which can quickly settle into carpet fibers and lead to wear and stains over time.
Encourage family members and guests to remove their shoes at the door. Provide a designated area, such as a shoe rack or basket, near the entrance for convenience. You can also offer comfortable indoor slippers for guests to make them feel at ease.
2. Using Rugs and Doormats
Placing rugs and doormats strategically is a practical way to protect your carpets from dirt and debris. Start by using sturdy doormats outside each entrance to your home. These mats help catch dirt, dust, mud, rain, and snow from shoes before they can be tracked indoors.
Inside your home, use rugs in high-traffic areas such as hallways, entryways, and living rooms. Not only do rugs act as a barrier to protect your carpet, but they also add an extra layer of style and comfort to your space.
3. Regular Carpet Rotation
Rotating your rugs or rearranging furniture periodically is an excellent way to evenly distribute foot traffic across your carpets. Over time, high-traffic areas like walkways or spots near seating arrangements tend to experience more wear and tear, leading to uneven fading and flattening of carpet fibers.
Benefits:
Prevents Uneven Wear: Helps maintain a consistent look across the entire carpet.
Reduces Replacement Costs: Even usage ensures the carpet lasts longer, delaying the need for replacements.
Enhances Aesthetic Appeal: Changing furniture placement can refresh the look of your room while protecting your carpet.
4. Stain Protection Treatments
Carpet protectors and sprays are an excellent way to safeguard your carpets against stains and spills. These treatments create a protective barrier on the carpet fibers, making it easier to clean up messes before they settle in. Stain protectors are particularly useful in high-traffic areas or households with children and pets, where spills are more likely.
For best results, apply stain protectors after a professional cleaning. This ensures the carpet is free from dirt and residue, allowing the protector to adhere properly and deliver maximum effectiveness. You can also choose products specifically designed for your carpet type, such as wool-safe sprays for natural fibers or general protectors for synthetic materials.
Tips for Applying Carpet Protectors:
Test First: Always test the protector on an inconspicuous area to ensure it doesn’t affect the carpet’s color or texture.
Even Application: Spray the protector evenly across the entire carpet, ensuring all areas are covered.
Allow Drying Time: Let the carpet dry completely before walking on it to avoid transferring residue.
Common Mistakes to Avoid When Cleaning Carpets
1. Overwetting Carpets or Using Too Much Cleaning Solution
Excess water or cleaning solution can soak into the carpet backing, leading to mold, mildew, and long drying times. Always use the recommended amount of solution and extract as much moisture as possible.
2. Ignoring the Manufacturer’s Care Instructions
Every carpet has specific care requirements based on its material and construction. Ignoring these guidelines can result in damage or voided warranties. Always consult the manufacturer’s instructions before cleaning.
3. Using Harsh Chemicals That Damage Fibers
Strong chemicals can weaken carpet fibers, cause discoloration, and leave behind residue. Opt for gentle, carpet-safe solutions and test them on a small area before full application.
Experience Spotless Carpets with Modern Maids
Modern Maids is your trusted partner for professional house cleaning and maid services in Dallas, committed to making your home spotless, tidy, and welcoming. With a focus on quality and attention to detail, our team ensures your carpets are cleaned thoroughly, leaving them fresh, vibrant, and free from dirt and stains. Whether you need a routine clean or a deep carpet refresh, we’re equipped to handle it all, saving you time and effort.
Book your professional carpet cleaning service today through our convenient booking page or call us directly at (469)-430-8860 to experience the Modern Maids difference. Let us take care of your home while you enjoy a cleaner, more comfortable living space!
FAQs
1. What is the best thing to clean a dirty carpet?
The best way to clean a dirty carpet depends on the type of dirt and the carpet material. For general cleaning, a mix of warm water and a mild cleaning solution works well. For deep cleaning, a steam cleaner is highly effective. Spot cleaning with a mixture of white vinegar and water can handle stains quickly.
2. Does baking soda really clean the carpet?
Yes, baking soda is an effective and natural cleaner for carpets. It helps absorb odors and loosen dirt. Sprinkle baking soda over the carpet, let it sit for 15-20 minutes (or longer for deeper cleaning), and vacuum thoroughly for a refreshed surface.
3. What should you not clean the carpet with?
Avoid harsh chemicals like bleach or ammonia, as they can discolor or weaken carpet fibers. Similarly, using overly soapy solutions can leave residue behind, attracting more dirt and causing damage over time.
4. Can I use Dawn dish soap to clean my carpet?
Yes, Dawn dish soap can be used to clean carpets, but it should be diluted. Mix a few drops with warm water and use it for spot cleaning. Avoid over-saturating the carpet and rinse thoroughly to remove any soapy residue.
5. What should not be used in a carpet cleaner?
Avoid using oily or solvent-based products in carpet cleaners, as they can leave behind residue. Harsh detergents or anything not specifically labeled for carpet use should also be avoided to prevent damage to the fibers.
6. Is it better to shampoo or steam clean carpets?
Steam cleaning is often better because it removes dirt and allergens more effectively using hot water extraction. Carpet shampooing can be effective for heavily soiled areas but may leave more residue if not done properly.
7. Is it cheaper to clean your own carpet?
Cleaning your carpet yourself can be cheaper upfront, especially if you have the necessary tools and cleaning products. However, professional cleaning provides deeper results and may save money in the long run by extending your carpet’s lifespan.
8. What is the best homemade solution for cleaning carpets?
A mixture of equal parts white vinegar and warm water is one of the best homemade solutions for cleaning carpets. Add a few drops of dish soap for extra cleaning power, and use it to tackle stains or refresh the entire carpet.
DIY cleaning tips often include baking soda and baking powder for cleaning up, but have you ever wondered which one works best? While these two pantry staples might sound similar, their cleaning powers are worlds apart.
Baking soda is a powerhouse for tackling grease, stubborn stains, and unpleasant odors, thanks to its strong alkaline properties. On the other hand, baking powder is less effective for cleaning tasks due to its milder chemical reaction.
Baking soda’s versatility makes it a favorite for everything from whitening laundry to cleaning steel sinks and unclogging drains. It’s an inexpensive, natural solution that packs a punch in household cleaning routines.
This article will guide you through the key differences between baking soda and baking powder, helping you choose the right one for your cleaning needs. Let’s clear up the confusion and keep your home sparkling!
What Is Baking Soda?
Baking soda, scientifically known as sodium bicarbonate (NaHCO₃), is a white, crystalline solid that’s both odorless and non-flammable. With a melting point of 500°C, it’s a stable compound that remains effective under various conditions.
Its basic nature makes it a powerful yet gentle cleaning agent, capable of tackling a wide range of household messes. Unlike harsh chemical cleaners, baking soda is safe to use and doesn’t release toxic fumes, making it a favorite in many homes.
When bicarb soda reacts with acids (like vinegar) or oils, it helps break down grease and stains. The carbon dioxide bubbles lift dirt, while its mild abrasiveness scrubs surfaces without causing damage.
Practical uses of baking soda are endless—sprinkle it on carpets to deodorize, mix it with water to scrub your oven clean, or use it as a fridge deodorizer by placing an open box inside. For laundry, add a scoop to brighten whites and neutralize unpleasant smells.
Baking soda even doubles as an air freshener when paired with essential oils, keeping your space smelling fresh. Whether you’re scrubbing sinks, cleaning tiles, or freshening up fabrics, baking soda is a simple, affordable solution for nearly any cleaning task!
What Is Baking Powder?
Baking powder is a leavening agent commonly used in baking, but it differs chemically from baking soda. While baking soda is pure sodium bicarbonate, baking powder is a mixture of sodium bicarbonate, an acid (such as cream of tartar), and sometimes a starch to prevent clumping. This blend creates a milder chemical reaction, making baking powder less effective as a cleaning agent compared to baking soda.
The reason baking powder doesn’t pack the same punch is that it already contains both an acid and a base, which neutralize each other. This limits its ability to remove stains or tackle tough grime. However, baking powder can still be used for light cleaning tasks, such as freshening up mild odors or gently scrubbing delicate surfaces.
For example, if you’re out of baking soda, Substitute baking soda with baking powder, sprinkle it on a damp sponge for a quick wipe-down of countertops or use it to remove mild odors from small containers or mix baking powder with a little lemon juice to create a cleaning paste that’s good for rubbing on tiles While it’s not as versatile or powerful as baking soda, baking powder can serve as a backup option for minor cleaning jobs.
Baking Soda vs. Baking Powder for cleaning – Key Differences
Here’s a quick side-by-side comparison to understand how baking powder and baking soda differ when it comes to cleaning:
Feature
Baking Soda
Baking Powder
Composition
Pure sodium bicarbonate (NaHCO₃)
Sodium bicarbonate mixed with an acid and starch
pH Level
Strongly alkaline
Mildly alkaline
Effectiveness
Highly effective for removing stains, odors, and grime
Light odor removal, mild cleaning of delicate areas
Reactivity
Reacts strongly with acids (e.g., lemon juice, vinegar)
Milder reaction due to built-in acid component
Storage
Stable when kept dry
Requires dry storage to maintain effectiveness
Cost
Inexpensive
Slightly more expensive due to added ingredients
Versatility
Highly versatile for various cleaning tasks
Limited versatility, suitable only for light tasks
Why Baking Soda Is the Superior Choice?
When it comes to baking soda vs baking powder for cleaning, baking soda is the clear winner. Its strong alkaline properties, affordability, and versatility make it ideal for tackling tough kitchen stains, stains, odors, and grime.
Baking powder, while useful in the kitchen, simply doesn’t have the cleaning power or versatility to compete. For effective and affordable cleaning solutions, baking soda should always be your go-to option!
7 Ways to Use Baking Soda in Your Cleaning Routine
Baking soda is a versatile natural cleaner, providing powerful solutions for a wide range of household chores. Here are seven practical ways to incorporate it into your cleaning routine:
1. Deodorize Refrigerators
Got a smelly fridge? Baking soda can neutralize unpleasant odors instead of just masking them. Simply fill a cup with baking soda and place it in the back of your fridge. This trick helps keep your refrigerator smelling fresh and clean for weeks. Replace the baking soda every 1–2 months for the best results.
2. Remove Tough Stains from Stovetops
Stuck-on food and grease can make stovetops look grimy. Create a paste by mixing baking soda with water and scrub the surface gently. The mild abrasiveness of baking soda will lift away tough stains without scratching your stovetop, leaving it looking spotless
3. Unclog Drains
Baking soda works wonders for clearing clogged drains. Pour 1/2 cup of baking soda down the drain, followed by 1/2 cup of white vinegar. The fizzing reaction helps break down debris. Cover the drain, let it sit for 30 minutes, and then flush it with hot water. Avoid using this method in closed containers, as the reaction produces gas, also avoid using too much baking soda.
4. Freshen Toilet Bowls
For a natural and eco-friendly toilet cleaner, sprinkle baking soda into the bowl and let it sit for 15 minutes. Scrub with a toilet brush to remove stains and odors, leaving your toilet bowl fresh and clean.
5. Remove Shoe Odors
Neutralize unpleasant shoe smells by sprinkling baking soda inside the shoes. Let it sit overnight, then shake out the powder before wearing. Your shoes will smell fresher in no time.
6. Carpet Stain Remover
Got stubborn carpet stains? Cover the stain with a thin layer of baking soda. Spray a 1:1 vinegar and water solution over it and let it sit for an hour. Once dry, scrub the area with a brush and vacuum up the residue. This method uses the power of carbonic acid, created during the reaction, to lift stains effectively.
7. Keep Stainless Steel Sinks Shiny
Restore the sparkle to your stainless steel sink by sprinkling baking soda onto a soft cloth. Rub it into the surface using a bit of elbow grease, then rinse well. The same trick works for stainless steel and aluminum cookware too, keeping your kitchen shining like new.
Safety Tips
While baking soda is a safe and versatile cleaning agent, it’s essential to avoid mixing it with certain chemicals:
Hydrogen Peroxide (in closed containers): The reaction can build pressure and cause explosions as hydrogen peroxide is an acidic ingredient and upon mixing baking soda it releases carbon dioxide gas and foam.
Ammonia or Chlorine Bleach: These combinations release toxic gases that are harmful to your health.
Alcohol and Chemical Cleaners: Mixing baking soda with these can create harmful fumes or hazardous reactions.
When to Call in the Professionals?
While baking soda is a versatile and effective cleaning agent, there are times when it simply isn’t enough to handle the job.
For instance, heavy grime buildup on kitchen surfaces or stubborn stains on upholstery may require more than a simple scrub with baking soda. Similarly, significant mold growth, which can pose health risks, often demands professional-grade cleaning solutions and expertise.
Another scenario where DIY falls short is deep carpet cleaning. Baking soda and vinegar can help with small stains, but for dirt and allergens embedded deep within the fibers, professional tools and techniques are necessary to restore your carpet’s freshness.
Additionally, situations like post-illness sanitation or cleaning delicate surfaces (such as marble or antique wood) require specialized products and skills to ensure proper care without causing damage.
Why Professional Cleaning Makes Sense?
Calling in professionals not only guarantees a thorough and effective cleaning but also saves you the time and effort of tackling these challenging tasks on your own. Professional cleaners use advanced equipment and products designed to handle the toughest jobs while being mindful of your home’s unique needs.
Whether it’s deep cleaning or regular maintenance, Modern Maids offers a professional touch that leaves your home looking its best. Let us take care of the tough jobs so you can focus on what matters most!
Reach Out to Modern Maids for Your House Cleaning Needs
When it comes to keeping your home spotless, Modern Maids is the trusted provider of professional cleaning services in Dallas. Our team is dedicated to transforming your living space into a clean, tidy, and welcoming environment. Whether you need help tackling tough cleaning tasks, maintaining a sparkling home, or preparing for guests, we’ve got you covered.
Skip the hassle and let Modern Maids take care of your home. With our reliable and thorough services, you can enjoy peace of mind knowing every corner will be cleaned with precision and care.
Don’t wait—take the first step toward a cleaner, stress-free home today! Book your service now on Modern Maids’ Booking Page or call us directly at (469)-430-8860 to schedule your appointment. Experience the Modern Maids difference and see why so many Dallas residents trust us for their cleaning needs!
FAQs
Can I put baking powder in my washing machine?
While baking powder might seem like a substitute for baking soda, it’s not ideal for your washing machine. Baking powder contains additional ingredients like acid and starch, which could leave residue on your clothes or in the machine. For effective cleaning and deodorizing, stick to baking soda, as it helps whiten fabrics and neutralizes odors without any unwanted buildup.
What happens if you use baking powder instead of baking soda?
Using baking powder instead of baking soda for cleaning won’t deliver the same results. Baking powder has a milder chemical reaction due to its neutralized acid and base mixture, making it less effective for tackling stains, grime, and odors. Baking soda’s stronger alkaline properties make it the better choice for most cleaning tasks.
Can I use baking powder and vinegar to clean?
Yes, you can use baking powder and vinegar to clean, but the results will be less effective compared to using baking soda. The reaction between baking powder and vinegar produces carbon dioxide gas and bubbles, which can help loosen debris in light cleaning tasks, such as unclogging drains. However, baking soda’s stronger reaction makes it more effective for such purposes.
Can I use expired baking powder?
Expired baking powder may lose its effectiveness as a leavening agent but can still be used for light cleaning tasks. It can help with mild odor removal or gentle scrubbing of delicate surfaces. To check if it’s still active, mix a small amount with vinegar—if it fizzes, it can still work for some cleaning purposes!
A clean home isn’t just about appearances—it plays a big role in your health and comfort. Did you know your kitchen sink harbors more germs than your toilet? That’s why regular cleaning is essential, but sometimes, a simple wipe-down isn’t enough.
Many homeowners struggle to decide between standard cleaning vs deep cleaning. A regular cleaning service keeps surfaces tidy, while a deep cleaning service goes further, tackling hidden dirt and hard-to-reach areas. But where exactly does deep cleaning lie in comparison to standard cleaning?
Understanding the key differences between these services helps you choose the right option for your home’s needs. Whether you’re preparing for a special occasion, moving out, or simply wanting a fresh start, knowing when to opt for a professional deep cleaning service can make all the difference.
Let’s break it down step by step.
What is Standard Cleaning?
Standard cleaning is the routine house cleaning service that keeps your home neat, hygienic, and comfortable. It focuses on surface-level cleaning, tackling everyday messes without diving into deep-seated dirt or hard-to-reach areas.
While it helps maintain cleanliness, it doesn’t involve the in-depth cleaning required to eliminate accumulated dirt or grime buildup.
Dusting Surfaces
Dusting goes beyond a quick wipe—it ensures dusting surfaces, electronics, baseboards and frames, decorative items, and books to remove allergens and prevent buildup.
Bathrooms require special attention to maintain hygiene. Cleaning bathrooms in a standard cleaning service includes:
Cleaning mirrors to remove streaks and smudges.
Wiping counters and fixtures to prevent soap scum and bacteria buildup.
Mopping floors to keep the space fresh and sanitary.
Wiping Kitchen Surfaces
Since kitchens surely accumulate dirt, wiping cabinets, kitchen countertops, and sinks is essential. Standard cleaning includes:
Sink scrubbing to remove stains and bacteria.
Cleaning appliances externally.
Floor cleaning to eliminate spills and crumbs.
Taking Out the Trash
Neglecting trash can lead to bad odors, pest infestations, and bacteria growth. Regular disposal prevents hidden dirt and contributes to a healthier living environment.
While standard cleaning is enough for routine upkeep, it doesn’t cover the deeper cleaning required for neglected areas or deep-seated dirt—which is where deep cleaning comes in.
What is Deep Cleaning?
Deep cleaning is a thorough cleaning process that goes beyond standard cleaning by addressing hidden dirt, neglected areas, and deep-seated grime. Unlike routine cleaning tasks, deep cleaning tackles spots that often go unnoticed, such as behind appliances, under furniture, and inside cabinets and drawers.
It’s essential for maintaining a truly sanitary and healthier living environment.
Deep Cleaning in the Kitchen
A deep cleaning service in the kitchen involves in-depth cleaning of surfaces and appliances to eliminate grease buildup, grout stains, and hidden crumbs. Tasks include:
Cleaning inside appliances such as the oven, fridge, and microwave to remove spills and odors.
Cleaning the stove hood and filter to get rid of grease and smoke residue.
Scrubbing grout on backsplashes and countertops to remove stains and bacteria.
Cleaning fridge coils to enhance efficiency and extend lifespan.
Disinfecting small kitchen appliances, including coffee makers and toasters.
De-cluttering and wiping inside cabinets and drawers to prevent dust and pest accumulation.
Deep Cleaning in the Bathroom
Bathrooms require professional deep cleaning services to tackle soap scum, limescale, and bacteria buildup. Tasks include:
Scrubbing grout lines to remove mold and mildew.
Cleaning wastebaskets and disinfecting their interiors.
Removing soap scum and limescale from fixtures and showerheads.
Cleaning baseboards and door frames to eliminate dust and grime.
Cleaning inside medicine cabinets and vanities to remove spills and residue.
Disinfecting handles on doors, cabinets, and fixtures.
Thoroughly cleaning the toilet base to remove accumulated dirt.
Cleaning shower doors, curtains, and crevices where mold and grime tend to collect.
Additional Deep Cleaning Tasks
Deep cleaning isn’t limited to just kitchens and bathrooms—it covers the entire home:
Washing the interior of every window to remove dirt and streaks.
Removing couch and chair cushions to clean hidden dirt, crumbs, and pet hair within creases.
Moving and cleaning underneath couches and rugs to eliminate dust and debris from neglected areas.
Key Differences Between Standard and Deep Cleaning
While standard cleaning is all about routine maintenance, deep cleaning focuses on detailed attention to ensure every corner is spotless. Let’s analyze standard cleaning vs deep cleaning.
Aspect
Standard Cleaning
Deep Cleaning
Scope of Work
Maintains visible surfaces and general tidiness. Focuses on regular cleaning tasks like dusting surfaces, vacuuming, and cleaning bathrooms.
Targets hard-to-reach spots, hidden dirt, and deep-seated grime. Involves in-depth cleaning like scrubbing grout, washing windows, and cleaning appliances inside out.
Cost
Typically ranges from $0.12 to $0.20 per square foot.
Generally costs $0.15 to $0.25 per square foot due to the intensive work involved.
Time Taken
Usually takes around 1-2 hours for an average-sized home.
Can take anywhere from 4-8 hours for a comprehensive deep clean of a similar space.
Frequency
Ideal for weekly or bi-weekly schedules to maintain a clean home.
Recommended quarterly or semi-annually to tackle neglected areas and accumulated dirt.
Tools & Supplies
Basic cleaning supplies like mild cleaners and dusters.
Requires specialized equipment such as steam cleaning tools and stronger cleaning agents for stubborn grime.
Both Regular and deep cleaning play vital roles in keeping your home clean and comfortable. While standard cleaning keeps everything running smoothly day-to-day, a deep clean provides a fresh start, reaching into the corners and crannies that often go overlooked.
When to Choose Standard Cleaning?
If you’re someone who prefers a tidy and organized home but struggles to find the time for daily upkeep, standard cleaning is the perfect solution. Regular house cleaning ensures your home stays fresh, clean, and welcoming without requiring deep scrubbing or extensive labor.
Perfect for Busy Individuals and Families
Between work, errands, and family time, finding the energy for routine cleaning tasks can be a challenge. A regular cleaning service helps maintain cleanliness, so you don’t have to worry about coming home to dusting surfaces, mopping floors, or wiping kitchen countertops.
Ideal for Homes That Are Already Well-Maintained
If your home is already in good shape and just needs routine cleaning to prevent hidden dirt from building up, standard cleaning is the way to go. For example:
You vacuum weekly and keep bathroom surfaces clean, but need help with the details like wiping cabinets or dusting light fixtures.
For those who don’t need a deep cleaning checklist but want to keep their home looking its best, standard cleaning offers a stress-free way to maintain cleanliness. Whether you opt for a weekly, bi-weekly, or monthly schedule, it helps ensure a fresh and inviting space without requiring extra effort on your part.
When to Opt for Deep Cleaning?
If your home hasn’t been professionally cleaned in a while, deep cleaning is the best way to bring it back to a pristine condition.
Unlike standard cleaning, which focuses on surface-level maintenance, a deep cleaning service tackles accumulated dirt, neglected areas, and hard-to-reach spots to create a truly sanitary and healthier living environment.
Deep cleaning is particularly beneficial in these situations:
Preparing for or recovering from an event
Whether you’re hosting a gathering or cleaning up after a party, a thorough cleaning ensures your space looks and feels fresh.
After home renovations
Construction dust and debris can settle into hidden areas. Deep cleaning involves detailed dusting, scrubbing grout, and washing windows to restore cleanliness.
Seasonal cleaning
A spring cleaning session eliminates deep-seated dirt that builds up over time, making it easier to maintain cleanliness throughout the year.
Move-in/move-out cleaning
When changing homes, a professional deep cleaning service ensures a fresh start by tackling kitchen appliances, bathroom surfaces, and window frames to remove any traces of previous occupants.
Addressing health concerns
If you or a family member suffer from allergies, dust mites, or respiratory issues, deep cleaning tasks like scrubbing grout, cleaning air vents, and steam cleaning carpets help improve indoor air quality.
Visible dirt and neglected spaces
If you notice soap scum, dusting surfaces that never seem clean, or grime in hard-to-reach areas, it’s time for a professional cleaner to restore freshness.
7 Benefits of Professional Cleaning Services
Keeping a home spotless takes time, effort, and the right skills. While regular cleaning helps maintain cleanliness, nothing compares to the expertise of professional cleaning services.
Whether it’s a standard cleaning or a deep cleaning service, hiring trained professionals ensures a thorough cleaning with consistent results.
Expertise That Delivers Superior Results
Professional cleaners are trained to handle cleaning tasks more efficiently than most homeowners. They know how to tackle hard-to-reach areas, remove deep-seated dirt, and use effective cleaning techniques to ensure every part of your home is spotless.
Specialized Equipment and Cleaning Products
Unlike everyday cleaning supplies, professionals use specialized tools and products designed for deep cleaning tasks. From steam cleaning carpets to scrubbing grout, these advanced methods help eliminate stubborn stains, reduce allergens, and maintain indoor air quality.
Time-Saving Convenience
Cleaning takes time—something many busy homeowners don’t have. A professional cleaning service allows you to focus on work, family, or leisure while experts handle the routine cleaning tasks. Instead of spending hours mopping floors or dusting surfaces, you can enjoy a clean home without lifting a finger.
Thorough and Consistent Cleaning Standards
A reliable cleaning company ensures your home is cleaned with attention to detail every time. Unlike DIY cleaning, where tasks might be skipped, professionals follow a deep cleaning checklist or regular cleaning service plan, ensuring no neglected areas are left behind.
A Healthier Living Environment
Dirt, dust, and bacteria can accumulate quickly, affecting the indoor air quality of your home. A professional deep cleaning service eliminates hidden dirt, disinfects bathroom surfaces, and removes allergens from window sills, air vents, and kitchen appliances, contributing to a healthier home.
Cost-Effective in the Long Run
While some may see hiring cleaners as an expense, it actually saves money by preserving furniture, flooring, and appliances. Deep cleaning involves removing buildup that can cause long-term damage, ensuring your home stays in top condition.
A Worthwhile Investment
Whether for routine cleaning or in-depth cleaning, professional services provide a level of cleanliness that’s hard to achieve alone. By investing in professional deep cleaning services, you not only maintain a clean home but also enjoy reduced stress, improved hygiene, and more free time—making it well worth the investment.
Reach Out to Modern Maids for Your House Cleaning Needs
A clean home is more than just a luxury—it’s essential for comfort, health, and peace of mind. Whether you need routine upkeep or a deep cleaning service, Modern Maids is your trusted provider in Dallas.
Our team of professional cleaners is dedicated to making homes spotless, tidy, and welcoming, so you can enjoy a fresh, stress-free space without the hassle.
Why Choose Modern Maids?
Expertise in standard cleaning vs deep cleaning—tailored to your specific needs.
Trained professionals using specialized equipment for a thorough cleaning.
Easy, hassle-free booking and reliable service.
Commitment to high-quality standards, ensuring consistent results every time.
Book Your Cleaning Today!
Don’t let dust and clutter take over—let Modern Maids handle the work for you! Schedule your cleaning service now through our easy-to-use booking page or call (469)-430-8860 to speak with our team.
Experience the convenience of a professionally cleaned home with Modern Maids—where cleanliness meets comfort.